Samsung data synchronization. We transfer all data to a new smartphone without loss. Instead of paid synchronization
When you purchase new smartphone, you will probably want to transfer your contacts, data and applications from your old device to it. You can also copy the settings of your home screen icons, background images and other elements, plus, your data can be moved from Android smartphones to iPhone smartphones and vice versa. Below we will tell you how to do this.
If you need a simple and quick way transfer all your data from your old phone to your new one, then in this case you should try MobiKin Transfer for mobile. This innovative app will efficiently and easily move data such as contacts, messages, apps, music, photos and more without any restrictions.
Regardless of the reasons why you want to move your data, MobiKin Transfer for mobile will give you confidence that the information will be transferred securely and safely, without any risk of losing any part of it. Note that you can transfer content between phones operating on different networks and with by different operators communications. Just download the above app and follow simple instructions, and very soon you will be able to start moving all your data to your new smartphone.
When you transfer your data to your new device, you must ensure that all information on your old device has been deleted. The fact is that your personal data can be used by scammers for their own gain, and you should have complete confidence that your old smartphone has been cleared. MobiKin Transfer for mobile can do this too, and in one click.
Let us add that such revolutionary software can be used on more than 3,000 smartphones running Android, iOS and Windows. Download MobiKin Transfer for mobile to join more than 740 thousand people who have easily and securely transferred all their information from one device to another.
Transfer contacts
The most important thing that you will move to your new smartphone is your contacts. Fortunately, times have changed, and you will no longer have to do this painstaking process manually. Today, many smartphones transfer contacts thanks to synchronization with cloud storage. We will explain to you how this is done.
Synchronizing your Google account
The easiest way to keep your contacts across all your devices is to sync your Google account. If you previously saved your contacts on your Google account, then you can log into it and transfer it to your new smartphone. Go to “Settings>Account>Google” and activate the “Contacts synchronization” item. After this, your contacts will be transferred instantly.

Are you signed into multiple Google accounts? Then you can choose one of them to use for your contacts application. By default, this will be the account that you registered first. For any other, later accounts, you will have to do the synchronization manually. In your device's contacts application, you can choose which accounts will display which contacts.
By the way: if you don’t have a Google account yet, you can create one on your new smartphone. You can also do this on your computer, and then log into your newly created account via your phone using the required login information.
By and large, synchronization via Google has its advantages. On the one hand, it supports more complex business card formats than the data exports listed below. On the other hand you can use account Google on almost all platforms, including Windows phones, iPhone, and PC running Windows, Linux or Mac.
Transfer contacts from Android to iPhone
Once your contacts are synced with your Google account, transferring them to your iPhone or iPad is much easier. Open the “Settings” section and there you will find an option to add another account. Google will be one of the options. Synchronize your account Google posts, and after a while your Google contacts will become visible in the address book of your device.

IN general view your Google account will appear as Gmail. You will be able to determine which elements of such an account should be transferred to the iPhone. If you want to transfer contacts from Android to iPhone, you can also turn off the areas for Mail or Calendar.
To view or hide contacts for individual Google accounts, you will need to enable or disable accounts in the application address book. In other words, you need to go to the contacts tab in the phone application and then click on the “Groups” icon.
Transfer to iOS
Alternatively, you can also count on Apple. This manufacturer has released an application Move to iOS, which can be downloaded from Play Store. Once downloaded, you can install it on your Android smartphone and launch it. After that on your new iPhone(or iPad) you will be able to import data. Start transferring iOS contacts, messages, photos, videos, email accounts and calendars. Since the transfer is carried out using a specially created WLAN network, and this process itself is protected by a PIN code, the transfer of the necessary information occurs very quickly.
Export contacts using an SD card
If synchronization via Google account is not suitable for you for some reason, and your old and new smartphones have an SD card slot, then you can transfer your contacts using a memory card. To do this, first export your contact details to an SD memory card using your old smartphone. Subsequently, such contact information will be stored in the directory that you see when you connect your smartphone to your computer. Next, remove the memory card and insert it into your new device. Now open your address book and select the option to import from the menu. Just follow the instructions and your contacts will be moved to automatic mode.

Note that this option for transferring contacts has a certain disadvantage if you have mixed many contacts from different address books, or if the contacts contain a large amount of data. In addition, sometimes one contact can be duplicated two, three or more times - all this is very annoying. But this can be dealt with - there is the necessary information on the Internet on how to fix such a problem.
Using internal memory
This method is almost the same as backing up using an SD card, although in this case the contacts are stored in internal memory phone. With this method, you can connect your device to your computer and save the necessary data on it, and then transfer it from the PC to your new device. Our advice to you: pay attention to the directory that your phone assigns to save contact information, as it will be easier for you to find it later using your PC. As a rule, the file with contact information in .vcf format is located in the System folder.
If you have a file manager on your smartphone, you can also find the above file on your device and send it directly from its location to your new device via email or Bluetooth.

Using a SIM card
If you want to use on your new smartphone SIM you can select the card that was previously in your old device old way and copy your contacts to the SIM card - thanks to this they will be available to you on your new phone. The advantage of this method is that you will be able to select or deselect contacts individually, and create something similar in your address book. The main disadvantage of the above method is the limited storage capacity of the SIM card. In other words, you can save up to 200 contacts.
By the way, exporting information using a SIM card is no longer available, starting with Android versions 5.0 Lollipop and above. However, data import is still available without any problems.

And this method also has a drawback - complex contacts containing data in addition to the name and telephone number, fragment and form duplicates. This means that even if you have fewer than 200 contacts, you will quickly reach the SIM card's memory limit. In addition, you will have additional risk that yours is old SIM card will not easily fit into a new smartphone.
Transfer data from iPhone to Android
Transferring data between Apple and Android isn't always easy, but there's a very simple solution for Contacts. Google explains step-by-step on its support page how you can sync Gmail, calendar, and contacts from your iPhone and iPad. You'll need to set up a Google Account on your Apple device, which will be linked to the app's settings in Mail, Contacts, and Calendar.
If you have iOS 7, you can simply select Google, but for iOS versions 5 and 6 you will need to select the “Other” subsection and then select “Add CardDAV account”. Set up your account and activate the Contacts option once you are logged into your account. After this, the process of synchronizing your contacts will automatically start. On a new Android smartphone, you can register with the same account information to sync and transfer contacts as described above.

Manufacturer solutions
Whatever the decision Google, Android smartphone makers have created apps that can transfer contacts from iPhones to devices from Samsung and other similar manufacturers. In some cases, such applications work with a cable connection, sometimes some of them create special communication channels between iPhone and Android, and there are also those that can work with cloud storage related to a specific manufacturer.
Sony Xperia Transfer
Sony's data transfer solution is called Xperia Transfer. This application helps you transfer content and contacts from iOS smartphones, BlackBerry, Windows and Android for a new one Xperia smartphone. Let's add that Xperia Transfer can transfer contacts, calendar, call log, SMS, MMS, notes, photos, music, videos and documents.
Samsung Switch Mobile
Samsung is a leader Android market– also has a solution designed to ease the transition of a new user to a phone from this manufacturer. The above solution is special application called SmartSwitch Mobile, designed for use when moving from an iPhone to a Galaxy device, when updating old model Galaxy, or when switching from any other Android smartphone. The Samsung support page explains in detail how SmartSwitch works. If your old device was from the Galaxy line and under Android control Marshmallow, you can even transfer the start screen layout to your new device.
HTC Transfer Tool
HTC decided not to bother choosing a name for its data transfer application and simply called it HTC Transfer Tool. By the way, a similar approach can be seen in other manufacturers. This application must be installed on both old and new smartphones, and the new device must be released by HTC. Transfer Tool will help you transfer emails, calendar, messages, contacts, call log, video, photo, music, background images, documents and settings.
LG
If you own a new smartphone from LG, then you can either use one of the above methods or be content with LG Bridge. This software has the same capabilities as applications from other manufacturers, although it requires a PC or Mac OS. On official page LG support you will find all the information you need on LG Bridge, but after you specify the model of your smartphone.
We can also recommend you to use the LG Backup (Sender) application, available for download from the Play Store. With it you can transfer SMS, contacts, call logs from your old device to a new one using a cable, WLAN or MicroSD card.
Transfer SMS
You can easily transfer your old SMS messages to your Android smartphone. Free app For Reserve copy SMS - SMS Backup & Restore - does just that. Your messages are saved in an XML file and can be transferred directly to your new smartphone via Bluetooth. Also, such a file can be sent via email, or transferred to cloud storage and downloaded from there.
Note that SMS Backup& Restore must be installed on the new Android smartphone as well. When launched, this application automatically finds the required file and recovers SMS messages. Important: When importing, the application does not pay attention to which messages already exist. If you import twice, then each of your messages will have its own double.

Let's also say that SMS Backup & Restore does not support transferring messages from Android to iPhone. Therefore you can only create backup copy Android SMS and read the XML file on your computer.
WhatsApp chats
Full WhatsApp streaming chats can also be transferred to your new smartphone, including pictures, video and audio. To do this, you need to download WhatsApp on your new device and replace the backup folder on it with the same folder from your old device before you launch the application for the first time. Note that you do not need any additional applications or third party tools.
Unfortunately, transferring WhatsApp chats from Android to iPhone or from iPhone to Android is not yet available, and adding Google Drive as a backup environment did not change the current situation. On iPhone WhatsApp stores chat logs in iCloud, which cannot be accessed from Android smartphones.
Transferring photos
The most simple solution To back up photos from Android smartphones, you can call it automatic backup to cloud storage. Applications such as Dropbox, Google Drive or Google+ can automatically sync when your smartphone is connected to a wireless device. As a result, the amount of mobile data is saved, images are transferred from the device completely in background, and the images can simply be downloaded from the cloud storage to your new Android device.

If the old and new smartphones have a card slot microSD memory, you can also backup your photos to an SD card and then restore them to your new device. In addition, there is a way using a PC: you just need to connect your smartphone, copy the folder with images to your computer and transfer it to a new Android device. Mac users to transfer photos you must download for yourself Android app File Transfer, otherwise they won't see any files.
To transfer photos and videos from Android to iPhone, you should also use the Copy My Data app. With its help, you can transfer old information from devices from Samsung and other Android manufacturers to iPhone step by step.
Transfer music
Your songs are most likely saved in MP3 format and are located in your Music folder. This is one of the directories that will appear on your computer after connecting your smartphone to it. Mac users must download Android File Transfer to see necessary files. This app saves such files on your PC and transfers them to the same folder on your new smartphone, but you can create a new folder yourself. No matter what your music folder is called, your music player should be able to find songs.

If you want to transfer music to iPhone, then in this case you will need to transfer the folder from MP3 to computer to your iTunes library. Step by step guide from Apple will help you transfer your music from Android to iPhone.
Applications
As soon as you are logged into your Google account on your new Android smartphone, the device will attempt to install the apps you previously downloaded from the Play Store. This uses Google's backup system, which unfortunately can only deal with a small number of applications.
In order to transfer application data from one Android device to another, you will need additional backup applications, for example, Titanium or Helium. Only with their help will you again have settings, saved accounts, game statistics, etc., and such applications are immediately ready for use. Many games today have an option cloud storage Google Play Games. You simply install the game on your new smartphone and can continue from the same place where you left off the gameplay on your old phone.
After all the data has been transferred, your new device will now be of primary importance to you.
Unfortunately, there is no way to transfer apps from Android to iPhone, plus there is also no time-saving way to automatically install apps from App Store, which you have already purchased from the Play Store.
Apple itself recommends that people reinstall such applications manually. Naturally, all the applications you purchased from the Play Store can no longer be transferred to the App Store, so you will have to buy the paid applications you need again.
How did you transfer your data the last time you updated your smartphone? Is there a method or specific application that you find useful? Share your thoughts with us in the comments.
Since Apple released iPhone 5S, which equips the first 64-bit processor for portable devices, the 64-bit processor has become a tendency for the cellphone industry. The same as the CPU for computer, a cellphone processor with the 64-bit architecture, means that it can execute 64-bit long instructions every time, which also implies that a cellphone equips a 64-bit processor, can run faster and perform better. Of Android cellphone, it also means that the cellphone can satisfy the basic requirement of the latest Android 5.0 operating system, a new Android OS which improves the execution efficiency a lot and can run more fluently than all former versions of Android. The new cellphone Samsung Galaxy S6 just released the other day is such a kind of Android phone, which possesses an 8-core, 64-bit CPU, and runs on Android 5.0 system. All of these make it worthwhile to be purchased.
However, you may be worried about if there are some problems when trying to transfer the data between the old Android operating system to the new Samsung Galaxy S6. After all since you want to replace your old Android phone, the most important thing is to export all old but important data from the old Android device, and then put them to the new Samsung Galaxy S6 (Edge+).
How to Sync Android files with Galaxy S6 with ease?
If you just need everything easy, you can turn to and let it help you accomplished all the data transfer work. This powerful tool can help you transfer all your data including the music, contacts, video, pictures, call log, calendar, SMS and so on from the old Android phone to your new Samsung Galaxy S6 efficiently. All you need to do is just some clicks.
Here is a tutorial.
Tutorial of Transferring Data from Old Android to Samsung Galaxy S6
Step 1: Install dr.fone on a computer.

You can get this amazing program from the website because it is famous. This program is designed to do the data transfer job, so it is really professional and by the way, it not only enables you to transfer the data from other Android/iOS/Nokia devices to Samsung Galaxy S6 directly but enables you to get the data from the existing backup files.
Step 2: Run dr.fone
After you’ve installed dr.fone on your computer, just launch it. The primary window of it will show on your screen. The interface is colorful but clear. Then just click the “ Switch” button to go to the Phone to Phone transfer window.

Step 3: Connect both your old Android phone & new Galaxy S6 Edge+ to the computer
Connect your old cell phone and the new Galaxy S6 to the computer. They will be detected and shown in the primary window automatically.

Step 4: Transfer music, video, contacts and so on from Android phone to Galaxy S6 Edge+
In the middle there are some checkboxes, just tick what you want, and then click the “ Start Transfer” button, and the program will start transferring the data you selected to your Samsung Galaxy S6.

When buying a new smartphone, users often wonder how to transfer data from an old phone to it. Today we will tell you how to do this procedure on Samsung devices.
There are several ways to transfer information from one Samsung device to another - this is using proprietary utility Smart Switch, synchronization with Samsung or Google account, application third party programs. Let's look at each of them.
Method 1: Smart Switch
Samsung Corporation has developed a proprietary application for transferring data from one device (not only Galaxy) to other smartphones of its own production. The application is called Smart Switch and exists in the format of a mobile utility or programs for desktop computers under Windows control and Mac OS.
Smart Switch allows you to transfer data via a USB cable or via Wi-Fi. In addition, you can use the desktop version of the application and transfer information between smartphones using a computer. The algorithm for all methods is similar, so let’s look at the transfer using an example wireless connection via phone app.
In addition to the Play Store, this application is also available in the Galaxy Apps store.
- Install Smart Switch on both devices.
- Launch the application on your old device. Select transfer method "Wi-Fi" ("Wireless").
- Select "Send" ("Send").
- Move on to a new device. Open Smart Switch and select "Get" ("Receive").
- In the window for selecting the OS of your old device, check the box "Android".
- On your old device, tap "Connect" ("Connect").
- You will be asked to select categories of data that will be transferred to the new device. Along with them, the application will also display the time required for the transfer.

Mark the required information and click "Send" ("Send"). - On the new device, confirm receipt of the files.
- After the specified time has passed, Smart Switch Mobile will notify you that the transfer was successful.

Click "Close" ("Close app").

On Galaxy S8/S8+ devices and higher, the Smart Switch is integrated into the system and is located at “Settings” - “Cloud and accounts” - “Smart Switch”.


This method is extremely simple, but using Smart Switch data and settings cannot be transferred third party applications, as well as cache and save games.
Method 2: dr. fone – Switch
A small utility from Chinese developers Wondershare, which allows you to transfer data from one Android smartphone to another in just a couple of clicks. Of course, the program is compatible with Samsung devices.


As with Smart Switch, there are restrictions on the type of files that can be transferred. In addition, the dr. fone – Switch to English language, and its trial version allows you to transfer only 10 positions of each data category.
Method 3: Sync with Samsung and Google accounts
The simplest of possible ways transferring data from one Samsung device to another - using the built-in Android data synchronization tool through Google and Samsung service accounts. This is done like this:
- On your old device, go to "Settings"—"Are common" and select "Backup and reset".
- Inside this menu item, check the option "Archive data".
- Return to the previous window and tap on "Accounts".
- Select "Samsung account".
- Tap on "Sync everything".
- Wait while the information is copied to the Samsung cloud storage.
- On your new smartphone, log in to the same account in which you saved the backup copy of your data. By default, Android has automatic synchronization enabled, so it will take some time for the data to appear on your device.
- For a Google account, the steps are almost identical, only in step 4 you need to select "Google".


This method, despite its simplicity, is also limited - you cannot transfer music and applications that are not installed through Galaxy Apps in this way.
Google Photo
If you only need to transfer your photos, then Google Photos will do the job perfectly. It's quite easy to use.

We have looked at the most convenient methods of transferring data between Samsung smartphones. Which one did you use?
When you get a new Samsung Galaxy S9, the first thing you need to do is transfer your contacts to your new smartphone. in fact, only with these contacts you can send/receive messages/receive calls from your friends, family, colleagues and other people. However, since it is difficult to enter contacts one by one without problems, it will be better to turn to another third party transfer tool for help. In the article, I will show you how to import contacts from SIM card/VCF/one phone/Gmail, Facebook and more accounts for Samsung Galaxy S9/S8/S7/S6/S5/S4/S3 in an easy way. Just keep reading to find out more!
Part 1. Sync Contacts to Samsung S5/S6/S7/S8/S9 from SIM Card
It's easy to transfer contacts to Samsung S5 from your SIM card. You just need to take your SIM card from your old phone and insert it into your samsung phone Galaxy. then, the contacts will be copied to Samsung S3.
Part 2. Sync contacts with Samsung S9/S8/S7/S6/S5 via VCF
If you ever save all contacts on your computer as VCF file, you can transfer them to S5 using a third party program. You can try the tool – Wondershare MobileGo for Android (Windows) Now. Both of these two versions allow import business card files Galaxy S5 in just one click.
Please choose the suit version according to your PC system. Then install it on your computer and launch it to open the original window. Here I will take Windows version, as an example. If you Mac version You can also follow similar activities.
step 1. connect Galaxy S5 to PC using USB cable. The program will start detecting your S3 immediately and then display it in the original window.
step 2. In the left column, you can see all the files on your Galaxy S5 displayed in different categories. Please Click “contact” to bring up the contacts window, and then “Import”. And then select the VCF file and the location to save the VCF file, like SIM card, phone memory card, or account.
The note: You can also transfer these contacts to Windows Live Mail, Windows Address Book or Outlook to Galaxy S5 using the program.
Part 3. Transfer/Sync Contacts from One Phone to Samsung S9/S8/S7/S6/S5 Directly
If you have just left your old phone and contact new Samsung S8/S7/S6/S5/S4, you will need to transfer contacts from one phone to Galaxy Phone. In case, you can try the program - dr.fone – switch. As part of the program, you can not only transfer contacts from one phone to Galaxy S5, but also transfer other files such as music, SMS, pictures, etc. between any smartphones, including for Windows Phone, Symbian, IOS and Android devices.
Here are the steps for you to complete the task. Please download the program from the website and install it by double clicking. After this, the program launch window will open. Press “switch” to enter the phone with the phone transfer function.

step 1. After starting the program, please connect both your Galaxy S5 and your old phone to your computer using two USB cables. The program will start displaying two phones and then displaying them in the start window. After this, you will see your old phone displayed on the left side and S5 on the right side.
If you want to transfer files from S5/S4/S3 to old phone, you can click the “roll” button to change phones whenever you want. If you want to clean your Samsung Galaxy Phone Before transferring, you can note, “ Clear data before copying” in the lower right corner.
step 2. Since all files are supported by default, you must remove traces of unwanted files accordingly. Then click “ Start of transmission” to start transferring the contact.
Part 4. Sync contacts to Galaxy S8/S7/S6/S5 from those in Gmail or Facebook or other accounts
With the program, you can even import contacts from Gmail, Facebook and more other accounts. On a Samsung S5, tap “Settings”, then “Accounts & Sync” and “Add Account” and then go into your accounts and copy contacts to the Galaxy S5. In a few minutes, you will then receive all the contacts that were once saved in Gmail, Facebook ads and other accounts.
Sooner or later, every phone owner is faced with the problem of transferring data from one device to another. It can be any combination. This is most often relevant for copying data from a phone to a computer or tablet, but there are many other devices with which you can “pair” your device. Sometimes it turns out that you need to establish contact between two phones. Let's talk about this.
In order to transfer data from one device to another, synchronization is needed. The difference from standard protocols is the presence of an external server for data storage. Everything here greatly depends on what kind of phone you have and to which one you need to transfer the information. In this article we will look at how to synchronize phones on the Android and Apple platforms.
Synchronizing Android phone books
Let's consider this problem using the example of synchronizing the phone books of an old and new phone. In order to synchronize them on this platform, you will need to create an account with Google. Everything is very simple here if you have Email Gmail means you are already registered and can proceed to the next step. Registration in such services as:
- YouTube;
- blogger;
- Documentation;
- Picasa.
If you have an account on the listed sites, just go to your mail. All of these resources were developed by Google, as was the Android platform itself, so they have well-developed synchronization schemes using accounts.
Next, let's work a little with the old phone. First of all, your phone book is information that is stored in memory in a certain form. In order to download this data first to Gmail, and then to new phone you need to format the contacts so that the resource can accept them. CSV and VCard are two formats suitable for this situation.
You need to go to phone book old device and select all the contacts there. Next you need to copy them to the memory card. During this process they will automatically change the format. After that, you can find them on the memory card by going to the “General” folder and then “Contacts”. The last step in this step is to import this information into your Gmail. You need to copy contacts one at a time.
Now that we have the phone book in Google account, it needs to be transferred to a new device on the Android platform. Moreover, using synchronization, you can set up automatic data transfer. For example, if you deleted or added a contact in the mail, the phone will receive this data and do the same.
Taking a new phone, we proceed like this:
- Go to Settings.
- We look for the Accounts item, click - a menu appears.
- In the pop-up window, the question “Add an existing account or create a new one?” appears at the top, and answer options appear at the bottom. Select “Existing”.
- Entering data Gmail mail, on which the contacts are saved and we enter.
- Then we synchronize and get a ready-made phone book on the new phone.
Having completed all these steps, you can quickly retrieve the information you need on your new device, be it a phone, tablet or other device. This is very convenient in any situation and life-saving if you lose your device.
Android Snap Sync
Photo synchronization was mentioned in passing in the review on how to clear memory Android phone. All photos from Google Photos can be downloaded if there is a network connection Google Drive, visible to everyone who has access to it (set by the account owner). To do this, go to the Google Drive application on your phone, select the left Top Menu, go into settings and set the Auto-add option.
The reverse process is supported by Google Photos. You need to go into the application, expand the menu in the upper left corner of the screen, select Startup and synchronization (support.google.com/photos/answer/6193313?co=GENIE.Platform%3DAndroid&hl=ru). Please note that the instructions only work for older builds. In new versions of Google Photos there is no such item. The authors rolled back the updates for this application to factory settings (version 1.11.0.110496109), and then the option appeared.

More detailed options are set as follows:

Here you can configure roaming settings, give preference to free WiFi, and specify the size of photos. You can sync most documents through Google Drive. Opposite those of them that have not yet been uploaded to the server will be a crossed out cloud.
Peer-to-Peer synchronization
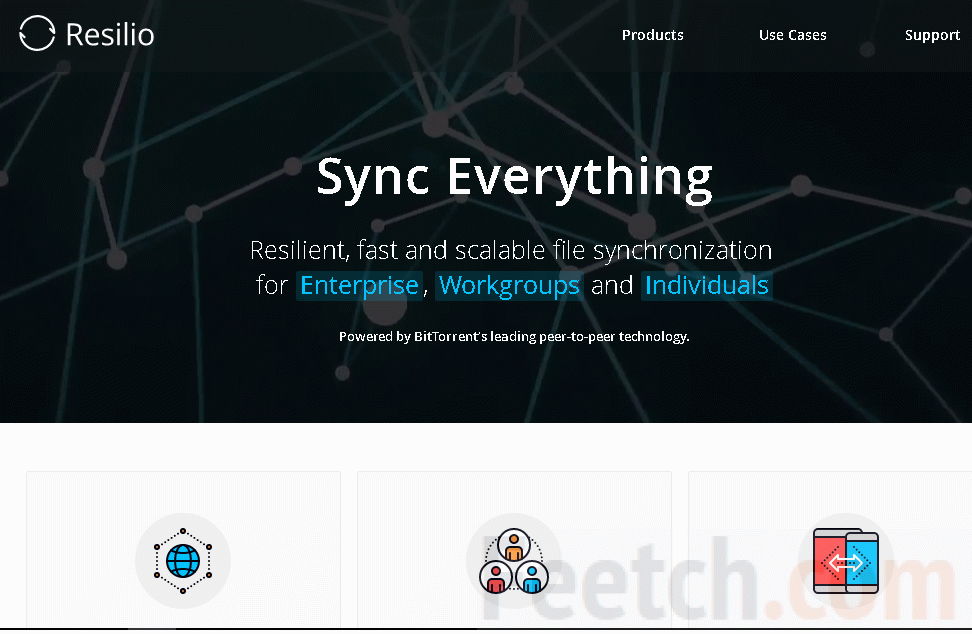
Many companies offer free and commercial versions of synchronizers. For example, Resilio offers a client for data transfer using Peer-to-Peer technology, widely used in torrent clients. A server is created with a dedicated hard drive, where synchronized subscribers upload information. You can download the application for your computer on the company's official website.
The mobile phone accesses the information by scanning a QR code, which must then be opened.
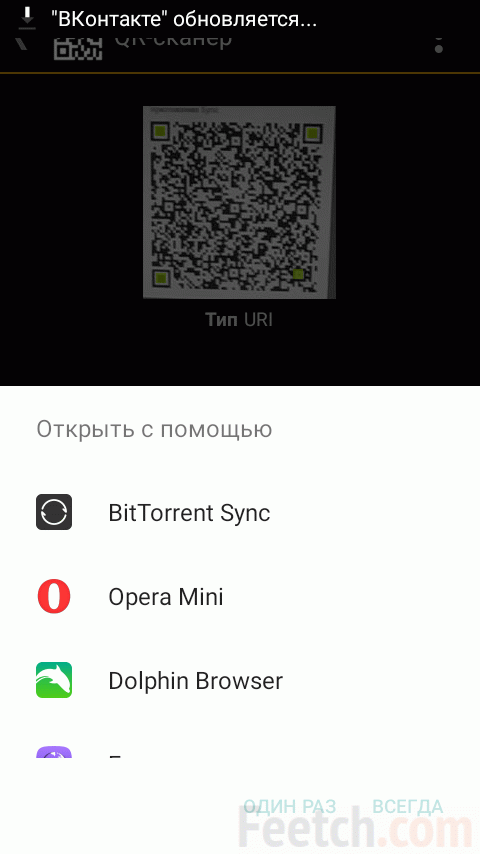
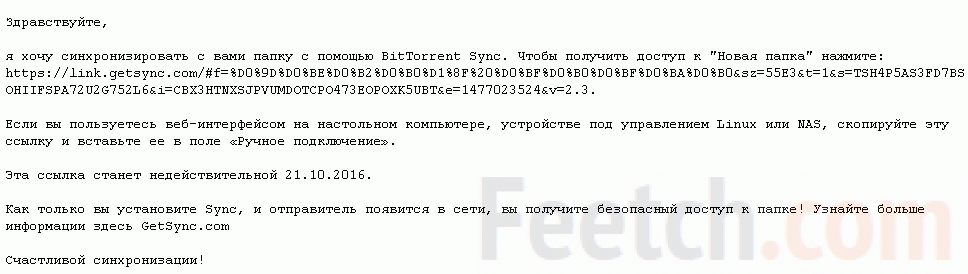
We used the BitTorrent Sync application from Google Play as a client. Although the software is quite young, it still managed to collect a lot of positive reviews.

It is possible to work with Google Drive. To transfer files, a request is sent to your account email, which you need to confirm by clicking on the link, or ignore.
Instead of paid synchronization
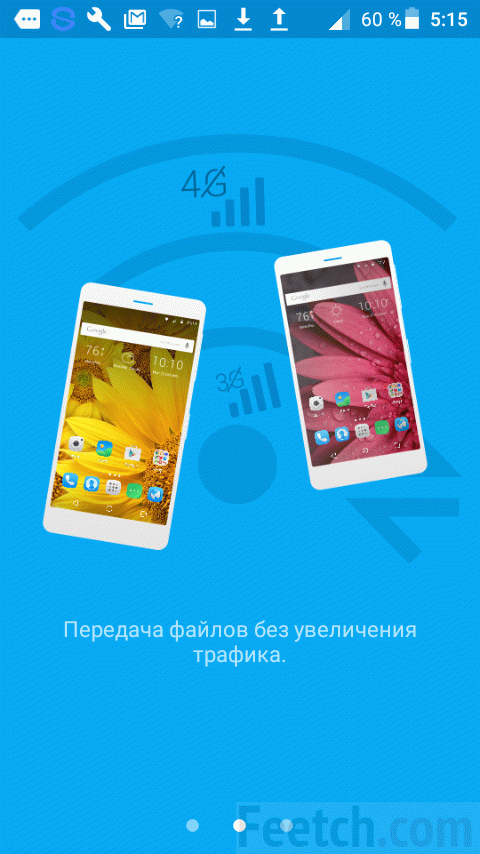
Google gives 15 GB of space for free, and you need to constantly ensure that there is free place. Instead, it is sometimes easier to transfer files over wireless protocols without the involvement of mobile networks.
BlueTooth
This interface did not take root in personal computers. Meanwhile, in automatic mode, it allows you to pair not only smartphones, but also regular phones, deprived operating systems. This is the best and fastest way to convey a small amount of information. This allows you to upload beautiful photos and high-quality music to simple equipment. What is important for developers is that the interface specification is available for free download (bluetooth.com). This means that anyone who wants to (and knows how to program) can start writing applications for connecting devices right now. This is an important fact, because many standards (including ANSI) are sold at a very decent price, and it is not possible to find them in the public domain.
The name was chosen in honor of the ancient Viking king Harald Bluetooth. Known not only for his conquests and attempts to unite the lands, but also for the installation of runic stones to describe his territory, and the construction of fortresses. Just as stones without the king's inscriptions are rock, so are telephones without software BlueTooth cannot communicate with each other properly. Harald I at one time managed to unite the kingdoms of Denmark and part of Norway. The developers from Stockholm, of course, read the ancient sagas and hoped that their interface could do what BlueTooth did for its subjects in the 10th century AD.
Like WiFi, the interface operates at a frequency of 2.4 GHz, and therefore expansion card modules are often combined. Both protocols can be used. This is very convenient, because both technologies are very popular, although, as is obvious, WiFi is gradually replacing its counterpart. In the fight against signal fading, the channel is constantly looking for more suitable frequencies, which provides a certain flexibility and adaptability of the interface.
Unlike WiFi, the protocol speed is not very high, barely exceeding 1 Mbit/s. But this is quite enough to transfer small files between phones. For example, a high-quality 4K resolution photo can weigh about 5 MB. That is, the transfer will take 10 seconds. Most phone cameras have a much lower resolution, therefore, information is transmitted almost instantly. BlueTooth 5, released in pursuit of WiFi, is much more productive, the bitrate reaches 50 Mbps at a distance of up to 230 meters. To synchronize two phones you need to do the following:


Data transfer is carried out through the menu of these folders, the second option is to go to the directories and act from there. Some phones will additionally need to accept an OPP data transfer profile to complete the operation successfully. This happens automatically, but requires user approval.

Using WiFi
Under Android, it is possible to directly transfer data via WiFi Direct. All phones that have enabled the option will see each other. The menu is located in the WiFi network settings.

But sometimes it is more convenient to communicate through friendly applications. For example, the WiFi Transfer application is installed on Alcatel Onetocuh. We couldn't find him in Play Market, but it is definitely present on many phones. The interface can be confusing when you first turn it on.

To a user accustomed to Windows, it seems logical to click images using the dot pointers at the bottom of the screen. But nothing happens! Only the Android user will guess that you need to drag to the left, then the next screen will appear.
Finally, on the third screen a prompt appears to start working... In particular, the system requires that there be no anonymous users in it. For presentation, use the user’s own nickname and an avatar to choose from from nine preset ones. Those interested can upload any photo.

After this, all that remains is to create your own group or join an existing one to begin transmitting information.

As can be seen from the screenshots, you can transfer music, videos, drawings, etc. Another common program is Share.it. We talked about it in the section on how to transfer photos from your phone to a computer (that does not support WiFi Direct).
Apple Sync
You can sync your iOS device wired using special program iTunes. This is done using the original USB cable that comes with the phone itself and a computer.
All devices of this brand are synchronized with iTunes. Every time you update your device, adding or deleting new data, images or music, you will need to sync it with your computer so that all the information is copied there. Already from a stationary machine, you can transfer information in the opposite way to any Apple device. Let's look at this in more detail.
- needed for synchronization latest version iTunes. Open the program and make sure all updates are installed.
- with help USB cable connect your phone to the computer via the appropriate connector.
- find the list of connected devices on the program control panel and select the one you need to work
- then open this menu, on the left you will see a list of tabs that you can transfer to your computer
- In order to synchronize devices, you need to click on the corresponding button at the bottom of the window.
A similar connection to a computer is also possible in reverse. You can also connect and synchronize without a cable. This can be done through wireless Internet, which, at good speed, is much more convenient.
By following these simple steps, you will make your life much easier when purchasing a new phone or any other device from the listed companies. If you are still tormented by the complexity of the question “how to sync phone to phone?” leave it. Just a few minutes of wasted time will save you whole hours of useless torment over technology in the future.
2 ratings, average: 4,00
out of 5)
