Restoring windows 8 on a laptop dns. How to restore a laptop to factory settings. How to find out the Windows key if it is hardwired into the BIOS
With pictures and videos on the website:
http://2133790.ru/vostnout.htm
Nowadays, laptops often come without a disk with the Windows 7 operating system. And sometimes reinstallation is required operating system.
If you have a laptop book, you can read in it how to do this. But sometimes there isn’t even a book. I read about it on the Internet and this is what I found:
Restore the system using hotkeys. Here is my short list of these hotkeys. The original source is here. After turning on the laptop, we begin to frantically press:
F3 – MSI;
F4 – Samsung. Under OS it is possible through Samsung Recovery Solution III;
F8 – Fujitsu Siemens. In general, it often allows you to get into the proprietary Recovery utility on other laptops (via troubleshooting).
F8 - Toshiba
F9 - ASUS;
F10 - Sony VAIO. Under OS it is possible through VAIO Recovery Utility;
F10 - Packard Bell;
F11 - HP Pavilion;
F11 - LG;
F11 - Lenovo ThinkPad.
Alt+F10 - Acer. Before doing this, select Disk-to-Disk (D2D) in the BIOS; a nuance about the recovery tool for acer laptops: it happens that the user sets a password for the recovery tool, and naturally forgets the password completely. As a result, when loading the recovery software, you are asked for a password. solution: boot into Acronis or any live Linux distribution (Windows cannot open this partition), mount the partition with the recovery system, look for a file in the root no larger than 1kb (I don’t remember the exact name, I don’t have a laptop at hand right now) open text editor and in the PD= field we see the password (tobish, in the Acer recovery tool, the password is not encrypted and is in clear text).
Ctrl+F11 - Dell Inspiron;
F8 or F9 - Dell XPS. I forgot.
Clamp - Rover
Lenovo: ThinkPad - ThinkVantage or Enter button at boot or F11. IdeaPad has a separate OneKey Rescue button, press when the power is off. Selection menu proprietary utility Recovery basically looks something like this.
On an old Acer 4202 with Windows XP, my drive was split into C: and D:, and during recovery only the C: drive was formatted (accordingly, I had to make sure that everything valuable was stored exclusively on D:, which 90% of users did not do, since My Documents and User Profile was located at C: in Documents and settings)
On the new Acer 4810TG (with Windows Vista) one partition C: which will be completely formatted with everything that is.
Accordingly, in all cases, to restore it is necessary to have
a) LiveCD with Ubuntu Linux
b) External HDD USB disk
We boot into Ubuntu Linux, copy all important data (you can also install midnight commander- analogue of far manager by running the command apt-get install mc and copy to the mounted /media/device_name) to another disk
Hello admin! I have new laptop with Windows 8.1, without a hidden partition with factory settings, I deleted this partition a long time ago, but then I regretted it. There is a desire to independently create such a partition with a backup reference image of Windows 8.1, so that, if necessary, I can roll back to this image containing all the software I need. Question! Tell me how, using the tools built into Windows 8.1, create a backup image of Win 8.1 with all installed programs and link it to system environment recovery so that I can rollback this image with one button - Push-Button Reset Overview?
How to create your own partition with factory settings or how, using the tools built into Windows 8.1, create a backup image of Windows 8.1 on a laptop and link it to the system recovery environment
Hello friends! Today is a very interesting article for computer enthusiasts, in which I will tell you about one unknown secret of restoring Windows 8.1.
Create reference Windows image 8.1, containing all the programs you need, possible not only on a new laptop, but also on regular computer. Install on your Windows laptop 8.1, then install everything on the system necessary programs, then create an image of Windows (in a way that I will show you), then link it to the system recovery environment and roll back to this image in the event of a severe system failure, you can roll back when the system is still functioning and booting, and also in the case when Windows won't boot at all. Details later in the article.
Many readers may ask the question: "What is Reset Windows with one button - Push-Button Reset Overview ?
We all know that in Windows 8.1, when systemic problems(which cannot be eliminated), there is a way to return the computer to its original state - Push-Button Reset Overview, i.e. Resetting Windows with one button, you will need an installation one, in a nutshell I will remind you how this is done. Insert the installation disk with Windows 8.1 into the drive, then go to
Options

Update and recovery

Recovery


After this happens Windows reset to the original state, as a result the user loses everything installed programs and settings, as well as personal data on the drive (C:), but the operating system takes on its original appearance. Let me remind you that to restore, Windows 8.1 takes backup files from the installation distribution, which you must have inserted into the drive.
Experienced users will notice that you can use the utility built into the system and create a recovery image in advance, and if necessary, roll back to it, in this case some part of the user data will remain intact! I note that in this case, most user settings and all installed applications are still lost.
To save all programs installed in the operating system, I suggest creating a complete image file of Windows 8.1 in WIM format and place it on a section specially created by us hard drive. Next, you need to bind the WIM image to the Windows 8.1 recovery environment, that is, upon return computer to its original state - Push-Button Reset Overview (one-button reset), the Win 8.1 operating system will use for recovery not the Windows 8.1 distribution files, but the one we created Windows 8.1 image file! In this case all your programs installed on the C: drive will remain safe and sound. If necessary, you can update the install.wim image file over time.
So, let's go. We have a new laptop with a UEFI BIOS and Windows 8.1 installed on it.
The programs we need are installed in the operating system.

First of all, we check whether our recovery environment is enabled.
Let's open command line as administrator and enter the command:
reagentc /info (program REAgentC.exe Used to configure the Windows Recovery Environment boot image and one-button reset recovery image, and to administer recovery options and settings. In our case, the REAgentC program shows that the recovery environment is turned on and, as expected, is located on the first hidden partition (Good recovery partition, volume 300 MB), but the recovery image and its location are not indicated, which means that recovery using one buttons - Push-Button Reset Overview the Windows 8.1 DVD will be used).
Note: if in your case the recovery environment is turned off - Disabled, then go to the very end of the article and read the necessary information).
In our case everything is fine.
Windows Recovery Environment Status: Enabled
Windows Recovery Environment Location: \\?\GLOBALROOT\device\hardd
isk0\partition1\Recovery\WindowsRE
Boot Configuration Data ID: 222a737e-019e-11e6-bc4d-aabece8a
bcca
Recovery image location:
Recovery image index: 0
Custom image location:
Custom image index: 0

Disk management.
We deleted the hidden partition with factory settings and will now create it again.
We create a regular partition at the end of the hard drive, a size of 20 GB, drive letter (E:) will be enough for me.

Go to the drive (E:) and create a folder on it: Recoveryimage

After that, we boot into Special boot options.
Options
Change computer settings
Update and recovery
Recovery
Special download options
Reboot now

Diagnostics

Extra options

Command line

Select our account

If you have a password, enter it and click Continue.

A command prompt window opens.
Enter the commands:
diskpart
lis vol (we determine the drive letters, we see that the operating system is installed on the C: drive, and the recovery partition we created has the letter D: instead of E:)
exit (exit diskpart),

enter the command:
Dism /Capture-Image /ImageFile:D:\ recoveryimage\install.wim /CaptureDir:C:\ /Name:"Windows"
install.wim: is the name of the WIM disk image (C:) with Windows 8.1.
D:\recoveryimage- the location where the WIM image is saved.
C:\- section with installed Windows 8.1 .
Operation progress 100%. The system image has been created.

Enter more commands
cd /d C:\windows\system32 (with this command we enter the directory C:\windows\system32)
reagentc /info (the recovery environment is enabled, but the image and its location are not specified)
reagentc /setosimage /path D:\Recoveryimage /index 1 /target C:\windows(this command binds the recovery image we created install.wim located on disk D:\ in folder recoveryimage to the system recovery environment (RE), now to restore using one button - Push-Button Reset Overview this will be used image file install.wim.
C:\Windows\System32>reagentc /setosimage /path D:\recoveryimage /index 1 /target
C:\Windows
Directory specified: \\?\GLOBALROOT\device\harddisk0\partition5\recoveryimage
REAGENTC.EXE: Operation completed successfully.
All this can be checked again with the command reagentc /info
C:\Windows\System32>reagentc /info
Windows Recovery Environment configuration information and
system reset:
Windows Recovery Environment Status: Enabled
Windows Recovery Environment Location: \\?\GLOBALROOT\device\hardd
isk0\partition1\Recovery\WindowsRE
Boot Configuration Data ID: 222a737e-019e-11e6-bc4d-aabece8a
bcca
Recovery image location: \\?\GLOBALROOT\device\harddisk0\pa
rtition5\recoveryimage
Recovery image index: 1
Custom image location:
Custom image index: 0
REAGENTC.EXE: Operation completed successfully.

Resetting your computer to its original state
Friends, now to return the computer to its original state - Push-Button Reset Overview (one-button reset of Windows), you do not need an installation distribution with Windows 8.1, since we have reprogrammed the recovery environment and now to return the computer to its original state, the file we created will be used -recovery image install.wim located on disk D:\ in the recoveryimage folder.
Options
Change computer settings
Update and recovery
Recovery
Removing all data and reinstalling Windows
Resetting your computer to its original state
Important Note: Many users delete together with the factory settings (15-20 GB), also
Although everyone understands that for stable operation of a PC it is simply necessary to keep its OS in working and healthy condition, sometimes the only way out is Windows recovery 8.1.
The recovery disk is a USB flash drive containing all the tools necessary to repair the system. It typically includes: Startup Repair, Updates, Reset, and System Restore.
To create a recovery disk, open the control panel and click on the “Recovery” section (the control panel is in the large or small icons view, this section is not in the category view). The top parameter of the window that opens is precisely responsible for creating the recovery disk we need. Click on it and go directly to creating the disc.
Clue. If you have a factory-preconfigured recovery partition on your computer, you can check the box to copy the recovery partition. True, this significantly increases the size of the recovery disk, and is only suitable for USB flash drives with a capacity of at least 32 GB, but it provides a valuable additional option for emergency recovery of Windows 8.1.
Once the disk is created, you can start your computer from it and access recovery options. However, do not forget that USB boot must be enabled in your motherboard's UEFI firmware.
Attention. If you're using Windows RT on a tablet, such as a Microsoft Surface, you should definitely create a recovery disk containing a system backup image. There is no other way to reinstall Windows RT except from a recovery disk, so if an accident occurs, you have only one option - to return the computer to the manufacturer to re-image it, which in our reality is unrealistic. To create a recovery disk with a full image Windows systems RT you will need a USB flash drive of only 4 GB.
Backup and restore Windows 8.1.
Ever since the days of Windows XP, when problems arose with the OS, it was considered common practice to completely reinstall the operating system and that’s it. software. There are now several other ways to ensure the safety of your installed copy of Windows and recover it in the event of a crisis.
Note. Windows 8 includes a tool for Reserve copy complete system image, Windows 7 has options for restoring files. This functionality has been removed in Windows 8.1. An alternative to these functions in Windows 8.1 is its own recovery option.
Repair Windows 8.1 using the Quick Repair option.
With Windows 8.1, Microsoft introduced a new way to create a backup image that's so easy that anyone can use it. This new recovery option creates a backup of your operating system that you can easily launch from your PC settings or, by inserting a recovery disc, from your OS startup options.
There is one important difference between the old system backup image and the new restore option. Even if you create your own custom recovery image, which, if anything happens, will restore all installed desktop programs, you will not be able to save their settings. This means that software such as Microsoft Outlook will be restored, but your accounts Email will have to be configured again. Same with all other desktop applications.
However, most users don’t have to worry, Windows 8.1 synchronizes most of its settings, including for desktop applications, and the same Microsoft Office 2013 can synchronize its settings between different computers.
The easiest way to access the recovery option is in the PC settings by selecting update and recovery there, and then in the left navigation bar pressing recovery.
The recovery option is the first option at the top of the screen, by the way, there is an explanation of what will be done. When you are ready to restore your computer, click the GET START button. The process is fully automated.
Windows 8.1 will explain to you what will be done during the recovery process and ask you to confirm this operation. Clicking on the OK button will begin the action itself, which can take from 15 to 60 minutes, which directly depends on your created custom recovery image.
You can also restore your computer while Windows 8.1 is running. There are several ways to do this:
- If your computer fails to start three times, the repair process starts when you boot it up. If the computer cannot be repaired, he suggests additional features, including restoration.
- Starting the computer with a recovery disk; Please note that you may need to access boot options. You need to boot from a USB flash drive.
- Starting your computer with the installation DVD Windows disk 8.1. On the settings screen, instead of system repair options, click the computer repair link.
Create a custom recovery image in Windows 8.1.
As mentioned above, you can create a custom recovery image. You may need to do this because by default, this function will update your copy of Windows 8.1, keeping files and applications intact, but will destroy all desktop applications.
Creating a custom recovery image will take a snapshot of your computer complete with all desktop software.
Note. Remember that when you restore from a custom recovery image, all desktop program settings are reset, so you will have to configure them again, however, if their settings are not automatically synchronized between computers.
To create a custom recovery image, you need to follow these steps:
- Click Win + X by opening the administration menu.
- Select and run Command Prompt (Administrator).
- Enter recimg -CreateImage C:\Folder, where C:\Folder is the location where you want to save the backup. This location may also be on another partition of the hard drive or on another drive. You can add additional fault tolerance to your recovery image creation.
Hello friends, in this article we decided to tell you how to restore laptop to factory settings. Let's start with the manufacturer Toshiba (who is interested, you can read a separate article -), the second we will consider the Sony laptop, the third HP pavilion. Separate articles are written for laptops, and,. Well, then we will try to supplement the article with information on products from other manufacturers; judging by your letters, this topic is of interest to many of our readers.
- Good day, I wanted to ask you how to restore a laptop to its original factory settings? I know that these settings are located in a hidden partition of the hard drive, but I carelessly deleted this partition and now when I try to roll back to factory settings I get an error. I have not created recovery DVDs and in general, I have never had the opportunity to restore a laptop to factory settings. What is the way out of my situation?
- Hello admin, please explain what I should do. A Toshiba laptop, it has a hidden partition, also a C: drive and a D: drive. I didn’t touch the hidden partition, but on drive D: I deleted everything, and now I can’t roll back to factory settings, they say Toshiba laptops use a hidden partition and some other folder HDD RECOVERY, which is located on the disk, to restore factory settings D:. What should I do now?
- I bought a Toshiba laptop, the instructions for the laptop say, if you want to roll back to factory settings, press the F8 key, the recovery program will start. I pressed it, but Additional download options are launched and that’s it... And then what to do? And another question, when you first started it, a message appeared - We recommend that you create a resuscitator media on a USB flash drive or DVDs, using the Recovery program, it will help you restore the contents of the computer to the original factory state, even in the event of serious damage to the computer. Explain how to use this resuscitator media in case of problems?
- Hello, tell me how to restore a Hewlett-Packard (HP) laptop to factory settings if the laptop does not boot at all. When loading Windows exits with an error.
- Admin, answer this question. All laptop manufacturers complete them with special RECOVERY program, located in a hidden partition, using this program you can roll back the laptop to factory settings in case of serious problems with the operating system. Question – Is there any alternative to this program?
How to restore a laptop to factory settings
When does the thought of restoring our laptop to factory settings occur to us? That’s right, when we no longer understand what’s going on with it, and most importantly, the laptop itself doesn’t understand what’s happening to it, due to dozens of unnecessary partitions created on it, four installed operating systems, thousands various programs and three antiviruses.
- Note: Before performing a factory reset, you can copy all data from the C: drive and desktop using .
Many users may notice that in such a situation you can reinstall Windows with all programs, drivers and everything. But I, in turn, will notice restore laptop to factory settings, for an inexperienced user, much easier. Then you won’t have to worry about finding and installing drivers for all devices, you’ll just need to install it again necessary programs that's all. The only thing that confuses many people in this situation is that many have never tried restoring the laptop to factory settings even once in their lives. To introduce you to this restoration is the purpose of our article; I hope after reading it, you will have a better idea of how this can be done.
I have to restore factory settings on various laptops quite often and I want to say that the recovery mechanism itself is almost the same on all laptops, but of course there are always nuances that are better to know in advance.
First rule. During a factory reset, network adapter The power supply must be permanently connected to the laptop.
You reboot the laptop and press a certain key on the keyboard when loading, then the factory reset program starts, this is where you need to be careful. The factory reset program may offer you the option of restoring just the C: drive or restoring the entire HDD. If you select drive C:, then only it will be restored to factory settings, and the remaining partitions with your data will remain untouched. If you choose to restore the entire hard drive to factory settings, then all the partitions you created, with all your files, will be deleted and your laptop will be in the same condition as at the time of purchase.
Where is the laptop factory reset program located?
Usually in a hidden section of the laptop, which is called the “Recovery Partition,” the volume is up to 20-plus gigabytes. You can see it if you go to Computer Management->Disk Management. It is advisable not to delete this partition, otherwise you will not be able to restore the laptop to factory settings.
Owners Toshiba laptop you need to know that besides the hidden RECOVERY section, they also have a HDD RECOVERY folder located on the D: drive, which cannot be deleted either.
Note: Friends, if the hidden partitions on your laptop are not deleted, but the factory reset program is not working, read our article -.
Why create laptop recovery DVDs?
As soon as we bought the laptop and turned it on, on the screen, immediately after the working Windows desktop, a service window from the laptop manufacturer appears asking you to create laptop recovery DVDs. That is, we will create this same hidden partition with factory settings, but on DVDs. This is done in case the hidden section of the laptop, for some reason (usually due to the user’s fault), becomes damaged or is deleted completely.
To create recovery DVDs, you usually need 3 blank CDs. If there are serious problems with your laptop, for example, you cannot load the operating system at all, and your hidden partition has been deleted, we can restore the laptop to its factory state using previously created recovery DVDs.
Hotkeys for restoring laptops to factory settings
ASUS – When the ASUS splash screen appears, press F9
Acer - Alt+F10
HP pavilion - when turning on the laptop, press the esc key. Enter the start menu, then press the F11 key
Samsung - F4
Sony vaio - F10. New Sony VAIO laptops use a special button Assist, try pressing it when loading. Loading VAIO Care, select from the menu Start troubleshooting (Recovery) -> Select keyboard layout Russian -> Diagnostics -> VAIO Recovery Tools -> Windows 8 -> Run the Recovery Wizard(System recovery in step-by-step mode).

Toshiba - F8 or on the latest models 0 or even sometimes you need to press Fn+0
Packard Bell - F10
Dell inspiron - when the dell splash screen appears, press Ctrl+F11
Fujitsu Siemens - F8
LG-F11
Lenovo-F11
So, first we restore the Toshiba laptop to factory settings, press F8 when loading (if you have one of the most latest models Toshiba laptop, then immediately when you turn on the laptop, press and hold 0), a window appears Additional download options. Choose Troubleshooting your computer and press Enter.

Selecting language settings.


We select the Toshiba HDD RECOVERY recovery tool or it may be called Toshiba Recovery Wizard.

In the next window, we are warned that drive C: will be restored to its original state, that is, everything will be deleted from it and its state will be restored to the state at the time of purchase of the laptop, drive D: will remain untouched.


You cannot interrupt the operation, so make sure that the AC adapter is connected to the laptop. Click Yes and start the process of restoring the laptop to its original factory state.

A factory reset process is in progress.

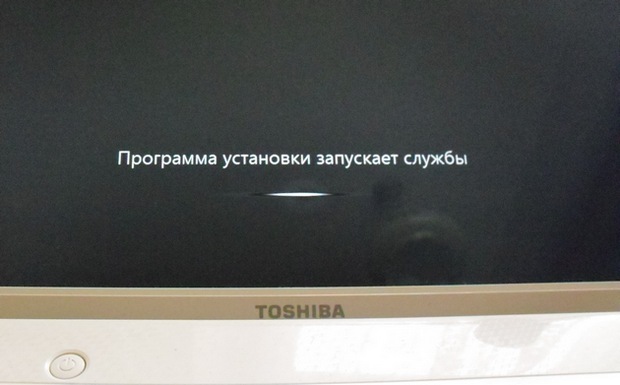
The software and drivers are being installed.


Choose a username and password for your account. We set the date and time, they are usually correct by default. If you wish, you can register your laptop to extend the warranty.

First Windows startup. That's all
How to factory reset a Sony laptop
Press the F10 key when loading and enter the Manager Windows boot, select using the keyboard Launching VAIO Recovery Center.


A window appears in front of us, in which we can familiarize ourselves with the recovery options.
For example, we choose Recover drive C: and in the next window we read information about what will be restored.


Disk C: is restored to its factory state, all software is reinstalled, but not software installed after purchasing the computer, it will have to be installed again. This program deletes all files on the C: drive, but does not affect files on other partitions.

If you and I choose Completely restore the system, then everything on the C: drive and all other partitions will be deleted. After recovery, all disk space will be occupied by drive C:


How to restore an HP laptop to factory settings
If the laptop does not boot at all due to system errors and you want to restore its original settings, then, in order not to lose your data, you can load it from any Live CD, then transfer important files to a portable hard drive, then restore the factory settings, since restoring the factory settings will delete all your data from the laptop.
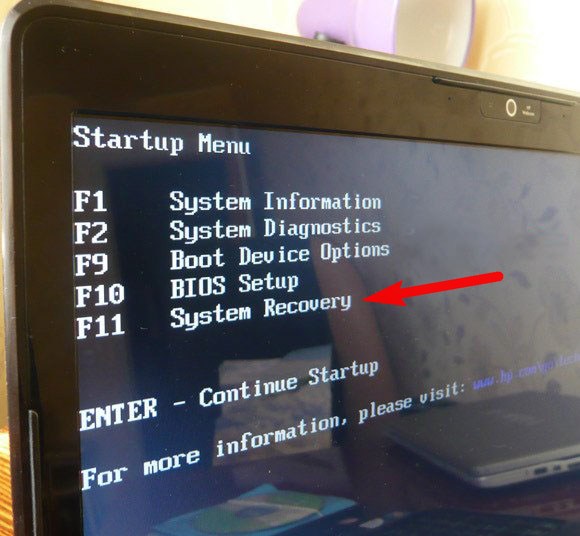
Press the key when turning on the laptop Esc.

We enter the boot menu, as we see, the F11 key is responsible for restoring factory settings - System Recovery. Press the F11 key.
A window appears HP Recovery Manager. Here we need the item " Restoring the system to its original condition when shipped from the manufacturer».

Click on “ Restore without creating a backup copy files" and click Next.

Now you need to turn everything off external devices: printer, scanner, mouse, click Next and the process of restoring the HP laptop to factory settings will begin.
Is there an alternative to the laptop's built-in factory reset program? Yes there are, these are programs and and they have much more opportunities.
Windows 8 is a reliable, convenient and stable operating system. However, even it is susceptible to virus attacks, and may also stop loading due to any user actions. In addition, untested programs may cause certain errors. In this regard, the question arises, how to restore Windows 8 on a laptop?
Of course, the solution may be to reinstall the operating system. However, what if you bought a laptop with a pre-installed OS? After all, it is official, and, of course, you do not have a disk for Windows reinstallation. In addition, to install the operating system you must have certain knowledge. And it’s much easier to perform a restore than a reinstallation.
How to restore Windows8
First of all, it is worth noting that there are several methods for restoring Windows 8 on a laptop:
- Before loading the operating system, press a special key.
- Launch the built-in utility that is provided on the laptop.
- Launch the built-in Windows recovery tools.
- Recovering from .
It is worth noting that the first method allows you to perform a recovery even if Windows 8 does not boot. The second method is special program, which is provided by the laptop developer. If you bought a laptop with a pre-installed operating system, then special utility should already be installed. In addition, a starting point must be created. If such a program is not installed, then it can be installed from the disk that comes with the kit. You will also have to create a backup of the OS.
The last option is to launch the built-in Windows 8 recovery tools. It is worth noting that when installing the OS, a restore point is created, which can later be changed. You can . For example, immediately after installing a new operating system and configuring it. This will allow you to roll back the system to the state at which you created the backup. So, let's look at all the options in more detail.
System Restore in Windows 8. How to create a restore point on Windows 8: Video
Running recovery before booting the operating system
It is worth noting that if the boot attempt is unsuccessful, you will be automatically prompted to run Windows 8 recovery on your laptop. The fact is that, as mentioned above when installing the OS, backup copy is created automatically. In addition, the manufacturer also took care of restoration. Every modern laptop has a special section called “Recovery”. It contains a backup copy of Windows.
To run the built-in function you just need to press the corresponding button when loading. These are different buttons on every laptop. On some models there is a separate key, on others it may be F9 or any other button on the keyboard. You can find this out in the user manual. So, after pressing the corresponding key, just follow the prompts on the screen. The system will do everything automatically.
Built-in Windows recovery tools
Everything here is extremely simple. Press the Windows key combination + X and select "System". In the window that appears, in the left menu, find and open the “Protection” item. Then all you have to do is click the “Restore” button. As you can see, everything is extremely simple.
In order to this method worked, we need immediately after Windows installations 8 and installing all drivers. You can create a copy in the above menu. Instead of the “Restore” button, we should click “Create”. This function is at the very bottom of the menu. Once clicked, follow the on-screen prompts.

Windows 8 System Recovery Tools: Video
Restoring Windows 8 from an installation disk or flash drive
Another way to restore Windows 8 on a laptop is to create a boot disk or flash drive. To do this we will have to create boot disk or flash drive. It is worth noting that disks are used less and less every year, and today there are laptops that do not have laser drive for reading CDs or DVDs. So we'll look at how to create bootable USB flash drive and restore from it using Windows 8. In this case, creating a disk is performed in the same way.
Restoring Windows 8 from an installation disk or flash drive: Video
So, first we need the UltraISO program. In addition, we will need. All this can be easily downloaded on the Internet. After installing the program, launch it and insert the flash drive into the USB port. The application is divided into four windows. In the lower left menu, you need to select the directory (folder) in which the desired image is located and select it. In the lower right menu, open the image by double-clicking with the left mouse button.

Appear in the upper windows open image. Now at the very top, find and click the “Boot” button. Select "Burn hard disk image". 
In the window that appears, in the “Disk Drive” line, select your memory drive to which the image will be saved, and click the “Burn” button. The system will warn you that the flash drive will be formatted and all data will be deleted. We agree with this. That's it, wait until the system writes the image.

After that, reboot the computer and . Here you need to enter the “Boot” section. Next, select the “Boot Device Priority” item and set “JetFlash” in the “1st boot device” section. This means that the operating system will be loaded from the flash drive. Save the settings and restart the computer. As a rule, everything happens automatically, but in some cases you will have to press “Enter” to boot Windows from the memory drive. After downloading all the necessary files, you can choose one of the options:
- Recovery.
- Installing a new OS.
Read the on-screen prompts carefully and follow them.
How to perform a system restore on Windows 8. System recovery tools: Video
