Recovery program for flashing a flash drive. SMI MPTool – brief instructions for repairing flash drives. Signs that a USB device has failed and needs to be repaired or restored
I will try to make the guide as short and concise as possible, so as not to unnecessarily complicate the situation. I would like to immediately note an important fact that for most modern cheap USB2.0 -flash drives on company controllers SMI , you will have to use tools. This is due to the fact that manufacturers do not hesitate to install low-quality DownGrade -flash memory, which turns out to be too tough for the good old one SMIMPTool.
At the end of the material, I will try to explain ways out of non-standard situations that resulted in errors or incorrect work.
INTRODUCTION
WITH first you need to select a version of the utility that is compatible with a specific flash drive SMIMPTOOL . In this material, I will not dwell deeply on this issue, I will only try to explain it in a nutshell. All available versions on my website have in their names a list of controllers with which they are compatible. For exampleSMI MPTool V2.5.27 v8 M1004, indicates the presence inside the archive of a set of firmware for the following controller models: SM3257ENAA, SM3257ENLT and SM3260AD.
SMI MPTool – from here we download all available editions of the distribution kits of the production utility for flashing microcontrollers SMI.
SMI MPTool REPACK – the same eggs, only not from the original distributions of production programs, but collected from official user recovery utilities.
TRANSCEND-SM32X-BY-USBDEV – essentially the same thing, only cobbled together from the contents of the online recovery service server Transcend JetFlash.
In addition to directly supporting the controller model, the utility must support the memory chip used in the flash drive. In 99 percent of cases, this is solved by changing the distribution to a more recent one.
For example, I will use the toolSMI Mass Production Tool V2.5.42 v7 O0515v1compatible with chipsSM3257AA, SM3257ENAA, SM3257ENBA, SM3257ENLT, SM3261AB and SM3267AB.
RESTORATION PROCESS
Download and unpack the utility to a place convenient for you, it is advisable that the address be short and without Russian and other strange characters.
For example, I used the root directory of the hard drive:
D:\USBDEV_SMIMPTOOL_O0603\
Launch the application sm32Xtest_V42-7.exe (executable file name may vary), then connect the faulty one USB -storage device. If the utility does not automatically pick it up, then use the ‘ button Scan USB (F5) ‘, to search for compatible devices.
As a result, your flash drive should be displayed in the main dialog window of the program. It will look similar to what is shown in the screenshot below.
GO TO SETTINGS
Next, we check the utility settings for the presence of correctly set parameters. To do this, click on the button Setting , enter the password for the config = 320 .
The utility will ask you to specify the required settings file, by default this is default.ini .
MAIN FLOW SETTING
The most optimal settings are shown in the screenshot below.
PRETEST = Erase All Block – the most universal value, but sometimes it may still be necessary to set ‘ Erase Good Block Only ‘. Namely in those cases when the memory did not fall to the grandmother, plus flash memory is needed DYNA -tool. Those. for example, with the parameter ‘ Erase Good Block Only ‘ you can flash a working flash drive that only applications can takeDyna Mass Storage Production Tool. This is explained by the fact that the utility SMIMPTool , when filtering only among the good blocks, you do not have to deal with a pile of slag. But I want to note that this method does not work with a controller SM3257ENBA , although with previous models like SM3257ENAA and SM3257ENLT , there are no problems.
[X] WRITE CID
DBF METHOD = TSOP Standard Type
[X] DOWNLOAD ISP
[X] FORMAT
[X] FAT32 – file system to suit your taste, but the default is always FAT32.
DISK TYPE = USB-ZIP – in this case ZIP means that the device will be detected as removable drive , not as fixed.
USB Power – depending on the novelty of the flash drive and its volume. If the flash drive is cheap and at the same time new and voluminous, then the recommended value is 500mA . For old or small flash drives, recommended values 100-200mA.
CAPACITY SETTING
On this tab, we need to set the allowed number of bad blocks ( Bad Block ), with which the firmware process can be successfully completed. Default, recommended value for SLC -memory this value is 20, and for MLC = 44. In the vast majority of cases, the value 44 is sufficient to successfully complete operations. In some cases(for especially leaky low-quality memory), you should specify a more significant value, like 50-100. Using larger values does not make any sense in 99% of cases, even if the utility writes that the permissible number of problems has been exceeded.
You can also use other modes for regulating the volume of a flash drive, which I personally almost never use:
–
BIN Level (SM3255 & SM3257 Only)– by specifying multiple levels.
–
Fix – by setting the minimum and maximum volume.
FINAL STAGE
That’s basically all the setup that needs to be done to successfully flash the device’s firmware. There are, of course, non-standard situations in which you have to do a little magic, but this is extremely rare.
All we have to do is save the settings using the button OK and start the firmware process by clicking on ‘ Start (Space Key) ‘. On average, the utility processes a flash drive in 2-3 minutes, although it may take a little longer.
If you use the attribute ERASEALLBLOCK , before starting the firmware process, the utility will warn us that it will clear the entire table of bad blocks: ‘Warning: The pretest will erase bad block. Do you want Continuous??‘.
If the Pretest procedure or any other, will buzz for more than 5-10 minutes, then there is no point in waiting any longer. Because it can last 5 hours and still at the end you will catch some unpleasant error.
NOTES – ERRORS
I’ll tell you a little about the problems encountered when restoring flash drives Silicon Motion.
THE UTILITY DOESN'T SEEN THE FLASH DRIVE
Flash drives on controllers SMI , freeze like everyone else, but still much less often than Phison . Therefore, I would not immediately try to transfer a flash drive to testmod on SMI , but would try another method first. Quite often, when there is abuse SMI -shkami, the registry is crap and you have to clean it. Therefore, do not forget to periodically clean the registry using a utility such as USB Oblivion.
Bad Block over setting (11)
The number of bad blocks found exceeds the specified acceptable value. You need to increase it in the settings, at the address -SETTING – Capacity Setting – Bad Block. Increase the value to 100 points , if this does not help, then check the installed pretest method. In such cases, be sure to set Pretest = Erase All Block.
Bad Block over setting (11) (User-3724 (M) > FW-3584 (M))
Significantly different from the previous error in that there is a mention in parentheses of USER and FW . This means that the utility did not have enough strength to cope with bad memory and you need to turn to Sorting utilities (DYNA application) . Further poking around in SMIMPTool , in this case there is no point!
Initial Param Fail (0F) (ISP can`t be found!!)
The program cannot find the firmware for your flash drive in the directory with the utility. Most likely, the production flasher distribution you are using does not have a directory with firmware for your controller model. They should look like UFD_3257ENBA or UFD_3267AB.
Please leave comments on the article in the comments, but you should ask me for advice on repairing your flash drives exclusively on the USBDev project forum –CLICK TO ASK A QUESTION ON THE FORUM .
Many factors lead to “diseases” of flash drives (when they refuse to work). In this publication, we will not be interested in them (the reasons), but in ways to return gadgets to full functioning - how to flash or reflash a flash drive.
It is not difficult to flash or reflash a flash drive.
The main purpose of using a flash drive is to record data. The data (together with flash) has a wide variety of purposes - from simple storage to loading the OS (even checking fingerprints).
Architecture and recording system
It is also important for the topic of our article to understand its components:
- The physical connection to the PC is made using a USB interface (sometimes microUSB);
- Controller;
- Memory chip;
- Signal oscillator for USB bus.
The FAT system (16, 32 or ex) is used for recording (depending on the size). For capacities over 64 GB - exFAT or NTFS. If using the gadget becomes problematic (read-write errors), it needs to be formatted or flashed.
Windows tools

Flashing a flash drive
If formatting the drive is not available (the OS program reports errors and special utilities do not produce results), then to bring it back to life you will need to flash the flash drive firmware, or rather, flash the flash drive controller firmware.
The correct name for what is usually called firmware is microprogram consisting of controller microcode and service data on microcircuits. The microcode is embedded in the device during manufacturing at the factory. But the service manual is often rewritten during operation.
Software repair (repeating factory actions) includes cleaning, testing memory, creating new translation tables and writing them to service fields - this is what is called “low-level formatting”.
Utilities for such work have a strict specialization based on controller models. Therefore, the repairman needs to find the one that corresponds to a specific instance (after all, microcircuit options can change from batch to batch!) - patiently going through more than a dozen.
Determining the brand (type)
Before flashing a flash drive, you need to determine the VID and PID values for it. From them we will recognize the model, and from it we will find technological software for repairs. To determine the model, the easiest way would be to look at the markings after opening the case. It would be more gentle to use software methods.
To find the VID (manufacturer identification) and PID (product identification) codes that recognize any USB flash drive, special software is used. For one of the devices, we can use (for example) the Flash Drive Information Extractor program (there are many others).
After installing the application and running the GetFlashInfo.exe file, click “Get data”. Let's get a sample report:

Based on the obtained values for VID and PID, entered into the database window, the controller and program (UTILS) for flashing the flash drive are determined:

There will be other devices in the list with the same controller. The more similar one is selected from them (intuitively). Now we find the utility - enter the found name in the search. If what you are looking for is not found on this site, you can Google it or turn to other sources. Even if the name is slightly different, it’s okay - it should work out.
Choosing an OS for techno-utilities
Technological utilities work better under Windows XP - production workers are more conservative and do not chase fashion. In addition, due to the fact that driver installation and other “dangerous” actions will be required, you must have administrator rights.
Reflash with the found program
We disconnect the drive, launch the executing exe file of the downloaded and unpacked utility (in this case MPTool.exe).
IMPORTANT. It is worth looking in the archive for the “read me” text file (readme.txt) - it may contain useful information. It may contain instructions or a hyperlink to a source with them. Translate the English text using Google Translator.
After launching the application, connect the USB flash drive to the PC - information about it appears in the program window. By pressing the “Start” key, flashing begins. The process is reflected by a yellow stripe.

Upon completion, an encouraging text will be reflected on the green background of one of the cells - OK.

The OS immediately prompts you to format the disk. If you have the necessary driver installed, then everything will work out. If not, then you need to disconnect/attach the gadget. Then the driver will be installed automatically and the flash drive will appear in Explorer - you can format it.
With another utility, the actions may be slightly different, but not so critical that you can’t handle it.
Manufacturers began to make publicly available software for flash drive repair. To download what you need in a particular case, the model (sometimes additionally the serial number) is indicated in the technical support section. In some cases, the serial number is requested by the software itself (checked via the Internet). It would not be superfluous to check the authenticity with the SerialCheck program, since counterfeits surround us everywhere.
Almost any model can be brought to life using proprietary programs. Plus the opportunity to find a similar case on the forums. The firmware of the Chinese flash drive controller is no different, except for their smaller capacity compared to the declared one. A flash drive with an unidentified controller brand may be unrepairable.
Complex cases include SanDisk flash drives. This is due to corporate policy. The company itself carries out the full production cycle - from the development of non-standard solutions to sales. There is no repair software for them. If you can’t find the utility, don’t worry and use a bucket.
Flash drive prevention
As we already understood, it is better not to let the flash drive need repair. Here are some recommendations to minimize unwanted effects:
- Protection from temperature fluctuations, from the influence of water, aggressive environments, mechanical influences, X-rays, electromagnetic fields. Accurate insertion/removal;
- When a flash drive is filled to capacity, its file system may be damaged. A dangerous symptom when recording is slowdown and freezing;
- Check the flash drive using OS tools, defragment it;
- Do not use a flash drive as the only copy of data (imagine that you only have one key to your apartment);
- Follow the procedure for safely removing the flash drive;
- To avoid static discharges, do not touch the contacts of the flash drive with your fingers or metal objects, and avoid contact with other synthetics;
- If a flash drive behaves strangely, do not rush to treat it with low-level programs. First, copy important files to another medium, and then start repairing.
Now you know how to flash a USB flash drive and you can figure out this issue yourself. May your flash drives live long.
Leave your comments.
Hi all! It’s not for nothing that I decided to write an article on how to flash a flash drive – I have experience. Yesterday I restored my flash drive Kingston DT Elite 3.0 16GB. Everything worked out, and I thought, why not write similar instructions, and tell me what to do and how to do it, in order to give the flash drive a new life :).
Nowadays, probably every house has a flash drive and very rarely just one. It’s convenient to transfer information onto them, they’re beautiful, and besides, they’re not expensive these days. But very often USB drives fail. If we talk about why this happens, then we ourselves are in first place. Do you always do a safe removal of your flash drive? So I rarely do. There may, of course, be other reasons why flash drives simply “die”.
One point needs to be clarified here. It happens that the flash drive really “dies”. In this case, it is impossible to restore it. At least at home. But if the USB drive shows at least some signs of life when connected to the computer, then you can try to restore its operation using the controller firmware.
What signs of life might there be for a USB drive?
- When you connect the flash drive to the computer, the computer signals that the device is connected - that’s good.
- When connecting Windows, it asks you to format the removable drive (but during the formatting process there are problems and errors such as “Windows cannot complete formatting”).
- The flash drive is detected and visible in Explorer, but when you try to open it, the message “Insert disk...” appears.
- Errors occur when copying information.
- Very slow speed of writing/reading information.
If there is valuable information on the flash drive, then you can try to restore it before and after the firmware. This can be done using different programs. I advice Recuva, here is the article but there are many other good programs.
If the information is very valuable, then it is better not to do anything yourself so as not to make it worse. Contact special service centers that specialize in data recovery.
Let's now look at the entire process of flashing the controller using a real example, using my Kingston DataTraveler Elite 3.0 16GB flash drive as an example. My flash drive broke down. It’s interesting. I needed to upload files to it and delete those that had already been recorded. I connected it to the computer and started deleting the folder. But the folder was deleted very slowly. I unplugged and plugged this flash drive back in, a message appeared that the disk needs to be formatted “Before using the disk...”.
Since there were no Important files on the flash drive, I started formatting without hesitation.
But the process itself lasted a very long time and never ended, I forcibly stopped it. The message “Windows could not complete formatting” may also appear.
But still, I formatted it, the tenth time, and only in FAT 32. After which the USB drive was detected normally and I was even happy. But it was not there. I started copying files onto it, and the recording speed was approximately 100 kb/s. I decided to flash it, which I did.
Determining the VID and PID of the USB controller
First we need determine VID and PID. This is data about the model and manufacturer of the controller, which is located in our drive. Using this data, we will look for a utility for the firmware. There are many different programs that can be used to determine VID and PID. I recommend the utility Flash Drive Information Extractor You can download it from the link.
Connect the USB flash drive to your computer and run the Flash Drive Information Extractor program (extract the program folder from the archive and run the GetFlashInfo.exe file).
Click the button at the top of the program “Get data about the flash drive”.
The program will give us the result. We look at the information that is located opposite VID and PID.
You can copy these numbers, or leave the utility window open, we will now need the received data.
We are looking for a utility for flashing a flash drive
Based on the VID and PID data, we need to find the utility with which we will flash the controller. There is a good website flashboot.ru, which contains a database of flash drives and utilities for their recovery.
In the search results we look for a flash drive similar to ours. The list may include devices from other manufacturers. They just have the same controller, it was identified by VID and PID. You may have noticed that I have a 16 GB flash drive, but in the list I highlighted 32 GB. I think there's nothing wrong with that (just where the name of the utility is not indicated on 16 GB). You try to choose a more similar device from the list.
We are interested in the field UTILS(utility), copy its name in full.
Unfortunately, the utility that I need was not found on this site. Perhaps you will have better luck and you will see something in the search results. Download the utility to your computer.
But I didn’t stop there and started Googling. I just asked “SK6221 MPTool 2013-04-25” and found this utility on some other site. If you have the same flash drive, then this utility is . True, the name of the archive is different, but this did not stop me from successfully curing my flash drive.
USB drive recovery process
Disconnect the flash drive. Extract the folder with the utility from the archive and run .exe file. In my case it is the MPTool.exe file. Also look at the text file readme.txt. Perhaps there are instructions there, or a link to a site with instructions. If the instructions are in English, then translate it using the same translate.google.ru.
I'll tell you how I did it (you just may have a different utility and everything may be different there, but it shouldn’t be very different).
The utility is running. We connect the flash drive. I have information about the flash drive in two lines in the program. Press the button Start. In my case, the yellow strip signaled the firmware process. We wait.
When the process ended, I saw a green color, everything seemed to be fine.
A Windows message should immediately appear asking you to format the disk. But most likely nothing will work out the first time. Unplug the flash drive and plug it back in. The driver should be installed and the removable drive should appear in Explorer. You can format it.
I checked the recording speed, everything is as it should be for USB 3.0, everything is fine!
You need to be prepared for the fact that the actions may differ from those I described. And not everything can work out the first time. The main thing is not to give up and everything will work out!
Recently, one more thing has been added to my main non-work “therapeutic” activities (computer repair, reinstallation and configuration). Flash drive recovery. They carry it non-stop. handfuls. Either flash drives are starting to get worse, or people are no longer taking care of them, but the fact remains: not a week goes by without someone throwing me this kind of “hack.”
The usual phrase uttered by a client when handing me a dead flash drive usually sounds like this: “I gave it to our computer specialists - they said that they couldn’t fix it...”. I’m generally a trusting person, but when it comes to computers, I won’t calm down until I try it myself. So, from 100% of flash drives diagnosed as “Throw Away” from outside computer scientists, I recovered... 100%! It’s amazingly simple what motivates such “computer geeks”... Is it like “too lazy to bother”? Usually it takes me 10 - 20 minutes to recover... Or is it not knowing “how”? But no one canceled the Internet! It seems to me that having stupidly tried to format a flash drive and received the error “The disk cannot be formatted,” they boldly recommend throwing it away working flash drive in the trash...
Especially for such “computer geeks” (I will return a note to the client to the “computer geeks” with the address of this article along with the flash drive), and also for everyone wanting to know I’m conducting a brief educational program on restoring flash drives.
Theory
Let's start with the theoretical part. You can skip it if you wish. What does a flash drive consist of? Very simple. Typically, such a device contains 2 chips: the first is the flash memory itself, where the data is stored. The second is a microcontroller that handles read/write operations of the memory chip and ensures data transfer from the computer via USB to memory and back.
Failures in the operation of the drive occur both in the first microcircuit and in the second. The microcontroller has a cache and is controlled by its own firmware, which performs read/write operations to the cache and transfers from the cache to the memory chip. As a result of many factors (such as a flash drive pulled out of the computer ahead of time, power failures, poor contact in the connector, static electricity, etc.), phenomena such as damage to the contents of the controller cache or damage to its firmware occur.
In the first case, the data from the cache will either not be written to the memory chip or will be written corrupted. In the second case, everything is much worse, because A failure of the microcontroller control program can do anything to the memory. To the point of writing complete garbage into it. In addition, flash memory itself has a limited write resource, albeit a large one. Also, the controller can block some memory operations if it doesn’t like something.
It is because of such failures that the flash drive stops working normally. At the same time, often The hardware of the flash drive itself remains fully functional. You just need to either fix the brains of the microcontroller or improve the memory. Here is a list of the most common flash drive software failures:
- The drive is not detected by the system
- The drive is detected, but shows zero size or less than it was
- Windows requires you to format the flash drive, but it won't format
- When I try to write to a flash drive, Windows swears “remove write protection”
- Messages like “Insert disk into drive” or “Disk cannot be accessed”
Practice
Attention! Using the practice below in 99% of cases will lead to damage to the information stored on the drive! If you need the flash drive itself, proceed as written below. If you just need information from it, look for a specialized company that deals with data recovery from flash memory. Such companies have special equipment that can connect to a memory chip, bypassing the flash drive controller, and pull everything out from there as is for further recovery.
1. Recovery utilities from the flash drive manufacturer
If your flash drive fails eminent manufacturer such as Transcend, Kingston, Kingmax, A-Data, etc., then first of all go to the manufacturer's website looking for a recovery utility. It makes sense to look at the manufacturer’s website even if he is not named. Looks like you'll be lucky. The main thing is that he is famous, this manufacturer. (in one of my cases, the flash drive said Samsung, but I didn’t find any utilities on the GNUSMAS website). On the manufacturer's website we are looking for a utility like Recovery Tool or Format Tool, in general, a recovery utility. We download the utility, if found, launch it with the diseased flash drive inserted, follow the instructions of the program and in 50% of cases we are pleased with the flash drive that has come to life, as clean as from a store.
If you have a flash drive no name, i.e. it is unknown what the name of that Chinese child was who soldered her for a handful of rice in a basement on the outskirts of Beijing, then we move on to the next point.
If you are in the 50% for whom the manufacturer’s utility did not help, then we also move on to the next point.
Here are a few links to recovery utilities from different companies:
Kingmax: Recovery Programm - find your flash drive there in the photo and download the corresponding Recovery Programm for it
Transcend: JetFlash Online Recovery – download and repair your JetFlash. Everything except the JetFlash V15 model, which requires a separate utility and can be downloaded there.
A-Data: Support/Download Site
2. Dancing with a tambourine
If your Chinese no name is broken or there is no utility on the manufacturer’s website, or if it exists but didn’t help, then this is the place for you. This is where all your creative potential will be revealed :)
First of all, I will say that there are not so many companies producing memory and controllers for flash drives. The rest (even the most famous ones) either buy components from them and stamp their own, or stupidly buy ready-made, faceless drives and instruct Chinese kids to draw beautiful labels on them. Why am I saying this? And besides, every manufacturer of components for flash drives has its own proprietary recovery utility!
This is the utility we have to use, having first found out what kind of controller is in our flash drive. So:
1. Find out the manufacturer of the flash drive controller. To do this, we need to find out its VID (Vendor ID) and PID (Product ID). This can be done, for example, with the CheckUDisk program. Download it, run it, plug in the flash drive and see something like this:

I circled what we need in red, namely VID and PID. In my case (I restored a 1 Gb Kingston DataTraveler from the dead) VID = 13fe, and PID = 1d00.
2. After we have calculated the VID and PID, we go look for it in the database of recovery utilities on the website flashboot.ru. on this site at the top we enter our VID (or PID) into the field, click the “Find” button and a sign appears with a bunch of lines. We are looking there for something similar to our flash drive, namely: we are looking for VID, PID, volume and, preferably, manufacturer that matches ours (if it is known, of course). In relation to my experimental subject, the following happened:
 As can be seen from the screenshot, the database contains similar information: Kingston DataTraveler, 1 GB capacity. It is also clear that the controller of this flash drive is made by Phison, and that there is a utility called Phison Preformat v.1.30 (UP10, UP11). There is no link to the utility in this line, but there is one above, in other lines, and below. Download this program, run it and see:
 This is a low-level formatting program. It offers 4 options, but I chose “Low Level Formatting (Full)” - just in case. Click OK and...
 After a short wait and observing the “Formatting” inscription, we see a window happily informing us that low-level formatting has been successfully completed and that we need to press the shutter, i.e. remove the flash drive and insert it again. We do what we are told and... “A miracle has happened! A friend saved a friend’s life!” (c) M/f “Kid and Carlson”. In general, the flash drive is back in service. Alive again. Windows required formatting. I agreed (like I had a choice :)). That's all. The flash drive is like new. Filling it with information and then reading it showed that everything was OK with it!
It doesn’t really look like dancing with a tambourine, does it? And all because my case turned out to be simple. In my case, the Phison company, which made the controller for the flash drive that I was restoring, made a simple utility that my former colleague Uncle Kuzmich, who, being a car mechanic, became interested in computers at the age of 60, could also understand.
It can be much cooler. Let me clarify: among the utilities on this site there are professional things (this is understandable, these are programs for internal use, for specialists). These utilities can be terribly sophisticated, with a bunch of options that you need to delve into. There is no manual for these programs; the truth is learned empirically or found from the crumbs of information that can be found on the website flashboot.ru and on the Internet.
Here's an example: the other day I pulled a taxi on the road and foolishly took a passenger (I usually don't take one). He was very drunk and tried to run around the interior of my large VAZ-11113 OKA car... In short, this bad man drove his knee into my radio, in which a 4 GB Kingmax SuperStick flash drive was sticking out. She fell out and fell. After picking it up and inserting it back, the radio swears “unsupported device” and gets offended. At home, on the computer, it was also not found. Based on VID and PID, I found the SMI_SMI32X_I1030_v2.02.02 utility, the settings of which look like this:
 In general, I was unable to restore it. But I didn't expect it. Because my radio had previously burned 6 different flash drives that were pulled out of it during the game (Sony surprises me, to be honest, couldn’t they have come up with a protection?). But there are a lot of options in these settings. I showed them so that you are ready to face such an obstacle.
By the way, 2 weeks ago the same program, with default settings, restored someone else’s device (which looked like a bullet) with the Rover logo. And a month ago, a golden gift flash drive from Samsung was restored to her.
In general, be prepared for difficult decisions :) According to my personal statistics, I was not able to recover only those flash drives that were burned by my Sony car radio :)
And finally
And finally, I will say: don’t be afraid! Prepare yourself for the fact that the flash drive is dead anyway. If it turns out to be restored - great (but it turns out Very often), but it doesn’t work out - well, screw her, the little lady is dead... The main thing is not to be afraid to experiment.
If that doesn’t work, you can ask questions on the flashboot.ru website forum (just carefully read what’s already there, professionals don’t like babies), or here: if I know, I’ll answer.
For this, I say goodbye. Good luck treating patients!
In our world, almost everything breaks and Silicon Power flash drives are no exception. The damage is very easy to notice. In some cases, some files begin to disappear from your storage device. Sometimes the drive simply ceases to be detected by the computer or any other device (it happens that it is detected by the computer, but not detected by the phone, or vice versa). Also, the memory card can be detected, but not opened, and so on.
In any case, it is necessary to restore the flash drive so that it can be used again. Unfortunately, in most cases you will not be able to recover any information and it will be permanently deleted. But after this, the USB drive can again be fully used and information can be written to it without fear that it will be lost somewhere. It is worth noting that removable media from Silicon Power very rarely last long after restoration; they still have to be replaced.
You can restore Silicon Power removable media using the programs that the company itself released. Apart from this, there are other software that help in this matter. We will analyze proven methods that have been tested by users from all over the world.
Method 1: Silicon Power Recover Tool
The first and most famous utility from Silicon Power. It has only one purpose - to fix damaged flash drives. Silicon Power Recover Tool works with removable media with Innostor IS903, IS902 and IS902E, IS916EN, and IS9162 series controllers. Its use is extremely simple and looks like this:

Method 2: SP ToolBox
The second proprietary program, which includes as many as 7 instruments. We only need two of them. To use Silicon Power ToolBox to recover your media, do the following:


The program can now be closed.
Method 3: SP USB Flash Drive Recovery Software
The third program from the manufacturer, which recovers flash drives from Silicon Power with great success. In fact, it performs the same process that users usually do using the iFlash service. Read about what it is and how to use it in the lesson on restoring Kingston flash drives.
The point of using this service is to find the necessary program and use it to restore the flash drive. The search is carried out using parameters such as VID and PID. So, USB Flash Drive Recovery independently determines these parameters and finds the required program on Silicon Power servers. Its usage looks like this:

Using this tool also does not make it possible to save the data contained in the drive's memory.
Method 4: SMI MPTool
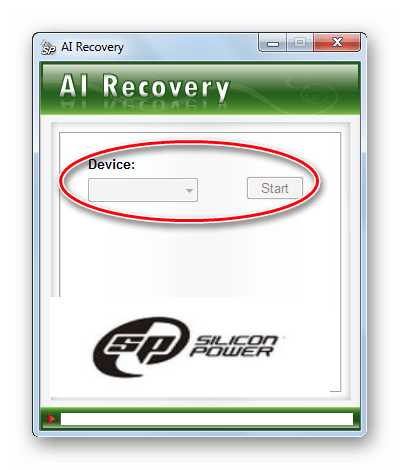
This program works with Silicon Motion controllers, which are installed in most Silicon Power flash drives. SMI MPTool differs in that it performs low-level recovery of damaged media. You can use it as follows:
- program and run it from the archive.
- Click on the button Scan USB" to start scanning your computer for a suitable flash drive. After this, your media should appear on one of the ports (column " Items"on the left). Click on it in this column to highlight it. Actually, if nothing happens, it means that the program is not suitable for your carrier.
- Next, click the “ Debug" If a window appears asking you to enter a password, enter the number 320.
- Now click the button Start" and wait for the restoration to complete.

In some cases, it helps if you do the above steps several times. In any case, it's worth a try. But, again, don’t expect data to be saved.
Method 5: Recuva File Recovery
Finally, we have reached a method that allows us to restore at least some of the damaged information. Only then will it be possible to restore the functionality of the device itself using one of the utilities described above. Recuva File Recovery is not SP's own development, but for some reason it is owned by this company. It is worth saying that this is not the same program that is familiar to all of us. All this only means that Recuva will be the most effective in working with flash drives from Silicon Power.
To take advantage of its capabilities, read the lesson on our website.
Only when you choose where you want to scan for deleted or damaged files, select the option " On my media card"(this is step 2). If the card is not detected or no files are found on it, start the whole process again. Only now select the option “ In a specific location" and specify your removable media according to its letter. By the way, you can find it out if you go to “ My computer"(or simply " Computer», « This computer" - it all depends on the version of Windows). 
Method 6: Flash Drive Recovery
This is also a universal program that is suitable for most modern models of removable storage media. Flash Drive Recovery is not developed by Silicon Power and is not listed among the recommended utilities on the manufacturer's website. But, judging by user reviews, it is extremely effective in working with flash drives from this manufacturer. Its usage looks like this:


In addition to Recuva File Recovery and Flash Drive Recovery, you can use TestDisk, R.saver and other utilities to recover data from damaged media. The most effective such programs are listed on our website.
After the recovery of lost data has been completed, use one of the above utilities to restore the functionality of the entire drive. You can also use the standard Windows tool to check disks and fix errors. How to do this is shown in the lesson on restoring Transcend flash drives (method 6).
Finally, you can format your removable media using other programs or the same standard Windows tool. As for the latter, you need to do the following:
- In the window " Computer» (« My computer», « This computer") right-click on your flash drive. In the drop-down menu, select “ Format…».
- When the formatting window opens, click on the " Begin" If it doesn’t help, start the process again, but uncheck the box next to “ Quick…».

Also try using other disk formatting programs. The best of them are listed on our website. And if this doesn’t help, we won’t recommend anything other than buying a new media.
