Delete the recovery partition. How to Recover a Deleted Partition Using AOMEI Partition Assistant
Hi all! I offer a short story in which I had to solve one small problem using the command line, I think it will be useful in your knowledge bank.
My friend bought a computer with a solid-state drive (capacity 120 GB) instead hard drive, there simply wasn’t enough money for a simple hard drive (we all know that prices for components have now risen). Our mutual friend decided to help him out and offered him a not-so-old hard drive for a while to store files. SATA drive II with a capacity of 400 GB. Together they connected the hard drive to the computer, entered Disk Management and saw that there were four partitions on the disk and only one of all four could be deleted normally. The fact is that factory Windows 8.1 with all service partitions was previously installed on this hard drive. If you right-click on the first, second and last section, only “Help” will be offered from all the options.

Without thinking twice, they decided that if they format the drive (D:) in the "Computer" window, all partitions will be deleted. Once in the Computer window, they right-clicked on the drive (D:) and simply formatted it.


Having entered disk management again, they saw that all partitions were intact and undamaged, then they simply deleted the disk (D:). Once again seeing that nothing happened with the other sections, their patience ran out and they called me.

Friends, hard disk partition manager programs immediately came to mind for many: and, of course, you can use them, but there is an easier way, the command line!
Launch the command line as administrator.

To manage disk space, enter the diskpart command.
We display a list of all disks with the list disk command and press Enter.
A list of all drives connected to the computer appears. Be careful, you can't make mistakes here. From the volume you can guess that Disk 0(111 GB) is solid state drive SSD, and Disk 1 (372 GB), this is our second hard drive on which we need to delete all partitions.
Select Disk 1 (372 GB) to delete all partitions, enter select command disk 1. (Caution! In your case, the number in the command may be different).
We enter the command clean and press Enter, it happens complete removal all partitions on the second hard drive.

Everything is ready, close the command line.
We enter disk management and see that all partitions on the hard drive have been deleted.
Before creating a single partition, the disk must be initialized. Right-click on Disk 1 and select Initialize disk.

If you don't know what it is, then select Master Boot Record MBR and click OK..

Now let's create a simple volume. Right-click on unallocated space and select Create Volume.
Question: Is it possible to delete the recovery partition?
I'm interested in this question:
Is it possible to remove the recovery partition and merge it with the main drive without any damage?
I recently bought a laptop SSD drive. It’s just that there’s not enough memory, it’s a pity to spend 20 gigs just to restore Windows. Thank you in advance
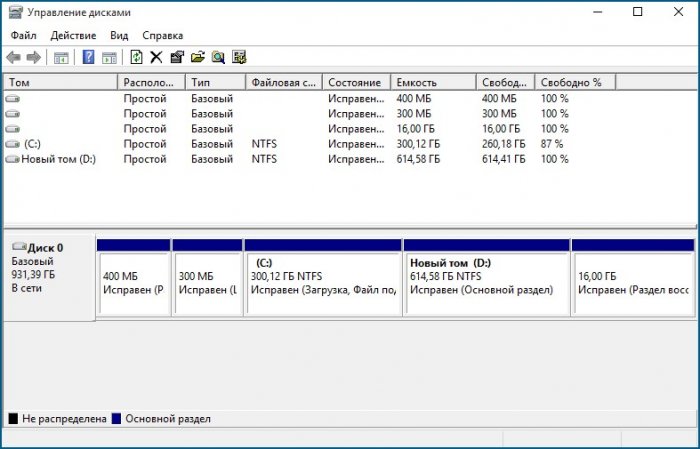
Here is the disk management screen
Answer: I would leave it in case you decide to sell your laptop. 20GB won't make any difference to the weather anyway. I only lost 450MB on my computer. And you get two partitions and both restore something there.. Maybe additionally what kind of archiving is included in the OS and it uses the second partition?
Question: Windows and system recovery from a flash drive cannot boot after deleting the recovery partition
On digma tablet eve 8.2 3g with windows 8.1 deleted the recovery partition and merged it with drive C, after which the tablet does not start, blue screen writes an error
Recovery. Your computer needs to be restored. The required device is not connected error code 0xc0000225 You will need recovery tools on bootable media, etc. Click Windows key to access UEFI firmware settings.
The point is that I copied the recovery partition to a flash drive in advance. But that's not the problem. I found that when loading the tablet you need to press the F7 key. I connected a flash drive and a keyboard through the hub, when I turn it on I press the f7 key, but there is no reaction, the f2 and del keys also do not bring any results, although they should allow me to enter the bios.
From the blue screen described above, I can use f8 to go to the menu in which there is a debugging mode, launch safe mode etc. When you click on any item, it redirects you to a blue screen. "The OS could not be loaded because the HAL layer is missing or contains errors" file \windows\system32\halmacpi.dll
If you press f10, something like a console appears with the name “change parameters windows loading" the line already contains the line /noexecute=optin /novga
When you press enter, it again says “The OS could not be loaded because the HAL layer is missing or contains errors” file \windows\system32\halmacpi.dll
Maybe I just don’t have time to press f7 when loading because I have to first turn on the button that connects the f1-f12 keys? what can be done? When loading the tablet with the volume and power keys held down, two lines flash after the splash screen, but it is not possible to read them, they disappear too quickly.
Answer: Unlike laptops, where the recovery partition with the factory image does not participate in booting and operating the system (it only takes part in rolling back to the factory state), on tablets the system is also loaded from it (wimboot technology).
The fact that you see error 225 means that your ESP partition (FAT32) is alive and the download starts properly from it, but there is nothing to download.
The way out, IMHO, is to return everything back to how it was.
Question: Recovery partitions
Good day! I decided to break the hard one into pieces. I went into disk management and saw that there were several system recovery partitions of 300, 352 and 450 MB. So this is the question - why are they needed (if there are links to the theory, I will be grateful) and most importantly, can I remove them and what is the benefit of this.
Answer: gecata, Yes, this is a laptop. But there is another related question - the laptop was originally purchased with Win 8. Gradually I updated it to 10 and now I want to reinstall it, having previously deleted all these recovery partitions, including this 20GB one. Will I still have my license? Or is she attached in some other way?
Question: How to delete the recovery partition
Good evening.
The problem is this:
bought an SSD drive
After much pain, I transferred the system from the HDD to it
transferred the recovery disk to the HDD.
Now the problem is that I want to expand the “C” drive using the unallocated space on the SSD, but it prevents me from making a 450MB partition. how to remove or move it
Question: When bootstrap The recovery partition of the laptop does not start from the button (in my case ALT+F10)
Laptop: Packard Bell
OS: Windows 8.1
GPT partitions.
Hello!
The catch is this: when the laptop boots up, the recovery partition does not start from the button (in my case ALT+F10).
History of events:
1) I bought a WD-drive for terrabyte and decided to make full transfer from the original screw (Seagate 320 GB) to the new one.
To do this, I used the Ghost program (12.0) and made a disk-to-disk copy. All partitions were successfully copied (including service ones), but Ghost made a proportional increase in each partition (the copied partitions became approximately three times larger). Naturally, I don’t need service partitions that are three times inflated, especially the last hidden recovery partition with Windows, which became 45 GB. I fixed this whole thing with the help of Easeus-PM, because Paragon and other partition masters refused to change the service partitions. But Windows stopped loading from the new screw.
2) I tried to copy disk to disk using Paragon 15.0, checked some boxes and launched it. And something strange happened - the original screw stopped loading!
Maybe it’s all about the boxes that my “direct” hands checked.... I don’t know. I restored the Windows boot using the strange program "O Dism ++" in which the line "Restore Boots" appeared in the menu. The recovery was automatic. Windows booted again, but when loading it now offers two Windows 8.1: the first one indicating volume 4 (and the system is located on volume 4) and simply Windows 8.1. The first option works.
But here’s a new problem: during initial boot, when pressing ALT+F10, when loading the recovery partition, it gives the error 0xc000000e (the same one it gave when Windows didn’t boot)
3) After poking around on Google and reviewing a bunch of videos, I copied all the partitions from the original hard drive to the new one separately, including the recovery partition with the factory Windows. From the bootable flash program WinNtsetup installed Windows from a hidden partition (ALREADY ON THE NEW SCREW) (used the image), indicating where the bootloader will be. Everything installed perfectly and licensed Windows starts.
! BUT. ALT+F10 now doesn't work at all. Those. Doesn't even respond to the button.
CONFIDENTS, ATTENTION, QUESTION: How can I make the button work?)?
Answer: Everything is fine with the hidden MSR partition, it is alive and well, it has the correct ID and should not appear in disk management. There is no urgent need for it on GPT, but without it conversion to a dynamic disk will not work.
aleshka2007, show a screenshot of command execution
Windows Batch file
reagentc /info bcdedit
Question: The laptop does not find the recovery partition
Launched refresh. There was preparation for setup. It was there for a long time and so I decided that the computer had frozen. Pressed the off button. Turned it on. Logged into Windows. In the middle there is a strip with the message “no changes have been made.” Neither refresh nor reset work now, although they worked. When I try to reset/refresh it says no necessary files. In Disk Management, the recovery partition is empty. but in AOMEI Partition Assistant Standard Edition 5.2 there is information there (about 8 GB). The recovery disk did not come with the Lenovo B 590 laptop, I didn’t think of creating it myself. I don't know what to do now.
Added after 44 minutes
P.S. After I turned it on, before logging into Windows there was something like “disc c repair”
Added after 7 hours 29 minutes
Lenovo technical support says that you need to take it to service center, and then everything will be restored for a fee...
on the Microsoft website when trying to ask a question - error 404,
"If the product does not perform as warranted during the warranty period, you may contact Lenovo representatives or to an authorized service center that provides warranty service"
Are representatives salespeople? Can they do anything even though the software is not under warranty?
Added after 1 minute
(a service center is not an option, because it’s in Vladivostok, and I’m already in Ussuriysk.)
Answer:
Message from Anton Heim
the manuals helped.
The following sequence of actions helped:
1) charms > options > change computer settings > general > special boot options > restart now
2) a blue screen appeared. And there I already pressed something like recovery. Did a reset.
3) now refresh/reset and the restore button work!
(I don’t know how important it is that Windows was in safe mode (I don’t even remember how I started it))
Question: Error 0x0000225 at startup: I decided to delete the recovery partition and Windows no longer boots
+1
There is not enough space on the tablet, I decided to remove the recovery partition and Windows will no longer load, remove HDD It won’t work, it’s soldered in, the same error 225.
How can I restore Windows?
Answer: Means new installation, oh well, the Windows key is not accustomed to bit depth, can I install x64?
what's the difficulty? I don't understand well, can you explain? in simple words?
Question: PackardBell ENTA-GM Recovery Section
Please help me find an image of the PackardBell ENTA-GM recovery partition, I really need to look everywhere
If anyone has it, please send me the link.
Answer:
Quote FlomasterAFK:
DDR2, frequency 800 MHz = 6400 MB/s
HDD at 5400 rpm = 100 MB/s
I ask again: what is the name of the video card in Device Manager?
Question: Recovery partition error An OS wasn't found.
Hello.
Switched to Win10 from 8.1
In order for Windows to become licensed, you must first update it and don’t care that many people want to install it completely. In general, I updated, received a license, and started a clean installation. I felt that something was wrong and saved the recovery partition on another computer. I completely deleted all partitions and repartitioned everything normally. And of course, after a clean installation, Windows refused to activate and blocked the key. The small-soft forum did not respond, and I decided to restore to 8.1 and update again. But new problem:
I definitely forgot to do something.
There was a recovery partition on the Lenovo laptop, the data from which I dumped to another location. Now the partition was needed and I created a new partition, dropped all the files there, assigned id = 27 and made the partition active.
As a result, when loading: An OS wasn't found.
I'm probably not even asking the question in the right place
Thank you.
If you can’t handle the second option yourself, then write, we’ll deploy the factory image on either MBR or GPT. We will need screenshots from you, a lot.
Question: I deleted the section. How to restore files to the same partition?
Using the recovery program ZAR scanned, the files are visible, but on this moment I have nowhere to copy everything. There is another partition and a flash drive, but everything won’t fit there. There was a lot on the remote section free space. But the Zar program does not allow you to somehow shrink or move it. I'm afraid to divide the lost section into two parts. Because I'm afraid that the partition has been fragmented, and one file may be scattered in pieces throughout the partition. Question, is there such a program that could manipulate files on an invisible partition, just like on a regular one?
Answer: A more precise background: There were three partitions c, d and e. In the standard "disk management" I deleted e instead of d (it was quietly highlighted). As a result, my disk e began to show one and a half terabytes instead of 200 GB. Akronis didn’t see anything after that. Therefore, I removed drive D to clarify the situation. The sizes of all disks took the real size.
After Zar I tried partition table doctor as it was stated as best program to restore partitions. Indeed, immediately upon launch a message appeared about some sectors not matching. I made a backup of the table using the same program. I was glad that there were none virtual machines No need. But it's early. The fixboot button resulted in the message: “I can’t restore.” The rebuild button led to the fact that my disks c and d were rebuilt, but e remained untouched.
I tried the testdisk, but the messages: “mismathes”, “seems too small”, “cant recover partition” made me realize that in the two days that I was fiddling with the screw, I could earn money on the disk and restore the information, but as a result, neither , nor anything else.
Almost all computers that come with an operating system Windows 8 have a dedicated system recovery partition consisting of important files needed to reset or Windows recovery 8 to factory condition.This recovery partition typically consumes about 15 GB of disk space. Since most computers that are available today can offer at least 500 GB of disk space, users may not feel the need to free up more disk space. But users who purchased a computer with a 64 or 128 GB SSD (Solid State Drive) may want to free up some space by removing this system recovery partition.
Moment partition recovery consists of recovering images and other important files, before deleting the recovery partition,you must first go to recovery partition USB flash drive .After moving recovery partition delete recovery partition. You can then use the new one USB disk recovery to restore Windows 8 to factory settings.
Follow the steps below step by step instructions for moving recovery partition to a USB stick and then delete recovery partition in Windows 8.
NOTE: This procedure only works on Windows 8 and doesn't work on Windows 7.
Step 1: Connect a USB drive with at least 16 GB of disk space (you may need more USB space if recovery partition larger than 16 GB) and backup all data in a safe place. This USB storage device will be erased.
Step 2: Switch to the Start screen, type Create a recovery disk change search filter Options(see Figure), and then press Enter to launch the Disk Recovery wizard. If you see UAC, just click the Yes button.
Step 3: After starting the Disk Recovery wizard, check the option Copy PC recovery partition to recovery disk, and then click Next.
Step 4: Select the USB drive and click Next.
Step 5: You will see the message “Everything on the disk will be deleted. If you have personal files on the drive, make sure you back up the files." Since you have already transferred all data from USB, click on the button Create to start the transfer recovery partition to the selected USB storage device. Depending on size Windows recovery partition This process may take several minutes (or hours to complete).
Step 6: When Windows 8 complete copying recovery partition to the USB drive, you will see the message “You can also delete recovery partition on your PC to free up some disk space”, and a parameter named Delete recovery partition.
Step 7: Click the button Delete recovery partition to see an error message saying “You may need to free up some disk space, deleting the system recovery partition, but you won't be able to update or restore your computer again without a recovery disc.” Since you've already transferred recovery partition to a USB stick, you can safely remove disk recovery partition.
Click the button Delete And recovery partition will be deleted. After the job is done, Windows 8 will show you how much disk space you have gained by deleting the recovery partition. Good luck!
Hello admin! For the second time in my life I’m buying a laptop and I can’t figure out the hidden partitions on its hard drive! I bought my first laptop a long time ago,from before installed Windows 7 in 2009 and there were two hidden partitions, yesterday I bought a laptop with Windows 8.1, and there are already three hidden partitions on it, and after upgrading to Windows 10 there were already four, and one IT specialist friend said that there is also a fifth partition, but you can see it only using the command line or special program! Explain to a layman why they are needed, because in total they take up 20 GB of disk space on my laptop.
Hello friends! On all modern laptops with Windows 7, 8.1, 10 operating systems installed, you will see hidden partitions on the hard drive. Why are they needed, how to view their contents and what will happen if you delete them, I will talk about all this in today’s article.
Hidden partitions on laptops appeared along with the operating system Windows system 7. On Windows XP there were no hidden partitions; the laptops came with an installation disk with the operating system; if the XP device behaved unstable, it could easily be reinstalled using the distribution kit.
With the advent (in 2007) operating system Windows Vista the rules have changed, when buying a laptop there is no installation disk was no longer included, but on a laptop it was possible to create DVDs recovery and, if necessary, restore Vista using them. Many laptop models already came with ready-made recovery discs.
Windows 7
In 2009, on laptops with Windows 7 preinstalled, I first saw two hidden partitions, the first 9 GB Good (recovery partition) and the second System Reserved 100 MB.
Note: on laptops from many manufacturers, on the contrary, the first section was System Reserved 100 MB, and the most recent (third or fourth) recovery partition is 9-15 GB.
Naturally, I immediately wanted to know what was inside these sections! E if you assign a letter first hidden section -System Reserved System reserved 100 MB, then it turns out that the section containsin itself boot storage configuration files (BCD) Boot folder And system boot manager (bootmgr file)- these files are responsible for loading the operating system.

The second partition (9 GB) contained (compressed file Windows image 7 divided into several parts and the Recovery rollback program, with which you could return the laptop to its factory state even if it did not boot.

Windows 8, 8.1, 10
On October 26, 2012, laptops appeared with Windows 8 installed, and a year later Windows 8.1 and they already had a UEFI BIOS with the protocol secure boot Secure Boot, and contained four hidden partitions, including the third hidden service partition MSR, which is not displayed in Disk Management(size 128 MB), you can see it using the command line

or any hard disk partition manager, for example .

When updating Windows 8.1 before Windows 10 has another (fifth) hidden partition


You can see all existing partitions of your laptop’s hard drive not only using AOMEI Partition, but also using the command line. Let's launch command line As an administrator, enter the commands:
diskpart
lis dis
seldis 0
lis par

So, what do the hidden sections of a new laptop that has been updated from Windows 8.1 to Windows 10 contain?
How to enter a hidden section and see what’s there?
Friends, if you enter Disk Management on your laptop and right-click on the hidden partition, only “Help” will open, that is, assign hidden section letter and you won’t be able to enter it.

There is another way to do this. Eg, let's take a look at the hidden partition (463 MB) that was created when updating from Windows 8.1 to Windows 10.
Launch the command line as administrator, enter the commands:
diskpart
lis vol
sel vol 1 (1 hidden section number created when updating from Win 8.1 to Win 10 ), you may have a different number.
assign
The drive name or mount point assignment was successful.
exit
exit

Windows 10 assigned our hidden partition a letter (E:) and it is visible in Explorer, go into it.

The hidden partition contains the Recovery folder.

In the Recovery folder there is a folder WindowsRE and is already in ita custom image with Windows 10 Recovery Environment tools (Winre.wim).


So we have guessed the secret of this hidden section created when Windows update 8.1 to Windows 10, it contains all the system disaster recovery tools. If this hidden section is deleted, then we will not be able to restore Windows 10 in the recovery environment.
Let me remind you how the recovery environment works.
We reboot Windows 10 while pressing the key Shift.
And we enter the Windows 10 recovery environment,
Diagnostics -> Extra options. We see all the available operating system recovery environment tools.

Now format or completely delete the hidden partition.
We enter the recovery environment and see that not a single tool is available to us.

Also, we will not be able to create a USB flash drive or Windows 10 recovery disk, an error will appear“We are unable to create a recovery disk on this computer. Some required files are missing. To troubleshoot problems when your computer won't boot, use Windows installation media." That is, when restoring Windows 10, we will have to boot from the operating system distribution, since it also contains recovery environment files.

At the end of the article, let's see what is contained on other hidden partitions of a Windows 10 laptop:

1. The first hidden partition is 400 MB in size contains Windows 8.1 recovery environment files, in Windows folder RE is located a custom image with Windows 8.1 Recovery Environment tools (Winre.wim). N oh since we upgraded to Windows 10 and are not going to roll back to Windows 8.1 , then we no longer need this section and we can delete it.

2. Second hidden partition of 300 MB in size OK (Encrypted (EFI) system partition) FAT32 contains boot storage configuration files (BCD) - EFI\Microsoft\Boot folder. This section must not be touched under any circumstances, otherwise you will not boot into Win 10.

3. The third hidden and not displayed in Disk Management service partition MSR, required for GPT markup on UEFI systems, file system NTFS size 128 MB.

4. We have already disassembled the fourth hidden partition of 400 MB; on it, like on the first hidden partition 400 MB, there are recovery environment files, but not Windows 8.1, but Windows 10.

5. On the fifth partition, in the Recovery folder, there is a factory image of install.wim with Windows 8.1. Using this section, you can return your factory settings at any time, that is, Windows 8.1.


Total: Of all the hidden partitions of a laptop that has been updated from Windows 8.1 to Win 10, only the first 400 MB partition can be deleted without consequences (but what will that give you). The rest, whatever one may say, are still needed.
Deleting a non-system disk partition without user intervention is a fairly rare occurrence. Of course, the reason for deleting a disk partition (or even several) may be malware, bad sectors and other hard drive failures, but more often the disappearance of entire disk partitions with data is the result of user experiments with software, which such users are not yet ready to work with.
Inside Windows, deleting a system disk partition is quite difficult, because the operating system is protected from self-destruction. As a rule, in order to cause consequences such as deleting a Windows partition or a boot sector (a small partition reserved by the system), you need to experiment with software that works from bootable media. Or inside another operating system installed, respectively, on another disk partition. Therefore, non-system disk partitions on which users’ personal data are stored are most often subject to erroneous deletion. In most cases, this data is of much greater value than the operating system, the functionality of which can be restored in extreme cases by reinstalling.
How to recover deleted disk partitions and save the data stored on them? Below we will look at this process step by step using free program for Windows – AOMEI Partition Assistant.
AOMEI Partition Assistant has a paid edition that provides additional features on working with computer disk space. But to restore disk partitions, the functionality of the free Standard Edition of the program will be sufficient. You can download it from the official website of the developer.
1. In what cases will restoring disk partitions help, and in what cases will it not?
But before proceeding directly to the instructions, there are a few points to clarify. Below we will consider a way to restore deleted disk partitions - essentially, return them to the state they were in before deletion. The recovered partitions will have the same size, the same location in the disk partition table, and they will contain the same data as before. To restore disk partitions, a special type of software will be used - a disk space allocation manager, the AOMEI Partition Assistant program mentioned above. Partition recovery will not help solve the issue of saving data after erroneous formatting of disk partitions or removable drives. For these purposes, it is necessary to resort to the help of a separate type of program designed for data recovery: Recuva, R-studio and others.
Restoring disk partitions will not help if, after deletion, the disk space was redistributed and new partitions have already been created in place of the deleted partitions. In this case, we can only talk about data recovery using the above programs.
And one more nuance: if in Explorer or file manager The disk partition is not visible as drive D, E, F, etc., perhaps it was not deleted, and its invisibility is due to the absence of a letter. The letters of disk partitions and computer devices may disappear after a system failure, experiments with Windows settings, unsuccessful rollback to backup copy, as well as as a result of other interventions in the system. The easiest way to clarify this is in the standard disk management utility. Universal method its launch for everyone Windows versions– use the “Run” system service (keys + R). Command to enter:

If a letter is missing, the non-system partition will be marked as good. And you can assign a letter to it using the corresponding command in the context menu.

The picture with a deleted partition (or several partitions) will be different: a certain part of the disk space will be marked “Not allocated”.

This is the diagnosis for applying the instructions for restoring disk partitions, which is given below.
2. Recovering non-system disk partitions
In the AOMEI Partition Assistant program window after launching it we will see the same picture as in the management utility Windows disks– the deleted section in the table above and in the visual representation below will be marked as unallocated space.

We launch the Partition Recovery Wizard - either in the “Wizard” menu at the top or on the side panel of the program interface.

At the first stage of the wizard, select the desired hard drive, if there are several of them connected to the computer, and on the disk itself, click on the same unallocated (unallocated) space that remains after deleting the disk partition. Click “Next”.

Next we will see a window for selecting the type of search for deleted partitions. The selection scheme is simple: first we use quick search, and if during this process the deleted partitions are not found, all that remains is to repeat the procedure by selecting a full search. Click “Next”.

The section is found, mark it with a checkmark and click the “Go” button.

End of operation.

The deleted disk partition has been restored. The folders and files stored on it were not damaged.

If several disk partitions were deleted, after searching, you need to check the boxes for all detected partitions and restore them.

3. Recovering Windows system partitions
Recovering erroneously deleted system files Windows partitions will return operating system ability to boot. But the operation of restoring drive C and the boot sector, compared to restoring non-system disk partitions, is more complicated in that you will have to work with bootable media. And to create one you need a working computer device. On such a computer you need to install AOMEI Partition Assistant and create an emergency Live disk using the program. In the side panel of the program window, launch the bootable CD creation wizard. At the first stage of the wizard, select the “Create a simple Windows PE” option (since the second option requires fiddling with additional AOMEI software). Click “Next”.


We boot the computer from a disk or flash drive. In the AOMEI Partition Assistant window, in our case, we see that both system partitions - drive C and the 500-MB boot sector - have merged into a single unallocated space. To restore Windows, we follow the same path as for saving non-system disk partitions, described in the previous paragraph of the article. Launch the Partition Recovery Wizard.

Click on an unoccupied space.

Select quick search. If it doesn’t help, repeat the operation by selecting a full search.

We mark the sections found by the program. Click “Go”.


System partitions have been restored.
Have a great day!
