How to number not all pages. How to number pages in Word? Complete instructions! Why is the numbering order in the document broken?
The more information collected in one place, the more difficult it is to understand it. Page numbers are our compass in the world of learning; without them it is impossible to imagine a single assignment in literature or a foreign language.
I think everyone remembers the school homework: “Read up to 153 pages.” Or this teacher’s message: “Open your textbook to page 12.”
Let's figure out how to number the pages of a document in the Word editor.
Page numbering in Word
The creation of large documents, books, diplomas, term papers, instructions is inextricably linked with page numbering. It's worth noting that numbering standards can vary dramatically.
If in fiction, a designer can afford ornate numbers and place them anywhere on the page, then in term papers or graduation projects, one must adhere to the rules of design, otherwise, even a brilliantly written work will not even be accepted for consideration.
In Word, you can insert page numbers in several places:
- at the top of the page;
- at the bottom of the page;
- in the margins of the page.
How to enable numbering at the top of the page
- From the “Insert” menu, select “Header and Footer”.
- From the drop-down menu, you are interested in the “Page Number” command.
- Then in the “Page Numbers” menu window, use the “Top of Page” command.
- In the menu that opens, you can select a page numbering option from the template library and click on it with the left mouse button.
How to enable numbering at the bottom of the page
Similar to the case described in point 1, automatic numbering occurs at the bottom of the page.
- Open the “Insert” function.
- In the menu ribbon, select the “Header and Footer” command.
- In the “Page Number” group, in the menu, use the “Bottom of Page” command.
- And at the end of the algorithm, click on the number placement template.
How to enable numbering in page margins
Placing the page number in the margins is no different from any other placement.
- In the main menu, select the “Insert” item.
- In the command ribbon that opens, click on the “Page number” line.
- In the drop-down list, use item number three, “In the margins of the page.”
- In conclusion, you should choose a template that meets your requirements.
Change page numbering in Word
By default, Word uses page numbering from first to last. In most cases, this method is acceptable, yet it is not for nothing that it is made by default, but in cases where we are dealing with coursework, or setting page numbers in a book, such numbering becomes useless.
In this section, we will look in detail at how to change the page numbering for different cases.
How to number pages without a title page
Coursework, essay, diploma and similar documents that have a title page do not allow numbering on the first page.
The title page is not numbered, and although it is part of the book, it is not numbered.
Let's consider an example in which you need to remove the numbering of the title page in a Word document:

As a result of these actions, the numbering of the document will start from zero, and then on the first page “0” will be hidden by a special footer. The second page will accordingly receive the number “1” and will continue further, automatically.
How to number pages starting from any page (from 3 and up)
In order to be able to number pages starting from the second, third or any other, you should perform the following steps.
- Place the cursor at the end of the first page.
- Click on the “Page Layout” menu item.
- Select the “Breaks” function and use the “next page” command. Go to the end of the second page and repeat your steps.
As a result, three pages with the number “1” will appear in the document.
- Next, in the “Insert” menu, access the “Page Number” line.
- In the window that opens, click on the line “Page Number Format”.
- The next step is to check the box in the “Start with” line, and set the cell to “0”.
- Next, on the first and second pages, set “Special header and footer on the first page.”
- As a result of our actions, we removed the numbers from the first and second pages, and our third page begins with the number “1”.
How to put even and odd page numbers
Let's give an example of the implementation of book page numbering, where there will be even numbering on one side and odd numbering on the other.
This format is used because two pages will be printed on one sheet at once: the first and second. In order not to get confused in page numbers, it is more correct to set even and odd numbering.
Page numbers will need to be placed on the first and second pages separately. Let's start from the first page:
- Let's go to the "Insert" menu.
- Select the number layout format (in my case I use Simple Number 3)
For the second page do the following:
- Let's go to the "Insert" menu.
- Let's go to the "Header and Footers" block and select "Page Number".
- Depending on the planned location for the number, we activate “Top of the page” or “Bottom of the page”.
- Select the number layout format (in my case I use Simple Number 1).
- In the construct menu that opens, click on the “Options” item.
- Select the line “Even and odd headers and footers for different pages” and check the box.
At this point, the page layout is completed, and the numbering will change to even and odd, as shown in the screenshot below.
How to add numbering like “Page 10 of 250”
- We carry out the document numbering procedure.
- Use the mouse cursor to highlight the number of the first page of the document.
- Press the key combination “Alt + F9”
- Instead of “1” the inscription will appear
- Add “\250” to the end.
- Press Enter.
As a result, we get numbering in the “X\250” format throughout the document. Where X is the number of the current page of the document, and 250 is the number of pages in the document.
Another option for creating the numbering “X out of 250” is as follows.
- In the main editor menu, click on the “Insert” menu item.
- In the set of commands that opens, activate the “Page Number” command.
- In the window that opens, select one of the suggested locations for the page number.
- In the templates provided to choose from, we find the option “Page X from Y).
- Your page will be numbered as follows: Page 1 of 5.
- Press the keyboard shortcut “Ctrl F9”.
- The page numbering will look like “X of 250”. Where X is the current page number, and 250 is the number of pages in the document.
What is continuous pagination?
When working with complex documents containing a large number of sections, it becomes necessary to number the page, both as part of a section and as a page of the entire document as a whole. In this case, the numbering that runs through the entire document is called continuous.
Continuous numbering differs from regular numbering by a certain number of pages. To correct the situation, use the hotkeys “Alt” + “F9”. The following is the algorithm for creating continuous numbering.
Let's say the difference between continuous and regular numbering is 12 pages. To correct the value of continuous numbering to one that corresponds to reality, you should:
- Select a continuous numbering number.
- Press the key combination “Alt +F9”. The page numbering will change to
- Press the key combination “Ctrl + F9”. Another curly brace will be added to the formula. ( ( )
- Before the brackets we put an equal sign, and after -10 and press “Ctrl + F9”. . (= ( -10 )
As a result, continuous numbering will increase by 10 points.
How to make page numbers in headers and footers
You should have become acquainted with headers and footers in the article “, so it’s better to follow the link and read the material.
If you are already familiar with headers and footers, let's continue.
- Place the cursor on the virtual line located above the first line in our document and double-click with the left mouse button.
- As a result, the header will appear and the designer will open in the command ribbon.
- Select and activate the “Page Number” command. This can be done by left-clicking on the selected function.
- In the menu that opens, select the item that corresponds to our desire regarding the placement of the numbering of our document and click on it with the left mouse button.
This way we can assign pagination to the already created footer.
Many users often have to work with documents with a large number of pages. It is very difficult to navigate in such a file, since it will take a lot of time to find the desired paragraph or section. In this article, we'll look at how to number pages in Word to make it easier to navigate through the text.
Thanks to this, you can quickly navigate through the document and correctly determine where exactly you are. Moreover, if you plan to print this file in the future, numbering will save you from possible confusion in the sequence of pages.
In order to number a document in the Microsoft Word editor, you must do the following:
- First of all, let's open a file with large contents.

- After that, go to the “Insert” tab and click on the “Header and Footers” button. In the menu that appears, select “Page Number”. You will be asked where exactly to insert this element (when you hover over each item, you will see preliminary options on the right):

- above or below;

- on the fields;

- current position.

- Immediately after this, you will see that a field for entering information will appear at the top or bottom (depending on the selected numbering type). In addition, a new “Designer” tab will open in the top panel. If you click on the “Position” icon, you can adjust the distance from the top and bottom edges. This way you can manually specify indents before the text.

Just don't overdo it. Consider the borders of the sheet. If you overdo it, you can go beyond print.
- In order to save the settings, you need to click on the “Close header and footer window” button.

- Immediately after this, the dotted line will automatically disappear. As a result of this, you will see a neat number located at the bottom of the sheet.

If you don’t like something or it didn’t turn out the way you wanted, you can always resume editing. To do this, just double-click the left mouse button on the element located in the footer.

Options
For more detailed settings, there is a special menu item, which is located on the “Designer” tab.

Let's consider each parameter separately.
By default, the Word editor is configured to automatically number content (starting from the very beginning and with the number 1). But in some situations this is not necessary. For example, if the first page is the title page. Especially if it is an official document and they will put a stamp there.
In order to fix this, you need to check the “Special footer for the first page” item in the “Options” menu. Immediately after this, you will see the corresponding inscription at the bottom of the sheet.


If you remove this checkbox, the number will appear on the title page again.

Different headers and footers for even and odd pages
To activate this setting, you need to check the corresponding box. Immediately after this, another inscription will be displayed near the frame. Now you can specify specific text for the header or footer of the top or bottom of an even or odd sheet.

Thanks to this, you can number the pages however you like. The main thing is not to overdo it. Otherwise you may end up with an unreadable document.

Additional items
In addition to numbers, you can add anything to the footer. In addition, you can change the position of the elements. For example, make sure that everything that is there is aligned to the left. To do this, just click on the desired icon on the “Home” tab.

You can also add text. For example, you can start with the combination “Page No.”

In this case the text will be static. and page numbers increase.

You can also insert the current date and time. To do this you need to do the following.
- Go to the "Design" tab. After that, click on the “Date and Time” icon. In the menu that appears, you can select any format. To insert, click on the “OK” button.

- To prevent the date from sticking to the number, you need to place the cursor after this element and press the Tab button on the keyboard.
- Thanks to this, the document will look much more beautiful.

If you want to move to the third block (on the right), you need to press the Tab key again.
Microsoft developers tried to make the headers and footers more rich. In order to insert more information about the file, you need to do the following:
- Double-click on the bottom field to enable editing.
- Open the “Design” tab on the toolbar.
- Then click on the “Document Details” icon.
- Immediately after this you will see possible insert options:
- author's name;
- file name;
- the path to the file;
- document's name;
- document property:
- author;
- organization address;
- organization email address;
- annotation;
- date of publication;
- keywords;
- Name;
- organization;
- notes;
- supervisor;
- state;
- organization phone number;
- subject;
- organization fax.

You can put in whatever you want, but don't overdo it.
Page number format
In addition, you can customize the display of the appearance of the numbering. To do this, you need to do the following.
- In the menu that appears, click on the “Header and Footer” button.
- Next, select the “Page Number” section.
- Then click on the item that interests us.

- Immediately after this you will see the following window.

If you wish, you can specify which number to start counting from. By default, a new document starts at "1", but you can specify any value. For example, the number "5". To save, click on the “OK” button.

As a result of this, you will see that the countdown has started from the specified parameter.

Sometimes you need to make sure that a set of numbers other than Arabic is used. To do this, just select the desired option.

For example, to make Roman numerals, you need to click on the appropriate item. To save, click on the “OK” button.


In addition to everything described above, you can include the document title number in the header and footer. To do this, call up the “Page Number Format” window (how to do this is shown earlier) and check the appropriate box.

To add numbered headings, do the following:
- Click on the title of the section (in our case, this is the title of the verse).
- Then click on the Heading 1 style.
- Immediately after this you will see that the appearance of the text will change. But this is not enough.

- Make the title line active.
- Click on the triangle next to the “Multi-level list” icon.
- Select an option for headings.

- As a result of this you will see the following.

- Try checking the box next to the desired item again.

- This time everything should work out. The chapter number will appear next to the page number.

How to insert content
The convenience of numbering is that thanks to it you can create a table of contents. To do this you need to do the following.
- Go to the beginning or end of the document.

- In order to separate from the main text, you need to press the key combination Ctrl + Enter.

- As a result of this, you will find yourself on a new sheet.
- Then go to the "Links" tab.
- Click on the "Table of Contents" icon.
- After that, select any of the options.

- As a result, you will see the following result.

How to remove numbering
If you don't like what you've done, you can always delete it. To do this you need to take the following steps.
- Go to the "Insert" tab.
- Click on the "Header and Footer" button.
- In the menu that appears, select the “Page Number” section.
- Then click on “Delete numbers”.

- Thanks to this, everything will disappear without a trace.

Conclusion
This article discussed the main points when working with page numbering in the Word editor. If something doesn't work out for you, you may be doing something wrong. Try reading it again. In addition, you can access online help on the Microsoft website.
Video instruction
In addition to the instructions above, you can watch the video for additional comments.
Often, when writing long materials in Word, you need to quickly number pages. For diplomas, abstracts, books, articles. In this article you will learn how to automatically number pages in the Microsoft Word text editor. How to number from the first, second or third sheet, and exclude some pages.
I have itWord 2016. Also tested in versions 2007 and 2010.In other versions, the interface is slightly different, but the actions are very similar.
Numbering from the first page
Let's start with the standard task - number all pages in order, without exception.
In the top panel in Word, select the “Insert” tab → “Page Number” → “Page Number”.
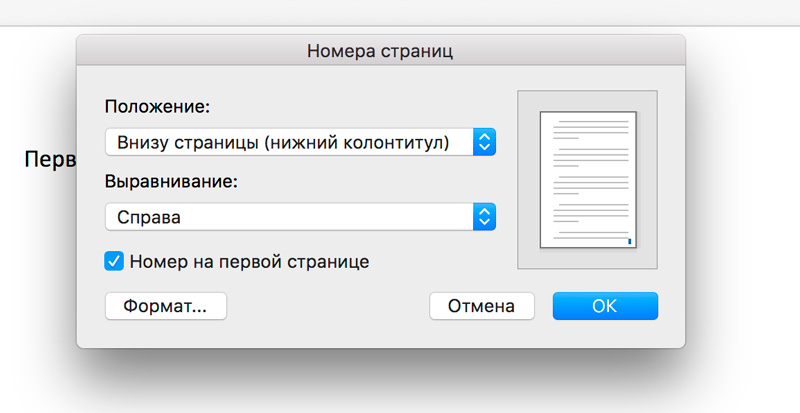
A window will appear allowing you to choose where to display the number (top or bottom) and alignment. Some versions will instead have a drop-down window to select a footer template.
Changing the numbering format
When setting numbering, there is a “Format” button. With its help you can change the display and numbering order. For example, make numbering in letters, Roman numerals, start counting numbering from an arbitrary number.

Double clicking on the page number opens the footer designer. You can also change the format using the Page Number button.

Numbering from the second page
To avoid putting the first page number, follow the steps from the previous paragraph: on the insert tab, click “Page Number” and in the window that appears, uncheck the “Number on the first page” checkbox.

A similar result can be obtained by double-clicking on the numbering, and on the tab that opens with the header and footer designer, click the “Special header and footer for the first page” checkbox.
The countdown starts from the first page, but the number will not be displayed on it.
To exit the header and footer designer, its tab has a special button: “Close header and footer window.”
Change starting digit
If you need to start counting from the second page from the number 1, you need to set 0 as the starting number. To do this, double-click on the page number, in the tab that appears, open “Page number” → “Page number format” → “Start from” → specify 0.

At the same time, do not forget to click the “Special footer for the first page” checkbox so that the zero is not shown.

If you want to start numbering from 3, 4, 5 or another page other than the second, you won’t be able to simply add a special header and footer; it only works for the first page. In such cases, go to the first page, place the cursor on the last line of the first page and click on the Layout tab → Breaks → Next Page.

Then double-click on the number of this page and check the box “Special footer for the first page” (as in the previous paragraphs). Repeat this step for each page that does not need a number.

Using the “Numbering Format”, specify the number from which to start counting. As a result, you can make sure that there are no numberings on the first five pages, and then on the sixth the countdown starts from 1 or 6.
Exclude pages from numbering
You can ignore some pages in the numbering, that is, skip them.

After you have numbered, click on the bottom line on the page you want to exclude. On the Layout tab, click Breaks → Next Page. After this action, there will be one number on this and the next page. Now you can hide one of the numbers: double-click on it and click the “Special footer” checkbox.
As you can see, Word has very flexible page numbering settings. You can enter numbers in just a minute.
Video on page numbering in Word 2010:
Microsoft Word, which users simply call Word, is rightfully considered one of the most popular programs for working with texts. A wide variety of functions allows you to solve very different problems that relate to typing and formatting text documents. A simple intuitive menu makes work possible for people of any age and level of knowledge.
Very often, when typing a document with several pages, users are faced with a seemingly simple task - page numbering. But not everyone is able to immediately find the function they need, despite the fact that this is quite simple to do. Also, not everyone can immediately figure out how to arrange the page number according to any special requirements for the document, which happens quite often. Let's figure out how to number pages in Word of different versions.
Let's first look at how to number pages in Word 2003, since this version of the program is still quite popular and is used by a large number of users.
After starting the program, go to the “Insert” tab and then select “Page Numbers” from the drop-down list.

In the window that appears, you can specify the numbering parameters:
- position - above or below;
- alignment - left, right, center, inside, outside.

It is also possible to specify the format of the page number, namely, numbers or letters, which page to start numbering from.
Page numbering in Word 2007, 2010, 2013
Word versions later than 2007 have a very thoughtful and user-friendly interface. It is designed in such a way that a huge number of functions are logically distributed across several tabs. In order to start numbering pages, you need to go to the “Insert” tab.

Here you need to click on the “Page Number” line, after which you can adjust the location of the page number in the drop-down menu (at the top of the page, at the bottom or in the margins).

In the same menu there is a line “Page Number Format”, by selecting which you can specify the page number from which numbering will begin.

To do this, you need to place a marker on the bottom displayed line (“start”) and enter in the box the number from which the document numbering should begin.
Another problem that Word users often encounter is page numbering without a title page. This means that you need to number pages starting not from the first page (title page), but from the next one, and the numbering should start from two, because the first page is considered the cover.
This is quite simple to do - you first need to enter the page number of the document as usual, after which each of the pages will be numbered. Now we turn off the numbering of the title page.

To do this, from the “Insert” tab, go to the “Page Layout” tab. A little to the left of the center of the menu there will be a line “Page Options”, next to which there will be a small button in the form of a gray square with a cross. By clicking on this button, the user will be able to see the “Page Settings” window in front of him, where he must check the box next to the line “Differentiate headers and footers of the first page”.

After these steps, the number on the title page will disappear without disturbing the overall page numbering of the document.
Coursework, dissertations, abstracts - all these types of work require a careful approach to design. And this applies not only to indents, correct design of figures and tables, but also to page numbering. As a rule, page numbering occurs starting from the title page, but, as we know, the title itself does not need to be numbered. We will tell you what to do and how to act correctly in such a situation right now.
Preface
Advanced users of the Word environment know about such a function in this program as “ Automatic page numbering" With its help, you can simply select the location of the number and its future design, and number the document in the correct order. But not everyone notices the other settings that are assigned to this function. One of these settings is the “”.
Making the correct page numbering
If you are already familiar with how to enter page numbers in Word, then feel free to skip the first paragraphs of this instruction, because now the process of creating the correct numbering for documents in Word will be discussed step by step.
- Open the document in which you want to add page numbers.
- On the top panel, click on the tab Insert.

- Find the function on the toolbar Page number and click on it.

This button is located in the sub-item Headers and footers.
- Select the location and appearance of the numbering.

- Once the numbering is set, you will automatically be taken to the header and footer builder. In this constructor we need to check a box next to a very important point for us - Special header and footer for the first page.

Now, when you exit the constructor, you will notice that the numbering starts from the second page, while the first page will also be taken into account.
Important points
- To exit the designer, double-click on the document workspace with the left mouse button.
- To enter the header and footer designer, double-click on the bottom or top area of the sheet.

- If you do not want the cover page to count toward the numbering, make it a separate document.
Bottom line
This is how you will make your work well-designed in relation to numbering. We hope that this material was very useful for you.
