Exchange files between graphics programs. Graphic files. Basic concepts and terms
The course “Computer Graphics” is an elective course for 9th grade students, designed for 17 hours.
This course is intended for working with children who want to learn basic techniques for working with computer graphics in CorelDRAW and Adobe Photoshop.
Goals and objectives of the course:
1.Give students a deep understanding of the principles of constructing and storing images.
2. Study graphic file formats and their appropriate use when working with various graphic programs.
3. Consider the application of the basics of computer graphics in various graphics programs.
4. Teach students to create and edit their own images using the tools of graphics programs.
5. Teach students how to exchange graphic data between various programs.
Download:
Preview:
Municipal formation of the city of Krasnodar
(territorial, administrative district (city, district, village)
municipal budgetary educational institution
municipal formation city of Krasnodar
Secondary school No. 93
(full name of the educational institution)
WORKING PROGRAMM
II type
Elective course in computer science "Computer graphics"
Level of study (grade)basic general education 9th grade ____________
Number of hours 17 Basic level _________________________________
Teacher Sokolova I.V. ________________________________________________
The program is developed based onauthor's programL.A. Zalogov, electivecourse “Computer Graphics” for primary school (9th grade), published in the collection of Programs for general education institutions: Computer Science. Grades 2-11 / Compiled by M.N. Borodin. – 6th ed. - M.: BINOM. Knowledge Laboratory, 2009. ________________________________________
EXPLANATORY NOTE
The course “Computer Graphics” is an elective course for 9th grade students, designed for 17 hours.
This course is designed to work with children who want to master the basic techniques of working with computer graphics in CorelDRAW and Adobe Photoshop.
Goals and objectives of the course:
1.Give students a deep understanding of the principles of constructing and storing images.
2. Study graphic file formats and their appropriate use when working with various graphics programs.
3. Consider the application of the basics of computer graphics in various graphics programs.
4. Teach students to create and edit their own images using the tools of graphics programs.
5. Teach students how to exchange graphic data between different programs.
Educational results:
1. Students must masterbasics of computer graphics, namely, you should know:
Features, advantages and disadvantages of raster graphics;
Features, advantages and disadvantages vector graphics;
Methods for describing colors in computer graphics- color models;
in methods of obtaining color shades on the monitor screen and printer;
Methods for storing images in raster and vector format files;
Graphic data compression methods;
Problems converting graphic file formats;
Purpose and functions of various graphic programs.
2. As a result of developmentpractical partstudents must be able to:
2.1. Create your own illustrations using the main tools of the CorelDRAW vector program, namely:
Create drawings from simple objects(lines, arcs, circles, etc.);
Perform basic operations on objects (deleting, moving, scaling, rotating, mirror reflection and etc.);
Create your own color shades in various color models;
Create fills from several color transitions;
Use patterned and textured fills;
Work with the contours of objects;
Create drawings from curves;
Create illustrations using methods for arranging and combining objects, as well as subtraction and intersection operations;
Receive three-dimensional images;
Apply various graphic effects (volume, flow, curly trimming, etc.);
Create inscriptions, headings, place text along a trajectory.
2.2. Edit images in Adobe Photoshop, namely
Select image fragments using various tools (Area, Lasso, Magic Wand, etc.);
Move, duplicate, rotate selected areas;
Edit photos using various artistic media;
Save selected areas for later use;
Mount photographs (create multilayer documents);
Elective course program "COMPUTER GRAPHICS"
Color black and white sketches and photographs.
Apply to text various effects;
Perform tone correction of photographs;
Perform color correction of photographs;
Retouch photos;
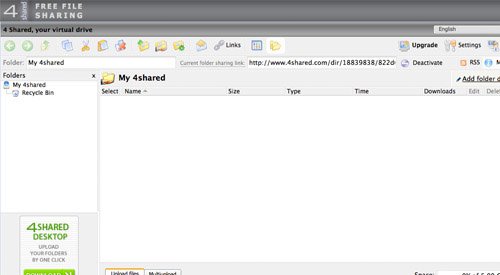
Exchange files between graphics programs.
Interdisciplinary connections
Students can further use the knowledge gained from studying the course “Computer Graphics” in the creation of advertising materials, for visualizing scientific and applied research in various fields of knowledge - physics, chemistry, biology, etc. The created image can be used in a report, article , multimedia presentation, posted on a web page or imported into a document of a publishing system. The knowledge and skills acquired as a result of mastering the “Computer Graphics” course arethe foundation for further improvement of skills in the field of three-dimensional modeling, animation, video editing, and the creation of virtual reality systems.
The Computer Graphics course covers:
Basic issues of creating, editing and storing images;
Features of working with images in raster programs;
Methods for creating illustrations in vector programs Creating 3D images on a computer screen is a rather complex task, and we need to devote a separate course to its consideration. Other areas of computer graphics are undoubtedly of great interest, but they require a certain professional specialization.
The vector program CorelDRAW is used to create illustrations, and Adobe Photoshop is used to edit images and edit photographs.
CorelDRAW is currently one of the most popular vector graphics programs. The program has gained its popularity due to the fact that it allows beginners and professional artists to create illustrations of varying complexity. On personal computers IBM PC CorelDRAW is the “king” of drawing programs
Adobe Photoshop is the world's most popular editing program raster images. It is used for retouching, tone and color correction, as well as for the purpose of building collages in which fragments of different images are merged together to create interesting and unusual effects.
Tutorial
1 . . Raster graphics. Advantages and disadvantages of raster graphics. Vector graphics. Advantages and disadvantages of vector graphics. Comparison of raster and vector graphics. Features of raster and vector programs.
2. Color systems in computer graphics. Formation of color shades on the monitor screen (additive color system). Formation of color shades when printing images (subtractive color system). Ways to create your own color shades in various graphics programs. The hue-saturation-brightness color system. Relationship various systems colors.
3. Graphic file formats. Vector formats. Raster formats. Graphic data compression methods. Convert files from one format to another.
4. Creation of illustrations. Features of vector programs. Introduction to CorelDRAW. Basics of working with objects. Coloring drawings. Auxiliary operating modes. Creating drawings from curves. Methods for arranging and combining objects. Volume effect. Overflow. Work with text. Saving and loading images in Corel DRAW.
5. . Features of raster programs. Introduction to Adobe Photoshop. Selecting areas. Masks and channels. Basics of working with layers. Drawing and coloring. Tone correction. Color correction. Photo retouching. Working with contours.
Workshop
1. . CorelDRAW home screen. Basics of working with objects. Coloring drawings. Creating drawings from curves. Various graphic effects. Work with text. Saving and loading images in CorelDRAW.
2 . . Adobe Photoshop work screen. Working with selected areas. Masks and channels. Basics of working with layers. Drawing and coloring. Basics of color correction. Basics of tone correction. Photo retouching. Working with contours. Exchange files between graphics programs.
Table of thematic distribution number of hours
p/p | Sections | Number of hours |
|
program | Working program |
||
Lecture part of the course |
|||
Methods for presenting graphic images | |||
Color in computer graphics | |||
Graphic file formats | |||
Creation of illustrations | |||
Editing and enhancing images | |||
Total: | |||
Practical part of the course |
|||
Practical lessons on vector graphics |
|||
CorelDRAW working window | |||
Object Basics | |||
Shading drawings | |||
Creating patterns from curves | |||
Various graphic effects | |||
Work with text | |||
Total: | |||
Practical lessons on raster graphics |
|||
Adobe Photoshop working window | |||
Working with selections | |||
Masks and channels | |||
Working with layers | |||
Drawing and coloring | |||
Tone Correction Basics | |||
Color Correction Basics | |||
Photo retouching | |||
Sharing files between graphics programs | |||
Total: | |||
TOTAL: | |||
Reserve time - 8 hours | |||
Teaching methods
Classes include lecture and practical parts. The practical part of the course is organized in the form of lessons. An important component of each lesson is independent work by students. The topic of the lesson is determined by the skills acquired; example topic: “Creating drawings from curves.” In each lesson, the material is presented as follows:
- Review of basic concepts and methods for working with them.
- Independently completing tasks to gain basic work skills; Each task formulates a goal and sets out how to achieve it.
- Exercises to do independently.
- Do-it-yourself projects.
The theoretical and applied parts of the course (at the discretion of the teacher) can be studied in parallel in order to immediately consolidate theoretical issues in practice.
Forms of knowledge control
Mastery of the theoretical part of the course is checked using tests.
Each practical lesson is assessed with a certain number of points.
The course provides for several tests and, therefore, calculation of intermediate ratings (number of points for the test and practical tasks).
The final grade is given based on the sum of points for all tests and practical exercises according to the following scheme:
“2” - less than 40% of the total points;
“3” - from 40% to 59% of the total points;
“4” - from 60% to 74% of the total points;
“5” - from 75% to 100% of the total points.
List of used educational and methodological literature
- L.A. Zalogova Computer graphics. Elective course: Textbook - M.BINOM. Knowledge Laboratory, 2005 – 212 p.
- L.A. Zalogova Computer graphics. Elective course: Workshop – M.BINOM. Knowledge Laboratory, 2005 – 245 p.
additional literature
- Duvanov A.A. Basics of computer science. We draw on the computer. St. Petersburg: BHV-Petersburg, 2005;
- Simonovich S.V., Evseev G.A., Alekseev A.G. Special informatics: Textbook. – M.: AST-PRESS: Inforkom-Press, 2000; August 29, 2012 _ No. 1,
head departments
Khmara S.E.
AGREED
Deputy Director for HR
L.V. Azarova
"__" August 2012
Current technologies and devices (whether PC or Mac) can undoubtedly reproduce large original files such as .PSD (Photoshop) and .AI (Illustrator), but this, unfortunately, does not apply to file sharing. They are too big and bulky to share with clients and colleagues. In this case, we usually find a way out of the situation in one of two ways: sending via email or sharing files through a hosting account. We don’t want to say anything against it, however, everyone knows that email You can attach no more than 100MB. On the other hand, file sharing through a web hosting account allows you to upload files that fit into your account; this also means that the file will be accessible to anyone who knows its direct path.
Web services for file sharing solve most of the above problems. Most of them are free and allow you to securely transfer large files. Further in our article we will talk about a number of such services. If you often share files via the Internet with your friends or colleagues, then you may want to try this file sharing method.
With its attractive interface, ease of use and fast data delivery, Stockholm-based Streamfile will become optimal solution file sharing regardless of your location.
Maximum file size: 300MB | Registration: not needed | Premium account: yes | Password protection: no

Pando - free P2P software for fast, easy and fun downloading, playing and sharing large media files.
Maximum file size: 1GB | Registration: required | Premium account: yes | Password protection: yes

Download, upload, archive and sync files of various sizes, data sets, and multimedia files.
Maximum file size: 100MB | Registration: not needed | Premium Account: No | Password protection: yes

Send music, movies and presentations in seconds!

Maximum file size: 200MB | Registration: not needed | Premium account: yes | Password protection: no

Maximum file size: 100MB per file, total size: 5GB | Registration: required | Premium account: yes | Password protection: no
With SendThisFile, you can easily send and receive large files to anyone, anywhere.

Files2U is a web service that allows users to send large files without worrying about restrictions Email and slowing down FTP.
Maximum file size: no limit | Registration: not needed | Premium Account: No | Password protection: number tracking

With this free web app from iDrive Online Backup, you can share files online and via your desktop PC.
Maximum file size: 500MB | Registration: not needed | Premium account: yes | Password protection: no

Maximum file size: 100MB | Registration: not needed | Premium account: yes | Password protection: no

Maximum file size: 100MB | Registration: not needed | Premium account: yes | Password protection: yes

This software synchronizes files online and on your computer and, what's more, makes them available to your friends and colleagues.
Maximum file size: no limit | Registration: required | Premium account: yes | Password protection: yes

Box.net is an online storage facility that allows you to easily and securely share content via a link or a shared folder with anyone.
Maximum file size: no limit | Registration: required | Premium account: yes | Password protection: yes

Maximum file size: no limit | Registration: not needed | Premium Account: No | Password protection: no

Maximum file size: 5GB | Registration: not needed | Premium Account: No | Password protection: no

Other services
Want to learn about other file sharing web services? Here are a couple more (though not all free) that are worth paying attention to.
This is a pseudo-SAAS delivery service digital information from YouSendIt.Inc. It gives users the ability to send, receive and track requested files. Yousendit is an alternative to sending large files via email applications, using FTP and sending CDs, DVDs and flash drives via Wiki.
A leading service provider that offers secure boot, moving and exchanging files. The service uses a network of the fastest, newest and most reliable servers with virtually unlimited memory.
- the site does not require registration: just go to home page and start uploading files.Education Committee of the Administration of the Municipal District of the Usolsky District Municipal Formation
Municipal educational institutionsecondary school No. 7
AGREED
"___" __________ 2014
Deputy Director of Municipal Educational Institution Secondary School No. 7
_________________________________
(signature, full name)
REVIEWED ON PS
Protocol No._________
from "___" __________ 2014
I APPROVED
Director of Municipal Educational Institution Secondary School No. 7
Mullina A.V.
order No. __________________
From "___" __________ 2014
Work program of the elective course
in computer science " COMPUTER GRAPHICS"
for 10th grade
Karpova Tatyana Yurievna
IT-teacher
2nd qualification category
Municipal educational institution secondary school No. 7
With. Sosnovka
year 2014
Explanatory note
The branch of computer science that deals with methods of creating and editing images using computers is called computer graphics.
People from various professions use computer graphics in their work. These are researchers in various scientific and applied fields, artists, designers, computer layout specialists, designers, developers of advertising products, creators of Web pages, authors of multimedia presentations, doctors, textile and clothing designers, photographers, specialists in the field of television and video editing, etc.
Images on a computer screen are created using graphics programs. These are raster and vector editors, programs for creating and processing three-dimensional objects, design automation systems, desktop publishing systems, etc.
The main focus of the Computer Graphics course is on creating illustrations and editing images, i.e. vector and raster programs. Creating three-dimensional images on a computer screen is a rather complex task, and a separate course should be devoted to its consideration. Other areas of computer graphics are undoubtedly of great interest, but they require a certain professional specialization.Reasons for drawing up work program
The work program of the elective course in computer science for 10 grades is based on:
Author's program of the elective course in computer science and ICT “Computer Graphics”, author of the program L.A. Zalogova, Ph.D. Physics and Mathematics, Associate Professor of the Department of Mathematical Support of Computer Systems, Perm State University.
The school curriculum, according to which the course is studied at a basic level in grade 10 through the educational institution component and amounts to
1 hour per week, 34 hours per year.
Theory – 15 hours
Practice - 18 hours
Target:
interest students, show the possibilities of modern software in graphic image processing;
introduce the principles of operation of raster graphics editors;
form a concept of the limitless possibilities of using image processing technologies.
Tasks:
provide a deep understanding of the principles of constructing and storing images;
study graphic file formats and the advisability of using them when working with various graphics programs;
consider the application of computer graphics fundamentals in various graphics programs;
teach students to create and edit their own images using the tools of graphics programs;
teach how to exchange graphic data between different programs.Educational results
Students must master basics of computer graphics, namely they should know:
features, advantages and disadvantages of raster graphics;
features, advantages and disadvantages of vector graphics;
methods for describing colors in computer graphics - color models;
methods for obtaining color shades on the screen and printer;
methods for storing images in raster and vector format files;
graphic data compression methods;
problems converting graphic file formats;
purpose and functions of various graphic programs.
As a result of development practical part students must be able to:
1) create your own illustrations using the main tools of the vector program, namely:
create drawings from simple objects (lines, arcs, circles, etc.);
perform basic operations on objects (deleting, moving, scaling, rotating, mirroring, etc.);
create your own color shades in various color models;
paint over drawings using various types of fills;
work with the contours of objects;
create drawings from curves;
create illustrations using methods for arranging and combining objects;Receive three-dimensional images;
Apply various graphic effects (volume, flow, curly trimming, etc.);
Create inscriptions, headings, place text along a trajectory;
2) edit images in the program , A
Select image fragments using various tools (area, lasso, magic wand, etc.);
Move, duplicate, rotate selected areas;
Edit photos using various artistic media;
Save selected areas for later use;
mount photographs (create multilayer documents);
Color black and white sketches and photographs;
Apply various effects to text;
Perform tone correction of photographs;
Perform color correction of photographs;
Retouch photos;
3) perform.
Student assessment criteria
Current control of the level of mastery of the material is carried out based on the results of students’ performance practical tasks at every lesson. At the end of the course, each student completes an individual project as credit. The last lesson is a conference where students present and discuss their work.
The final grade is given based on the sum of points for all tests and practical exercises according to the following scheme:
“2” - less than 40% of the total points;
“3” - from 40 to 59% of the total points;
“4” - from 60 to 74% of the total points;
“5” - from 75 to 100% of the total points.Contents of the work program
Topic 1. Methods for presenting graphic images
Raster graphics. Advantages of raster graphics. Disadvantages of raster graphics. Vector graphics. Advantages of vector graphics
The Computer Graphics course covers:
Basic issues of creating, editing and storing images;
Features of working with images in raster programs:
Methods for creating illustrations in vector programs.
Disadvantages of vector graphics. Comparison of raster and vector graphics. Features of raster and vector programs.
Topic 2. Color in computer graphics
Description of color shades on the monitor screen and on the printer (color models). Color model. Formation of your own color shades on the monitor screen. Formation of your own color shades when printing images. The relationship of color models. Color coding in various graphics programs.
Topic 3. Graphic file formats
Vector formats. Raster formats. Graphic data compression methods. Saving images in standard formats, as well as proprietary formats of graphics programs. Convert files from one format to another.
Topic 4. Creating illustrations
Introduction to the CogelDRAW program. Working window of the CogelDRAW program.
Menu features. Worksheet. Organization of the toolbar. Properties panel. Color palette. Status bar. Object Basics
Drawing lines, rectangles, squares, ellipses, circles, arcs, sectors, polygons and stars. Selecting objects. Operations on objects: moving, copying, deleting, mirroring, rotating, scaling. Changing the viewing scale when drawing small details. Features of creating illustrations on a computer. Coloring drawings. Auxiliary operating modes. Tools for precise drawing and positioning of objects relative to each other: rulers, guides, grid. Modes for displaying objects on the screen. Creating drawings from curves. Features of drawing curves. The most important elements of curves: nodes and trajectories. Editing the shape of a curve. Recommendations for creating drawings from curves.
Changing the order of objects. Aligning objects on the worksheet and relative to each other. Methods for combining objects: grouping, combining, welding. Excluding one object from another.
Volume effect. Creation of technical drawings. Creating convex and concave objects. Getting artistic effects. Work with text.
Features of simple and curly text. Text formatting. Placing text along a path. Creating embossed text. Scaling, rotating and moving individual letters of text. Saving and loading images.
Topic 5. Editing and improving images
Introduction to the Ad ob e PhotoSh op program. Working window of the program.
Menu features. Working field. Organization of the toolbar. Properties panel. Panels are auxiliary windows. View images at different scales. Status bar. Selecting areas. Masks and channels.
Modes for working with selected areas: standard and quick mask mode. Refine a previously created selection in Quick Mask mode. Save selected areas for reuse in channels. Collage. Basics of working with layers. Features of creating a computer collage. Drawing and coloring. Tone correction.
Name of sections and topics
Total hours
Practice
Section 1 “Methods of presenting graphic images” - 5 hours
Raster graphics
Vector graphics
Comparison of vector and raster graphics
Features of graphics editors
Practical work No. 1. "My drawing"
Section 2. “Color in computer graphics” - 3 hours
Color model
Forming your own flowers
Practical work No. 2. "Color ornament"
Section 3. “Graphic file formats” - 5 hours
Raster formats
Vector formats
Converting files from one format to another
Section 4. “Creating illustrations” - 15 hours
Introduction to CogelDRAW
Working window of the CogelDRAW program.
Object Basics
Shading drawings
Auxiliary operating modes
Creating patterns from curves
Volume effects
Flowover
Work with text
Practical work No. 3. “Creating a drawing”
Section 5. “Editing and enhancing images” - 5 hours
Introduction to the Ad ob e PhotoSh op program
Working window of the program
Drawing and coloring
Practical work No. 4. "Creating a collage"
Total:
Practical lessons on vector graphics
CorelDRAW working window
Object Basics
Shading drawings
Shading the drawings (end). Auxiliary operating modes
Creating patterns from curves
Volume effect
Bleeding effect
Work with text
Practical lessons on raster graphics
Masks and channels
Drawing and coloring
Working with layers (continued)
Tone Correction Basics
Color Correction Basics
Photo retouching
Working with Paths
Sharing files between graphics programs
Educational and methodological support of the course
For the teacher
The educational and methodological set “Computer graphics” consists of teaching aid and workshop.
Zalogova L.A. Computer graphics. Elective course: Textbook/L.A. Zalogova. – 2nd ed. – M.: BINOM. Knowledge Laboratory, 2011. – 212 pp., 16 pp. Ill.: ill.
Zalogova L.A. Computer graphics. Elective course: Workshop/L.A. Zalogova. – M.: BINOM. Knowledge Laboratory, 2011. – 245 pp., 16 pp. Ill.: ill.
For students:
Grinberg A. D., Grinberg S. Digital images. Minsk, 000 Medley, 2010.
Corrigan J. Computer graphics. M.: ENTROP, 1995.
Altman R. CogelDRAW 9. M.: ENTROP. Kyiv: VEK+, Kyiv: VNU Publishing Group, 2000.
Taits A.M., Taits A.A. CogelDRAW 11. - SP6.: BHV-Petersburg, 2003.
Taits A.M.. Taits A.A. Ad ob e РhotoSh op 7. - SP6.: BHV-Petersburg, 2001
Course Software
CorelDRAW is currently one of the most popular vector graphics programs. The program gained its popularity due to the fact that it allows beginners and professional artists to create illustrations of varying complexity. On IBM PC personal computers, CorelDRAW is the “king” of drawing programs.
Adobe PhotoShop is the world's most popular raster image editing program. It is used for retouching, tone and color correction, as well as for the purpose of building collages in which fragments of different images are merged together to create interesting and unusual effects.
Calendar and thematic planning of the elective course “Computer Graphics”
Grade 10
Lesson topic
Number of hours
note
carrying out
Methods for presenting graphic images
Color systems in computer graphics
Object Basics
Graphic file formats
Creation of illustrations
Editing and enhancing images
Methods for arranging and combining objects
Work screen Cog elDRAW
CorelDRAW working window
Object Basics
Volume effect
Shading drawings
Creating patterns from curves
Creating patterns from curves
Various graphic effects
Methods for arranging and combining objects
Work with text
Work screen A d O b e P hotoSh op
Adobe PhotoShop working window
Working with selections
Working with selections
Masks and channels
Masks and channels
Working with layers
Drawing and coloring
Working with layers
Drawing and coloring
Shading drawings
Drawing and coloring
Shading drawings
Tone Correction Basics
Creating a collage. Layer Basics
Tone Correction Basics
Tone Correction Basics
Color Correction Basics
Drawing and coloring
Color Correction Basics
Drawing and coloring
Photo retouching
Photo retouching
Photo retouching
Bleeding effect
Photo retouching
Sharing files between graphics programs
Sharing files between graphics programs
Sharing files between graphics programs
Working with Paths
Execution of design work
Execution of design work
Execution of design work
Protection of project work
Work with text
Work with text
Work with text
Work with text
Completeness of information and its updating Graphic and technical design Navigation
Page loading speed and determining factors Site interactivity Internet technologies Research of existing sites Criteria for evaluating sites Generalization Creative work Self-assessment Reflection
Chapter V. HTML Basics (8 hours)
In this chapter, you will learn how to place information in the right place on a web page; divide screen into separate windows with independent information and the ability to manage their content; create various interactive elements and receive a message about how the user worked with them; give instructions search engines about the most important things on your web pages. Perform a number of individual creative works to develop website elements. Provide an interactive experience for web page visitors.
Basic concepts: lists, tables, frames, forms, meta tags, interactivity.
Tables “Old songs about the main thing” Extra cells. Empty cells
Merging cells. Coordinate with neighbors Cell division. Coordinate again. Is it worth dividing? Nested tables Background colors. The table can be a rainbow For a rainbow - a colored cell!
Fields. In cramped conditions, but not in offence, Life with tables
Meta tags
Generalization Creative work. Topic “Implementation and protection of a small project” Self-assessment Reflection
Chapter VI. Website editors (8 hours)
After studying this chapter, you will learn why Dreamweaver and other website editors are needed; what are the possibilities
Dreamweaver when creating and editing websites, unlike HTML code editors; How to configure Dreamweaver settings; how to create various information resources with its help and connect them with each other and with external resources.
Basic concepts: web page editor, active elements, dynamic language, script, banner, server, administration.
Creating a new site Creating new files and folders
Customizing Web Page Characteristics Background Text
Using Rollover Navigation Bar
Accessing the HTML Code of a Web Page Summary
Creative work. Topic: “Implementation and protection of the project” Self-assessment Reflection
Chapter VII. Additional features creating web pages (6 hours)
In this chapter, you will learn how to quickly and efficiently change the appearance of all web pages on a site at once, designing them in the same style. Learn the basics of creating Cascading Style Sheets - CSS. Make a simple Flash animation. Learn to create dynamic and interactive web pages.
Key Concepts: Cascading Style Sheets, CSS, Selector, Flash, Symbol, Clip, Button, Motion Animation, Form Animation, Dynamic HTML, Interactivity, Scripting, Static and dynamic pages, active elements.
Purpose of CSS Cascading Style Sheets
Basics CSS Color in CSS
Size in CSS Comments
Creating a Style Sheet Syntax
Inheritance Context selectors
Font and text - twin brothers Von. Help Tom Sawyer paint the fence
Applying style sheets to part of a page Classes is awesome!
Subclasses. Maybe someone needs their own personal tag? The webmaster is not a magician, but he can do something
String element Block element
Block PropertiesBorder Wrap around a block of text
Positioning. How to get there, I don’t know where Favorite pages are. Personal style
Applying a style to a tag. Piece work Interaction of styles. Who's new?
Cascading styles and priorities. The greater the influence, the less significance - everything is not like in life
Summary Three ways to set a style
Priorities
Basic Concepts Character Types Motion Animation Shape Animation Buttons
Dynamic HTML Work with layers
Examples of using DHTML Creative work. Subject " Technical project» Self-esteem Reflection
Chapter VIII. Web Design Basics (8 hours)
In this chapter, you will see that designing site content is one of the most critical moments when creating any web resource. Visitors are attracted primarily by information that is relevant to them, forcing them to return to the site again and again. The design only emphasizes the content of the site, makes it easier to perceive, and helps
Logical design Type of site structure (linear, hierarchical, contextual, other)
Section names What each section will contain
Organization and connection of sections with each other What information will be placed on certain pages of the site
Physical design Technologies that will be used on the site
Software used Possible problems and ways to eliminate them How the information will be updated
Generalization Creative work Self-esteem Reflection
Chapter XI. Test work (10 hours)
It's time to do yours final project. You already have experience creating various website elements. Now all your knowledge
è skills and previous developments must be applied to create a complex project - website on the topic of your choice. The site is developed in a group or individually. In any case, you will be required to design, manufacture and host your website on the Internet. You need to defend your completed project in front of your classmates.
è teacher. It is also possible distance form protection with the involvement of remote specialists.
Basic concepts: theme and structure of a website, design, production, placement, site testing, expert assessment.
Choosing a theme for a creative project - website Technical specifications
Distribution of work between different specialists (customer, art director, webmaster, coder, programmer, layout designer, manager), their functions in the overall project Features of the collective (group) activities of site developers
Design, creation and placement of a website on the network Work acceptance certificate Protection of completed projects Self-assessment and evaluation. Reflection
Chapter XII. Web Design Olympiad (2 hours)
Olympiad in Computer Graphics and Web Design - good way demonstrate artistic, graphic and technical abilities
sti. This Olympiad is interdisciplinary and can be held within the framework of several academic subjects: art, painting, artistic creativity, decorative and applied arts, MCC, design, computer science.
Basic concepts: logo, form style, banner, layout, graphics, design.
Olympic tasks:
1. Design your layout"web business cards" Find the necessary slogans and their graphic accompaniment.
2. Design a logo layout for your school (class) in jpg format or gif. and present it in color and black and white versions.
3. Make two banners measuring 120x60 - animated and static. The purpose of banners is to influence the emotional sphere of a potential viewer.
4. Come up with a graphic illustration for a humor section of a website. The illustration must be funny, entertaining, and original. Illustration size 130x190 pixels. Format jpg file or gif.
5. Develop a title a web page on one of the topics: “Our class”, “Our school”, “We are fans!”, “Online newspaper”, “Web club”, “Point of sale” mobile phones", "Flower shop", "Dating service".
Excerpt from a student guide (from Chapter 7, “Advanced Web Page Creation”)
Background. Help Tom Sawyer paint the fence
You have already learned how to write inscriptions on Internet fences (web pages). You assign a COLOR attribute value to any tag in the form of a color name or RGB code. And apply the tag to the text.
When you learned HTML, you also learned how to set a background color and a background image. Let's consider what opportunities style sheets provide for this.
Background settings can only be controlled for a specific block markup element. Such an element can be the entire page, table, paragraph, heading, etc. For example, if we set the style:
h4 ( background-color:black;color:white;)
then all fourth-level headings will be displayed in white on a black background.
In addition to the background color and its transparency, you can now control background picture(coordinates of its placement and methods of repetition).
To work with background image There are several attributes:
background-image - sets the address of the image for the background;
background-repeat - determines how images on the screen will be duplicated; matter:
Repeat - the image is duplicated in both directions;
Repeat-x - the image is duplicated only horizontally;
Repeat-y - the image is duplicated only vertically;
No-repeat - one image is displayed from its true
mi sizes;
background-attachment - sets the behavior of the background; it is either fixed or scrolled along with the picture. Using this property you can create a good effect;
background-position - determines the position of the original image on the screen. The values can be commands LEFT, RIGHT, CENTER, coordinates in pixels or points, and also in percentages. You can specify both coordinates, one or none. The missing coordinate will be replaced with the default value, usually
but by centering.
For brevity, all background properties can be described in the general background attribute:
background: transparent|color url repeat scroll position
p ( background: gray http://www.eidos.ru/logo.gif no-repeat fixed 50% 30px; )
body ( url("fon.gif"); background-repeat:repeat-x; background-attachment:fixed;)
What a wealth of possibilities when using just one image for the background! However, with all the abundance of opportunities, it is not worth using them evil.
In Chapter 2, you created a logo and placed it on a web page in the file vizitka-family.htm. Change the page. Make the logo the background image, fixed in one of the top corners. Disable duplication and scrolling of this image.
Prospects for the course graduate
For students of a specialized school choosing one or another elective course, specific benefits and practical benefits are important this course. Therefore, the task of the teacher presenting this course is to reveal to students the promising aspects of this course.

working together. I’m sure it will be useful to us.” - Mikhail Bochkov, 10 B, Gymnasium No. 39, Tolyatti.
“We decided to choose Ergin Yuri Viktorovich as the theme of our site, since such great people as Yuri Viktorovich should be known to the world. This is the best, smartest and respected physicist in our city. My job was to collect information for the site. It was not easy to “catch” such a famous person! But finally he gave me a few of his precious minutes to tell me about himself. I didn’t even suspect that this man had such an exciting destiny. After meeting with Yergin, I devoted several hours to classifying the information, resulting in five sections: biography, publications, hobbies, students and advice. Some more time was spent on design: printing and artistic editing. I think what I was best at was the artistic processing of information.” - Zhiburda Olesya, 11th grade B, gymnasium 111, Ufa.
“I did the work myself. First I picked different variants pages in my head, then implemented them on the computer. I used Notepad and some html editors. The hardest thing was to make a site with a resolution of 800x600; I had to edit the site in different computers" - Roman Statsenko, 10th grade, Pacific Line School, Vladivostok.
“Thanks to the Eidos Center Olympiad, I was once again convinced that I can and want to connect myself with web design - I have the strength, skill, desire and most importantly - ideas. After all, without ideas, no matter how well a person masters his business, nothing worthwhile will come of it. I created such a design element as a colored scroll bar - I made it in accordance with the color scheme of the site (white with light blue outlines).” - Oleg Bershak, 11 B grade, Lyceum No. 1, Neftekamsk
List of information resources
Development information technologies happening at a fast pace. New standards become outdated before they are officially approved. In this sense, updated electronic publications are more mobile than “paper” versions of textbooks. Here are the addresses of Internet resources that contain information useful for creating websites of any level of complexity and quality.
http://htmlbook.ru - Merzhevich Vlad.
A short but information-rich textbook on website creation technology, HTML, CSS, design, graphics, etc. Made in the style of an extended reference book with examples. Written in accessible language. Suitable for in-depth lessons, both under the guidance of a teacher and individually.
http://www.intuit.ru/ - P.B. Khramtsov, S.A. Brik, A.M. Rusak, A.I. Surin.
Website of the Internet University of Information Technologies. The course of lectures is devoted to the basics of web technologies. Designed for university students, but can be useful to anyone who wants to deepen their knowledge in this area.
http://www.postroika.ru/ - Alenova Natalya.
“Textbook (guide) on html. I wrote this guide with beginners in mind, remembering how I once started myself. This is not a dry presentation of everything, this is an attempt to work on associations, to make everything more easy to remember. In some places I was unable to avoid tedious moments, but I tried and will continue to try, supplementing and correcting everything that was written from time to time.”
http://html.manual.ru/ - Gorodulin Vladimir. "HTML directory. This is not a translation of a boring specification or
attempt to write a textbook. The purpose of the reference book is to briefly and clearly describe the operation of all elements HTML language, which you can safely use when creating Internet pages, without fear that some version of any browser will give you an unpleasant surprise. In other words, here is the “classic” HTML used by professional web developers. And nothing superfluous.”
http://winchanger.narod.ru - A. Klimov A short reference book on HTML language tags.
http://www.w3.org/ - World Wide Web Consortium.
About the HTML 4.0 specification. Professional document. For those for whom reference books are not enough, or for a decisive argument in a dispute. The only normative version is English version of this document. However, translations of this document are available at http://www.w3.org/MarkUp/html40-updates/translations.html
Conclusion
Computer science plays a special role in senior specialized schools as a fundamental science about the methods of processing and using knowledge in social practice. Students use technical and software-methodological means of information technology every day, according to their age and existing conditions. Everyday using modern tools of intellectual work, the student not only constructs his own vision of the world, but also learns to effectively use information services in his own life and educational activities.
The elective course “Website Creation Technology” makes its contribution to the general educational training of technology students. The universality of most of the knowledge studied in this course and
methods of activity turns it into a discipline that integrates various subjects of the school course, since it helps students cope with the processing and presentation of a multi-subject information flow.
The success of this course in a specialized school is due to its productive personal orientation, high social conditionality, activity approach, as well as the professionalism of the course authors, who developed it based on their many years of pedagogical experience in teaching schoolchildren and teachers the basics of website building.

preparation for the preliminary level of training - mastering " Basic course" in computer science.
The course is designed for 70 teaching hours.
Goals and objectives of the course:
study graphic file formats and the advisability of using them when working with various graphics programs;
consider the application of computer graphics fundamentals in various graphics programs;
teach students to create and edit their own images using the tools of graphics programs;
teach how to exchange graphic data between different programs.
EDUCATIONAL RESULTS
Students must master the basics of computer graphics, namely:
features, advantages and disadvantages of raster graphics;
features, advantages and disadvantages of vector graphics;
methods for describing colors in computer graphics - color models;
methods for obtaining color shades on the screen and printer;
methods for storing images in raster and vector format files;
graphic data compression methods;
problems converting graphic file formats;
purpose and functions of various graphic programs.
As a result of mastering the practical part of the course, students should
1) create your own illustrations using the main tools of the CorelDRAW vector program, namely:
create drawings from simple objects (lines, arcs, circles, etc.);
perform basic operations on objects (deleting, moving, scaling, rotating, mirroring, etc.);
create your own color shades in various color models;
paint over drawings using various types of fills;
work with the contours of objects;
create drawings from curves;
create illustrations using methods for arranging and combining objects;

Educational and methodological support of the course
The educational and methodological set “Computer Graphics” consists of a textbook and a workshop.
The purpose of the tutorial is to:
provide a deep understanding of the principles of constructing and storing images;
consider the main capabilities of the most popular graphics programs.
In addition, the acquired knowledge and skills should become a good foundation for further improvement of skills.
The computer graphics workshop is an addition to the textbook. It is advisable to study these two books in parallel, since the material of the workshop fully corresponds to the content of the textbook. Each workshop lesson contains links to sections of the textbook that need to be studied, a description of basic work techniques, as well as exercises and projects for independent implementation.
The purpose of the workshop is to:
to consolidate in practice the principles of constructing and storing images;
learn to create and edit images using vector program CorelDRAW and raster program Adobe PhotoShop.
CorelDRAW is currently one of the most popular vector graphics programs. The program gained its popularity due to the fact that it allows beginners and professional artists to create illustrations of varying complexity. On IBM PC personal computers, CorelDRAW is the “king” of drawing programs.
Adobe PhotoShop is the world's most popular raster image editing program. It is used for retouching, tone and color correction, as well as for the purpose of building collages in which fragments of different images are merged together to create interesting and unusual effects.
Part 1. Image Basics 1. Methods of Presenting Graphic Images
Raster graphics. Advantages of raster graphics. Disadvantages of raster graphics. Vector graphics. Advantages of vector graphics
ki. Disadvantages of vector graphics. Comparison of raster and vector graphics. Features of raster and vector programs.
2. Color in computer graphics
Description of color shades on the monitor screen and on the printer (color models). RGB color model. Formation of your own color shades on the monitor screen. CMYK color model. Formation of your own color shades when printing images. The relationship between the RGB and CMYK color models. Color coding in various graphics programs. HSB color model (Hue - Saturation - Brightness).
3. Graphic file formats
Vector formats. Raster formats. Methods for compressing graphic data. Saving images in standard formats, as well as proprietary formats of graphics programs. Convert files from one format to another.
Part 2. Vector and raster graphics programs
4. Creation of illustrations
4.1. Introduction to CorelDRAW
4.2. CorelDRAW working window
Menu features. Worksheet. Organization of the toolbar. Properties panel. Color palette. Status bar.
4.3. Object Basics
Drawing lines, rectangles, squares, ellipses, circles, arcs, sectors, polygons and stars. Selecting objects. Operations on objects: moving, copying, deleting, mirroring, rotating, scaling. Changing the viewing scale when drawing small details. Features of creating illustrations on a computer.
4.4. Shading drawings
Painting an object (fill). Uniform, gradient, patterned and textured fills. Formation of your own color palette. Using built-in palettes.
4.5. Auxiliary operating modes
Tools for precise drawing and positioning of objects relative to each other: rulers, guides, grid. Modes for displaying objects on the screen: wireframe, normal, enhanced.
4.6. Creating patterns from curves
Features of drawing curves. The most important elements of curves: nodes and trajectories. Editing the shape of a curve. Recommendations for creating drawings from curves.
4.7. Methods for arranging and combining objects
Changing the order of objects. Aligning objects on the worksheet and relative to each other. Methods for combining objects: grouping, combining, welding. Excluding one object from another.
4.8. Volume effect
Extrusion method for obtaining three-dimensional images. Perspective and isometric images. Shading, rotation, highlighting of three-dimensional images.
4.9. Flowover
Creation of technical drawings. Creating convex and concave objects. Getting artistic effects.
4.10. Work with text
Features of simple and curly text. Text formatting. Placing text along a path. Creating embossed text. Scaling, rotating and moving individual letters of text. Changing the shape of text characters.
Features of working with drawings created in different versions CorelDRAW programs. Import and export images into CorelDRAW.
5. Editing and enhancing images
5.1. Introduction to Adobe PhotoShop
5.2. Working window Adobe programs PhotoShop
Menu features. Working field. Organization of the toolbar. Properties panel. Panels are auxiliary windows. View images at different scales. Status bar.
5.3. Selecting areas
The problem of selecting areas in raster programs. Using different selection tools: Marquee, Lasso, Magic Wand. Move and change the selection border. Transforms over the selected area. Crop the image.
5.4. Masks and channels
Modes for working with selected areas: standard and quick mask mode. Refine a previously created selection in Quick Mask mode. Save selected areas for reuse in channels.
5.5. Collage. Layer Basics
Features of creating a computer collage. The concept of a layer. Using layers to create a collage. Operations on layers: deleting, moving, scaling, rotating, mirroring, merging.
5.6. Drawing and coloring
Selecting foreground and background colors. Using drawing tools: pencil, brush, eraser, fill, gradient. Coloring black and white photographs.
5.7. Tone correction
The concept of tonal range of an image. Graph of pixel brightness distribution (histogram). Histogram of light, dark and dark

Clog of images. The main task of tone correction. Tone correction commands.
5.8. Color correction
The relationship of colors in an image. The principle of color correction. Color correction commands.
5.9. Photo retouching
Methods for eliminating defects from photographs. Lightening and darkening image fragments manually. Sharpening the image.
5.10. Working with Paths
Purpose of contours. Contour elements. Editing outlines. Outline outline. Converts an outline to a selection border. Use clipping paths to add a portion of a photograph to an illustration created in a drawing program.
1. Practical lessons on vector graphics
Lesson 1. CorelDRAW working window Lesson 2. Basics of working with objects Lesson 3. Shading drawings Lesson 4. Shading drawings (end).
Auxiliary operating modes Lesson 5. Creating drawings from curves
Lesson 6. Methods for arranging and combining objects Lesson 7. Volume effect Lesson 8. Flow effect Lesson 9. Working with text
2. Practical lessons on raster graphics
Lesson 1. Working window of Adobe PhotoShop Lesson 2. Working with selected areas Lesson 3. Masks and channels
Lesson 4. Creating a collage. Layer Basics Lesson 5: Drawing and Coloring Lesson 6: Layers (continued)
Lesson 7. Basics of tone correction Lesson 8. Basics of color correction Lesson 9. Retouching photos Lesson 10. Working with outlines
Lesson 11. Sharing files between graphics programs
FRAGMENT OF A PRACTICUM ON VECTOR GRAPHICS
Lesson 5 Lesson topic: Creating drawings from curves.
In this lesson:
changing the shape (editing) of a curve;
Basic Concepts
Essential Elements of Curves - nodes and trajectories.
A node is the point at which the curve changes its direction. Nodes
become visible if you select the Shape tool and click on the curve (Fig. 1).
As you draw, CorelDRAW sets the type of each node - smooth or sharp.
A smoothed node is a node in which the curve smoothly changes direction.
An acute node is a node at which the line abruptly changes direction.
Rice. 1. Curve drawn by hand using the Freehand tool (Curve)
The Shape tool is used to edit curves.
Operations on a curve: selecting one or more nodes; converting a straight line into a curve and vice versa; changing node types; adding nodes; removing nodes; curve break; combining two open trajectories into one.
All of the above operations are performed using the properties panel (Fig. 2) of the Shape tool.
When editing a curve, CorelDRAW works with three types of nodes: symmetrical, smooth, sharp.
The clipboard is used to temporarily store information when moving and copying data. Clipboard– an area of memory that Windows allocates for temporary storage of moved or copied information. Using the clipboard, you can copy and move fragments within a document, between documents, and even between programs.
Information stored on the clipboard can be pasted repeatedly into one or more documents that can be created in different applications. Data placed on the clipboard is retained until it is replaced with new data or until the end of your Windows session. Typically, there is no need to view information stored on the clipboard. If you wish, you can display and save the contents of the clipboard in a special file using the program Clipboard.
In all Windows applications, allowing the use of the clipboard, the scheme for working with it is standardized. First of all, the fragment to be copied or moved must be selected. Menu item commands are provided for exchange Edit:
· Cut– move the selected fragment to the buffer and delete it from the document;
· Copy– copy the selected fragment to the clipboard without deleting it from the document;
· Insert– paste the contents of the clipboard into the current document. The insertion location is determined by the position of the cursor.
Many applications duplicate these commands in the toolbar as well as in the context menu, and you can move, copy and paste snippets with a simple click on the appropriate button.
Nowadays, specialized programs are widely used that provide the user with greater opportunities when composing text documents, when working with audio and video files. Documents created in different programs, have different formats. They can communicate with each other using Object Linking and Embedding (OLE) technology. Everyone supports this technology Windows programs.
According to OLE terminology, any data (text, drawing, etc.) that is transferred from a document created using one program to a document created in another program is called an object. An object can be an entire document, a separate fragment or symbol.
A linked object is an object (data) created in one file and inserted into another file, maintaining a relationship between the files. The file in which the source object resides and the application in which it is created are, respectively, the source file (source file) and the source application. The file containing the inserted object is called the master document (destination file). A compound document stores information about the program in which the object was created. In order not to break the document-source connection, you cannot move, delete or change the file name.
Linked objects are used when you want the data in the target file to be updated when the data in the source file changes. For example, if a Paint picture is inserted as a linked object in a Wordpad document, then when you change the picture in Paint program, it will automatically be changed in the Wordpad document. When you update data in the target file, the data in the source file does not change.
When a connection is established between objects, the data continues to be physically located in the program where it was created (in the document server). The linked object is not part of the file in which it is inserted. The disadvantage of the linking operation appears when you transfer the client document file to another computer: its connection with the server documents is broken.
