What is powershell in windows 7. Windows PowerShell basics. Cmdlets in PowerShell
Hi all! Today a short note on the topic, how to open powershell as administrator. Let me remind you that PowerShell is a powerful programming and administration language from Microsoft, every year it grows, everything large quantity cmdlets and functionality. Essentially, it is a replacement for the Windows Command Prompt. Below we will consider methods that allow you to open and configure it.
.
Methods for opening a PowerShell snap-in
Powershell is developing very well and with the release of Windows 10 it has already received version 5, but our topic is different. So how to open powershell? Everything is simple if in Windows XP, then nothing. Since it is delivered separately, in all subsequent releases it comes as a built-in component. Most universal method open powershell this click
Win+R and enter powershell

By pressing enter, the PowerShell console will launch, the only problem is that it will not open as administrator. And as a result, many commands will not be executed; below we will see how to do this on behalf of the administrator.

How to run windows powershell as administrator in Windows 8.1 and Windows 7
You can open Windows Powershell through Start. In Windows 8.1, Windows 2012 R2, go to System Tools - Windows and right-click and select Run as administrator.

In Windows 7 and Windows 2008 R2 it looks like this Start > Accessories > Windows PowerShell

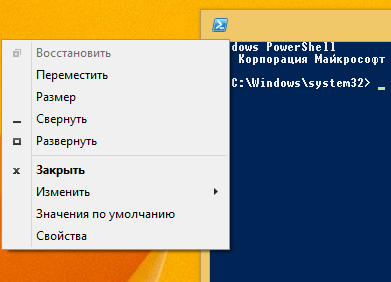
You can also create a shortcut in the task item and right-click on it and select the appropriate item

It would be convenient if PowerShell always opened as administrator, let's implement it. This is done the same way in all versions of Windows. Opening the control panel
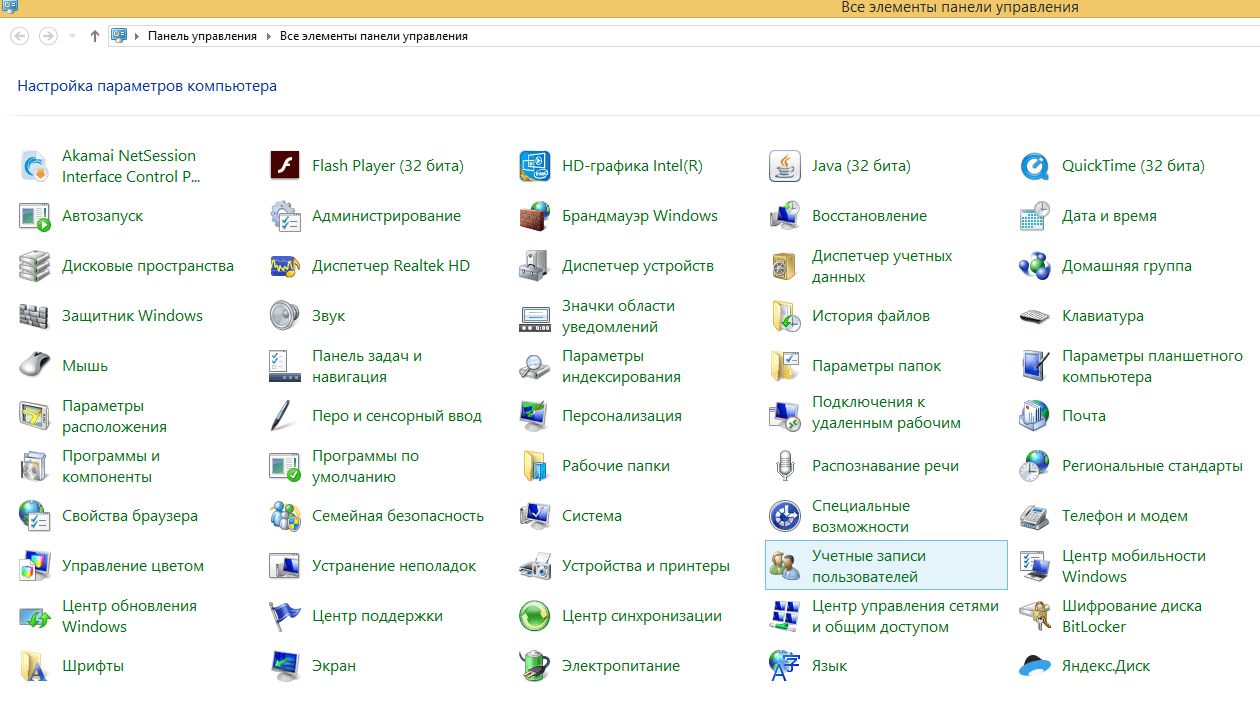

Right-click on it and select Properties. You can immediately see the path to the file where it is located in the system.

Click the "Advanced" button. You will see additional properties. where you need to check the box Run as administrator.

Everything is very simple. I am sure that now you will not have a question about how to open Windows Powershell. Another useful thing is to change the font in the powershell window.
How to Open PowerShell from the Start Button Context Menu in Windows 10
Microsoft is increasingly placing emphasis on command line towards its strong language (PowerShell), and this is logical, since its capabilities for managing operating systems Windows family, are almost limitless, if not more, than in the graphical interface. Beginning with Windows versions 10 1709, in the context menu, PowerShell, replaced the usual cmd for everyone. Right-click on the start button in Windows 10 and from the context menu, select the appropriate item:
- Windows PowerShell
- Windows PowerShell (administrator) is exactly the mode with maximum rights in Windows 10.

Launch Windows PowerShell using Search in Windows 10
On Windows 10 and older versions, you can find PowerShell using regular search, there is a special section for this. Click next to the Start button, the magnifying glass icon. In the search form that opens, enter the word PowerShell. You will search for all options, among which you will find the shell. If you right-click on it, you can open it as an administrator.

Launching Windows PowerShell from the Start menu in Windows 10
To open PowerShell from the Start menu, open it and find the Windows PowerShell item, it will be in the form of a folder, open it and run the appropriate version.

If you right-click, you can run the Vershel shell as an administrator with administrator rights.

Additional and generic shell launch methods
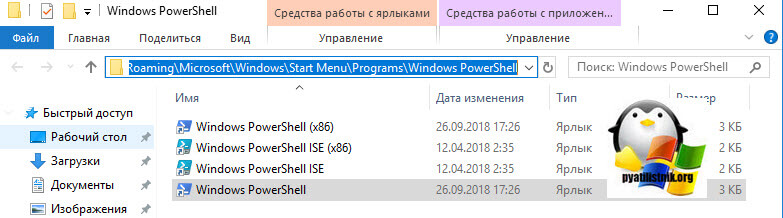
There are also very specific methods for opening a shell with a powerful language from Microsoft. The most clumsy one, it's easy to find executable file and run it directly from a location on the system. Let's go to your Windows 10 along the following path:
C:\Users\username\AppData\Roaming\Microsoft\Windows\Start Menu\Programs\Windows PowerShell
As a result, you will see a folder with shortcuts that are present in the Start menu, you can launch them.
You can also run the original executable file, which is located along the path:
C:\Windows\System32\WindowsPowerShell\v1.0
And by right-clicking on it, you can download it as an administrator, with maximum rights.

You can also launch Windows PowerShell from the command line window; to do this, simply enter the magic word in it and press Enter.

Well, let me also remind you of the method for launching a new task from the “Task Manager” snap-in. Open "Task Manager", select menu item "File - Run new task"

In the window that appears, enter PowerShell.

Well, the last method known to me is to launch PowerShell, via Windows Explorer 10, to do this, open Explorer, select the menu item "File - launch Windows PowerShell", there will be both modes.

What is PowerShell ISE
You've probably noticed that the PowerShell ISE shortcut is everywhere, and you'd like to know what it is. In a nutshell, this is a special shell in which you can write scripts and scenarios in PowerShell, using all the variety of cmdlets that Microsoft offers you.
Powershell changing the font is very simple, go to the Font tab in the properties, where you can set the size from 5 to 72.

You can also get to properties from the utility window itself, click on the icon in the upper left corner and select properties
Here the font settings are slightly different, and as they change, the size of the console also changes.

On the Colors tab, you can set the font color in Powershell and the window itself. By making it black, for example, like the command line.

I also advise that if you are an active console user, set the buffer size not to 50 commands, but at least to 100.

Thank you for your attention. These are the methods for opening the Power Shell console in Windows. Site material
Many users know about the Command Prompt, but very few have heard about Windows PowerShell. In a sense, PowerShell is a tool that aims to replace the command line and provide more powerful capabilities for managing the Windows operating system. In this article, we will try to explain clearly what this tool is, why it is so powerful and who tends to use it most often.
What is PowerShell?
For better understanding, we must first understand what a shell is. In computer science, a shell is a user interface that provides access to various services. operating system. The shell may be command line based or may include a graphical user interface (GUI).
Windows PowerShell is a shell developed by Microsoft for task automation and configuration management purposes. This powerful shell is based on the .NET framework and includes a command line shell and a scripting language.

There may also be a Windows PowerShell ISE on top of the standard command line shell. ISE acts as an integrated scripting environment - a graphical user interface that allows you to create various scripts without having to enter all the commands on the command line.
The first version of PowerShell was released in November 2006 for Windows XP. Windows Server 2003 and Windows Vista. The latest is version 4.0, which was released in October 2013. It comes by default with Windows 8.1 and Windows Server 2012 R2.
What can you do with PowerShell?
Microsoft developed Windows PowerShell as a tool that helps automate and quickly solve many tedious administrative tasks. For example, you can use PowerShell to see all USB devices installed on one or more computers on a network, or you can set up a time-consuming task to run in background while you do other work. You can also identify and terminate processes that are not responding, or filter specific information about computers on your network and export it in HTML format.
PowerShell's capabilities allow you to simplify and automate time-consuming and repetitive tasks by creating scripts and combining multiple commands together.
If you are a network administrator, you will find PowerShell very useful when working with Active Directory. Considering that the tool contains hundreds of customizable commands called cmdlets, the likelihood that PowerShell can help you become more productive is very high.
How to run PowerShell on Windows 8.1?
If you don't have a PowerShell tile on your Start screen or a shortcut on your desktop, then you can open it using search - this is one of the most simple ways. Press +Q, type "powershell" and then press Enter.

You can also open PowerShell from the Applications section of your Start screen: go to home screen and move the cursor to the lower left corner, just below the last tile in the first column. Click on the icon with the arrow pointing down. Then click on the PowerShell icon in the "Utilities" section.
To open PowerShell using the Run dialog, press +R, type "powershell" and press Enter.

How to run PowerShell on Windows 7?
In Windows 7, you can find the tool by searching for "powershell" in the Start menu.

You can also open PowerShell through the Start menu in the Accessories section.

Obviously, the above command in the Run window works in Windows 7 as well.
Who usually uses PowerShell?
Without any doubt, PowerShell is the choice of many IT administrators. And for good reason, because the tool greatly simplifies management operations and reduces the amount of work in large corporate networks.
Let's say you manage a large network containing over five hundred servers, and you need to implement a new security solution that depends on some service that needs to run on those servers. Of course, you can connect to each server and see if the required service is installed and running on them. However, in this case, your management is unlikely to be satisfied, because you will need too much time to complete the task.
WITH using PowerShell you can do this job within a few minutes as the entire operation can be done with a single script that will collect information about the services running on the specified servers and save it as a text file e.g.
PowerShell allows you to do much more than can be covered in one article, so if you are truly interested, we highly recommend that you purchase and read one of the many books that cover the power of this tool.
Have a great day!
In this article we will look at such technology from Microsoft as Windows PowerShell, we will talk about what PowerShell is, what cmdlets and a pipeline are, how to write scripts and modules, and also touch on other equally important and useful features of Windows PowerShell.
Before PowerShell, there were ( and there are) the following tools for automation and administration of services: Windows command line and Windows Script Host. But these technologies have disadvantages.
At the team Windows strings There is also the opportunity to perform some administrative tasks and the ability to write down an algorithm of actions, saving it as a script (bat file), while you can use certain programming elements, for example, use variables, conditional constructs, and even something like loops.
Most software products have a console interface, i.e. we can manage the program using the command line, while saving resources due to the lack of work costs GUI. Microsoft even releases editions without a graphical interface for the Windows Server server operating system ( Server Core, Windows Server 2016 even has Nano Server), but all this is not enough, since the command line capabilities are limited, i.e. We won’t be able to write some complex logic to automate something, and even if we can, it will take time and knowledge.
Also, a disadvantage of the command line is that to fully manage the server we use various console utilities of software products, and therefore using the command line for administration is actually difficult, from the point of view of the fact that all these utilities have different syntax, parameters, methods of use and in order to perform typical tasks, i.e. everyday, you have to keep all this in memory, and to perform atypical tasks you have to first read the help or documentation.
Windows Script Host technology allows you to perform all administrative tasks as the command line, including their automation by writing WSH scripts, but here we can already use full-fledged programming languages ( VBScript and JScript), i.e. complex logic and algorithms can be implemented. In addition, with the help of WSH we manage software products through an object interface, in other words, Windows Script Host is much more “ cooler» than the command line. But this technology also did not become that ideal tool for administration and automation of this administration for system administrators, since Windows Script Host required knowledge of the above programming languages, which is actually superfluous for system administrators. Administrators only need a simple administration tool with the ability to program some actions, and they do not want to delve into the object models of software products in the VBScript and JScript programming languages.
As a result, Microsoft needed to develop an administration tool for system administrators that would 100 percent satisfy all the needs of system administrators, both in terms of administration and automation capabilities, and in terms of convenience and ease of use, thus Windows PowerShell appeared.
What is Windows PowerShell?
Windows PowerShell is a Windows scripting language and command shell designed for administering and configuring Windows operating systems. PowerShell is built on top of the CRL framework and the .NET Framework, and unlike the command line, which accepts and returns text, Windows PowerShell works with objects. Each object in PowerShell has properties and methods that you can use to manipulate those objects.
On Windows Microsoft PowerShell developed the concept of cmdlets ( cmdlets), which is a command naming system " Verb-Noun" This system allows system administrators to quickly master and simplify work with PowerShell.
WITH using Windows PowerShell can:
- Access the file system;
- Manage the registry;
- Manage services;
- Manage processes;
- Configure the operating system;
- Install software;
- Install server roles and components;
- Administer and configure server roles and components;
- Write and use scripts to automate management and administration;
- Perform other system administrator tasks.
Windows PowerShell contains many commonly used utilities and commands that you can run from the command line, such as ipconfig, ping, and others. This was done in order to facilitate the transition of system administrators from the command line to PowerShell.
Also, for convenience, many frequently used commands and utilities in PowerShell have synonyms ( Alias), for example cls is a synonym for the Clear-Host cmdlet, dir is a synonym for Get-ChildItem ( full list synonyms can be viewed by running the Get-Alias cmdlet).
To simplify the search for the desired command, PowerShell has a special cmdlet Get-Command, with which you can search by both verb and noun. All commands in Windows PowerShell are grouped into modules ( e.g. Hyper-V, NetTCPIP), which also makes it easier to find the right command.
Once the required command has been found, you can look at the instructions for working with this command, i.e. help, there is a special Get-Help cmdlet for these purposes, for example the following command will show help for the Get-Command cmdlet:
Get-Help Get-Command
Help in Windows PowerShell can be short, detailed ( parameter -Detailed), full ( parameter -Full), and you can also display only examples ( parameter - Examples). The following command will only show examples of using the Get-Command cmdlet:
Get-Help Get-Command -Examples
PowerShell help is updatable, i.e. it can be updated with the Update-Help command.
Windows PowerShell Versions
The first version of PowerShell 1.0 appeared on November 14, 2006 and was released as a separate distribution that could be installed on the following versions of Windows operating systems: Windows XP Service Pack 2, Windows Server 2003 Service Pack 1 and Windows Vista.
In Windows Server 2008, PowerShell 1.0 came as a component that also had to be installed.
Starting with Windows 7 and Windows Server 2008 R2, PowerShell comes as an integral component of the system ( those. pre-installed, no need to install it). Below is a table of correspondence between the version of PowerShell and the version of the Windows operating system ( those. what version of PowerShell is installed by default on which version of Windows):
| PowerShell version | Windows versions |
| PowerShell 2.0 | Windows 7, Windows Server 2008 R2 |
| PowerShell 3.0 | Windows 8, Windows Server 2012 |
| PowerShell 4.0 | Windows 8.1, Windows Server 2012 R2 |
| PowerShell 5.0 | Windows 10, Windows Server 2016 |
With each new version PowerShell is becoming an increasingly powerful administration tool; by comparison, the first PowerShell had about 130 cmdlets, and PowerShell 5.0 now has over 600!
To know current version In PowerShell, you can use the PSVersion property of the $PSVersionTable built-in variable, for example, run the following command:
$PSVersionTable.PSVersion
Or run the cmdlet
Get-Variable -Name PSVersionTable –ValueOnly
where, the PSVersion value will be the PowerShell version.
PowerShell language
PowerShell is an object-oriented scripting programming language. It is used to write commands to control all components of the Windows operating system in Windows PowerShell, as well as to write scripts to automate administrative tasks in an integrated environment Windows scripts PowerShell (ISE). Although the PowerShell language was created for administration tasks, it is a full-fledged scripting programming language, since it has program constructs that are present in every programming language, such as: conditions, loops, error handling, working with variables, objects, and arrays.
The PowerShell language has a uniform syntax for writing commands and a naming structure for these commands based on the principle “ Verb-Noun", what is he doing given language intuitive for both programmers and system administrators.
Windows PowerShell
Windows PowerShell is an environment for executing commands and scripts in PowerShell. This shell has the same capabilities as the command line, such as: storing command execution history, setting appearance shell, completing commands with the Ctrl+C key combination, as well as many other features that are not available in the command line shell, for example such a wonderful feature as “ syntax highlighting» ( introduced in PowerShell 5.0).
There are several ways to launch PowerShell, for example:
- From the command line by typing PowerShell;
- Through the dialog box " Execute» ( keyboard shortcut Win+R), also typing PowerShell;
- In Windows 7 - Start->All Programs -> Accessories -> Windows PowerShell -> Windows PowerShell;
- In Windows 8.1 or Windows Server 2012 R2 - Start->All Programs -> System Tools -> Windows PowerShell;
- In Windows 10 or Windows Server 2016 - Start->All Programs -> Windows PowerShell Directory ( in group W) -> Windows PowerShell.
Example of running PowerShell in Windows Server 2016

Screenshot of PowerShell in Windows Server 2016

Cmdlets in PowerShell
Cmdlet (cmdlet) - This Windows team PowerShell, with which you can interact with operating system objects in order to manage them. These commands are part of the PowerShell language. Cmdlets are built according to the principle “ Verb-Noun", separated by a hyphen (-); in other words, we first indicate what to do, and with a hyphen we indicate what to do. For example, the Get-Help cmdlet, where Get is a verb meaning " Get", and Help is a noun " Help" in the context of PowerShell " Show – Help" PowerShell cmdlets return results as objects, which is one of the main differences from the Windows Command Prompt, in which commands return only text to the screen.
In addition to cmdlets for obtaining data (Get), there are also types of cmdlets such as:
- Add – adding data;
- Clear – clear;
- Enable – enable;
- Disable – turn off;
- New – create;
- Remove – remove;
- Set – set;
- Start - start;
- Stop – stop;
- Export – export;
- Import – import;
- And many more.
A complete list of cmdlets in Windows PowerShell can be viewed using the special Get-Command cmdlet. For example, run it with the -CommandType cmdlet parameter, as a result, a list of cmdlets will be displayed on your screen.
Get-Command -CommandType cmdlet
As you already understood, cmdlets have parameters with which we can specify the actions of the cmdlet. Parameters can be required or optional; for example, the Get-Command cmdlet has no required parameters.
The picture below shows a way to search for a cmdlet by verb ( Verb parameter). In this case, we displayed a list of cmdlets that can restart something.

Team
Get-Command -Verb Restart
To search for a cmdlet by noun, you must use the Noun parameter. For example, below we have a list of cmdlets that work with services.

Team
Get-Command -Noun Service
If you don't find the cmdlet you need by full name You can use a mask in *Text* format.
Pipeline in PowerShell
One of the main Windows features PowerShell is able to use a pipeline when executing commands.
Conveyor– this is the transfer of the result of a cmdlet through a vertical bar (|) to another cmdlet. At the same time, as you remember, in PowerShell cmdlets work with objects and return objects; accordingly, objects are also transferred along the pipeline.
Using a pipeline, you can perform complex tasks in a simple and convenient way without the need to write complex algorithms and scripts.
For example, let's find out the name of the largest file in the directory "C:\Windows\System32" ( simple example of a pipeline).

Team
Get-ChildItem -Path "C:\Windows\System32" -File | Sort-Object length -Descending | Select-Object -First 1
- Get-ChildItem – cmdlet for getting objects in the specified directory;
- Sort-Object is a cmdlet for sorting objects, in our case we sort by file size ( length -Descending);
- Select-Object is a cmdlet for selecting the desired properties of an object; in our case, we display standard fields and only the very first object, i.e. large file (parameter -First 1).
All cmdlets are separated from each other by a vertical bar. The result of each cmdlet is passed as input to another cmdlet, i.e. first we get all the objects in the specified directory, then we sort the result and finally select the very first object.
Background execution of tasks
Windows PowerShell has the ability to run jobs in the background, which is a mechanism by which you can run a command ( for example, which takes a long time to complete) in the background, i.e. after launch, you return to the current session and can continue working without waiting for the command to finish. This opportunity You will need it when you need to run a command that takes quite a long time to complete, and as you know, during this time the PowerShell session is blocked until the command completes, and you need to continue working.
You can manage all the tasks that are running in the background, for example, view the list of tasks, stop the task, delete the task, and, of course, view the result of the task.
Windows PowerShell has the following cmdlets for working with background jobs:
- Start-Job – start a background task;
- Stop-Job – stop a background task
- Get-Job – view the list of background tasks;
- Receive-Job – view the result of a background task;
- Remove-Job – remove a background task;
- Wait-Job – move a background task to the foreground in order to wait for it to finish.
To run in the background, you need to write the Start-Job command, and in curly braces () a command or set of commands that you want to run in the background.
For example, let's run some task ( show list of services) in the background, then look at the list background jobs and display the result of our task on the screen ( those. list of services).
Run a task in the background
Start-Job (Get-Service)
We look at the list of tasks running in the background
Displaying the result of Job1
Receive-Job Job1

As you can see, we now have a task with the status “ Completed", i.e. it has already completed ( Get-Service just works quickly).
In order to see the result of the background task, i.e. Get-Service cmdlet, we executed the Receive-Job command and passed it the job name ( the identifier value is also possible). As a result, we displayed a list of services.
Remote control using PowerShell
Windows PowerShell is designed not only for local use, but also for remote command execution. This feature is necessary so that you can control remote computers from your workplace, i.e. run PowerShell commands.
There are several ways remote control:
- Using the parameter –ComputerName (many teams have it). In other words, you pass the name of the computer on which you want to execute the command as a parameter. The method has the disadvantage of being limited to the execution of one command;
- Using sessions. Cmdlet Enter-PSSession (interactive session). In this way, you connect to a remote computer and all the commands that you type in PowerShell will be executed on remote computer just as if you were typing commands directly on the remote computer. The method also has the disadvantage that the session is limited to one computer;
- Using a cmdlet Invoke-Command. By using this method You can run commands or scripts on one computer or on several.
For example, to connect to a remote computer ( in the example below ServerName) in an interactive session, run the following command:
Enter-PSSession ServerName
Scripts, functions, and modules in Windows PowerShell
If you have written an algorithm, most likely you will want to save it in order to use it in the future. Windows PowerShell has a scripting mechanism for this purpose.
The essence of this mechanism is as follows: you write the set of commands you need and save it as a script - this is a simple text file with the extension .PS1.
Then, to run this script, you simply run it in PowerShell. In this case, you need to either specify the full path to the script file, or go to the directory with the script and call it by name.
Important!
By default, running scripts on Windows is prohibited! To view the script execution policy, run the cmdlet Get-ExecutionPolicy. As a result, it will return the current policy, for example:
- Restricted – execution of any scripts is blocked ( default value);
- AllSigned – execution of scripts that have a digital signature is allowed;
- RemoteSigned – execution of local scripts is allowed, all downloaded scripts must have a digital signature;
- Unrestricted - execution of any scripts is allowed ( not recommended as it is unsafe!).
To enable scripts to run, you must use the cmdlet Set-ExecutionPolicy with one of the above parameters.
For example, to allow local scripts to run, run the following command and accept the changes by pressing Y.
Set-ExecutionPolicy RemoteSigned
You can pass parameters to a script, make them mandatory, or set a default value.
Windows PowerShell provides a mechanism for creating your own functions, which, like built-in cmdlets, can be used in the PowerShell shell.
To do this you need to specify keyword Function and then in curly braces () write the algorithm for this function, i.e. command set ( for example, some frequently used procedure: create a user with certain rights, clean out certain directories, and so on). Then you need to save all this into a script, but only with the extension .psm1, since this file will already be a module.
That's not all, this file must be placed in the directory where PowerShell looks for modules. There are several such directories ( special directory in the user profile, the directory where PowerShell is installed), they can be viewed in PowerShell environment variables. To do this, run the following command
Get-ChildItem Env:\PSModulePath | Format-Table -AutoSize
Once you place the module you wrote in a special directory, you can access your functions as normal PowerShell commands.
Windows PowerShell Integrated Scripting Environment (ISE)
In order to make it convenient to write scripts, functions and, accordingly, modules, Microsoft has developed a special graphics program Integrated Scripting Environment(ISE) - Integrated Scripting Environment. It is very convenient to work in this program, and it also has powerful functionality ( creation of multiple tabs with scripts, output area, built-in debugger and more).
You can run it like this:
- In Windows 7 - Start -> All Programs -> Accessories -> Windows PowerShell -> Windows PowerShell ISE;
- In Windows 10 or Windows Server 2016 - Start->All Programs -> Windows PowerShell Directory ( in group W) -> Windows PowerShell ISE.
Note! ISE will not work on Windows system Server installed in the Server Core version.
Screenshot of the PowerShell Integrated Scripting Environment (ISE) in Windows Server 2016

That's all for me, I hope the material was useful to you! Good luck!
Running a program from PowerShell
The task of running any executable file (program or command line utility) from PowerShell occurs quite often. PowerShell offers several options for this. in various ways, which we will consider later in this article. Let's start with the simplest...
Direct launch
The easiest way to run an executable in PowerShell is to navigate to the directory with the file and run it directly. For example, let’s take a simple program that displays a greeting and execute it with the command:
Set-Location ″C:\Program Files″
.\Hello.exe
Please note that even if you are in the desired directory, you must specify the relative path to the executable file. The exception is files from the directories listed in environment variable(path). For example, various built-in programs and utilities (notepad, calc, ping, etc.) located in the Windows\System32 directory can be launched without specifying the path.

Operator &
If you need to specify the full path to the executable file, you can use the operator & (call operator). It allows you to execute a string of text specified in quotes like a single team. For example:
& ′C:\Program Files\Hello.exe′
Since the & operator does not parse the command being passed, it cannot interpret its parameters. Therefore, additional parameters\arguments are also passed as text, in quotes. As an example, let's take the previous program and modify it slightly so that it accepts the desired text as an argument:
& ′C:\Program Files\Hello.exe′ ′Hello, world′
If desired, you can specify multiple arguments separated by commas:
& ′C:\Program Files\Hello.exe′ ′Hello,′, ′ world′
For convenience, the command and arguments can be placed in variables:
$exe = ′C:\Program Files\Hello.exe′
$arg1 = ′Hello′
$arg2 = ′world′
& $exe $arg1 $arg2

Well, if there are a lot of arguments, then they can be combined using the following construction:
$exe = ′C:\Program Files\Hello.exe′
$allargs = @(′Hello,′,′world′)
& $exe $allargs
Invoke-Expression
The Invoke-Expression cmdlet works much the same way as the & operator—it takes a text string and executes it as a command. For example:
Invoke-Expression -Command ′C:\Windows\Hello.exe′
However, it has one big drawback, namely the inability to work with spaces. For example, the following command will cause an error:
Invoke-Expression -Command ′C:\Program Files\Hello.exe′
This feature makes using the cmdlet extremely inconvenient. Although, if necessary, such errors can be avoided using additional quotes, for example like this:
Invoke-Expression -Command ″C:\′Program Files′\Hello.exe″

Start-Process
The Start-Process cmdlet starts specified file as a process using the method Start.NET class Process. For example:
Start-Process -FilePath ′C:\Program Files\Hello.exe′
By default, the process runs in separate window, which closes at the end of the process. You can change this behavior using parameters, so the following command will run in the current window:
Start-Process -FilePath ′C:\Program Files\Hello.exe′ -NoNewWindow -Wait
Start-Process also allows you to pass additional arguments to the process:
Start-Process -FilePath ′C:\Program Files\Hello.exe′ -ArgumentList ′Hello, world′ -NoNewWindow -Wait
By default, the cmdlet does not return anything, but you can use the -PassThru parameter to force it to return a process object. It is very convenient to place this object in a variable:
$process = Start-Process -FilePath ′C:\Program Files\Hello.exe′ -Wait -PassThru
from which you can then learn many useful things, such as the status:
$process.HasExited
$process.ExitTime
or execution code:
$process.ExitCode

.NET
In principle, the .NET Process class can be used directly, without the Start-Process cmdlet. For example, you can start the process with the command:
::Start(′C:\Program Files\Hello.exe′)
This method is quite inconvenient and cumbersome (in my opinion), but a little more flexible in use. For example, let’s run our program in the current window, pass arguments to it and take the execution result:
$process = New-Object -TypeName System.Diagnostics.Process
$process.StartInfo.FileName = ″C:\Program Files\Hello.exe″
$process.StartInfo.Arguments = ″Hello,world″
$process.StartInfo.RedirectStandardOutput = $true
$process.StartInfo.UseShellExecute = $false
$process.Start()
$process.WaitForExit()
$process.StandatdOutput.ReadToEnd()
WMI
You can do almost anything with WMI, including running a program. The method is quite suitable for this Create WMI-class Win32_Process. This method starts a process on a local or remote machine via RPC. For example, to run a program on local computer you can use this command:
()″Win32_Process″).Create(′C:\Program Files\Hello.exe′)
And to execute on a remote computer, the command will look like this:
()″\\remotecomputer\root\cimv2:Win32_Process″).Create(′C:\Program Files\Hello.exe′)

Alternatively, you can use the Invoke-WmiMethod cmdlet:
Invoke-WmiMethod -Class Win32_Process -Name Create -ArgumentList ″C:\Program Files\Hello.exe″

Or using the Invoke-CimMethod cmdlet:
Invoke-CimMethod -ClassName Win32_Process -MethodName Create -Arguments @(CommandLine=″C:\Program Files\Hello.exe″)
WMI runs the process in a separate window and returns an object containing the process ID (ProcessID) and the result of execution (ReturnValue). ReturnValue can take the following values:
0
— Successful Completiom
2
—Access Denied
3
— Insufficient Privilege
8
—Unknown Failure
9
— Path Not Found
21
— Invalid Parameter
Invoke-Command
The Invoke-Command cmdlet can execute commands on a local or remote computer using WinRM. For example, to run our program on the local computer we use the command:
Invoke-Command -ScriptBlock (″C:\′Program Files′\Hello.exe″)
If necessary, you can pass arguments to the program:
Invoke-Command -ScriptBlock (C:\′Program Files′\Hello.exe ″Hello,world″)
Please note that Invoke-Command is not very friendly with spaces, so to avoid errors you have to get creative with quotes. However, such problems can be avoided, for example, by combining the use of the cmdlet with the & operator:
Invoke-Command -ScriptBlock (& ′C:\Program Files\Hello.exe′)
Invoke-Command is mainly used for remote control; its main advantage is the ability to execute simultaneously on several computers. For example:
Invoke-Command -ScriptBlock (″C:\′Program Files′\Hello.exe″) -ComputerName SRV1,SRV2,SRV3
$scriptblock = (″C:\′Program Files′\Hello.exe″)
$Computers = @(′SRV1′,′SRV2′,′SRV3′)
Invoke-Command -ScriptBlock $scriptblock -ComputerName $Computers
By default, the cmdlet returns the result of program execution, and if you run it in the background (the -AsJob parameter), it returns a Job object:
Invoke-Command -ScriptBlock (C:\′Program Files′\Hello.exe) -ComputerName localhost -AsJob -JobName Hello
Invoke-Item
The Invoke-Item cmdlet is designed to apply a default action to a file. So you can run the executable file with the command:
Invoke-Item -Path ″C:\Program Files\Hello.exe″
However, it is most convenient to use Invoke-Item to open a specific type of file. For example, this is how we open a text file:
Invoke-Item -Path ″C:\Files\test.txt″
And that's all text files in folder:
Invoke-Item -Path ″C:\Files\*.txt″
CMD
Well, in conclusion, another way to launch a program from PowerShell is using the cmd shell. The method is quite “indirect”, but nonetheless works. The following command starts a new instance of cmd, executes in it the specified program, exits cmd and returns the result:
cmd /c ″C:\Program Files\Hello.exe″
PoSh provides such an abundance of ways to launch a program. And each of them is good for certain situations.
By the way, the article was written based on PowerShell: Deep Dive and Best Practice. I recommend reading it, there is still a lot of interesting stuff there.
There are several different ways to run the script, the main ones are below:
- Launch PowerShell and run the script in it (enter the path to the file and the file name, for example, like this: C:\Scripts\test.ps1, or go to the script folder with the command cd C:\Scripts and run it with the command.\test.ps1) The shell can be found and launched in many ways. One way is through the Start menu. For Windows 7 - you need to go to "All Programs" - "Accessories" - "Windows PowerShell" and launch the "Windows PowerShell" shell. For Windows 10 - you need to find the group with the letter "W" and in it you will find "Windows PowerShell".
- Launch "Windows PowerShell ISE" is a program - a development environment that allows you to edit and debug PowerShell scripts, which is also available by default along with PowerShell itself. Having launched it, you just need to click the "Open" button or go to the File menu - Open and select required script, then press F5 or the "Run Script" button. You can find Windows PowerShell ISE in the same place as PowerShell - in the Start menu.
- Launch standard command line and write in it:
powershell -file<имя_скрипта> (example: powershell -file myscript.ps1)
If you haven't run PowerShell scripts before, you'll likely receive the following message: Can't download file<имя_скрипта>, since script execution is prohibited for this system. Type "get-help about_signing" for more information. This is due to the fact that for security reasons and to prevent accidental execution of malicious code, all scripts must be digitally signed.
How to allow execution of an unsigned PowerShell script?
1. In PowerShell, before running the script, run the command to allow execution of unsigned scripts for the current shell session:
Set-ExecutionPolicy RemoteSigned -Scope Process
2. At startup from the standard command line use the -executionpolicy parameter, i.e. run the script like this:
<имя_скрипта>
Both methods set the policy only for the current session, while the security policy for executing PowerShell scripts written in the registry will not be changed and will remain the same. If you want to change the script execution security policy to “permanent”, then use this method:
3. Allow launch forever: Launch PowerShell as Administrator, then run the command:
Set-ExecutionPolicy RemoteSigned
Note: If the script was downloaded from the Internet, then in order to avoid a request to confirm the launch, you need to use Bypass instead of RemoteSigned - completely disabling any requests and warnings.
How to run a PowerShell script in the background?
To do this, just use the launch parameter -WindowStyle, which can take the following values: Normal, Minimized, Maximized and Hidden. Thus, to run an unsigned script in the background, you need to run the command:
powershell -executionpolicy RemoteSigned -WindowStyle Hidden -file<имя_скрипта>
You can also add -NonInteractive if you wish, so that the script does not ask any questions. Thus, the script will be executed unnoticed by the user. Be careful when using this method.
Running a PowerShell script with parameters
The actual launch should be done as if you were launching regular program or bat file with parameters. For example, to run a script with parameters from the command line, you can write the following command:
powershell -executionpolicy RemoteSigned -file<имя_скрипта>param1 param2 "another text parameter"
In the script itself you can get these parameters like this:
Param ($var1, $var2, $var3) echo $var1, $var2, $var3
In PowerShell ISE, you can run a script with parameters in the same way using the command pane.
How to run a PowerShell script using a shortcut?
This task can be accomplished in two ways:
- Create a bat/cmd file in which to write a command to run the script (you have read the parameters above)
- Create a shortcut to PowerShell, which can be found in the c:\Windows\System32\WindowsPowerShell\v folder<версия>\ and in the shortcut properties in the "Object" field, add the necessary parameters.
So, for example, to run powershell script When the user logs in, you can simply create a shortcut as described in paragraph 2 and place it in startup. Also, creating a shortcut using one of the methods above will allow you to easily run the script as an administrator or as any other user as a regular program.
The PowerShell scripting language is quite a powerful tool for solving various problems, but it can be used not only for good things, but also for bad things, so use it wisely ;)
