Making a laptop case with your own hands. Ways to restore a broken laptop case Do-it-yourself laptop case made of wood
IN Lately more and more owners personal computers and laptops pay attention to the fact that modern gadgets do not always meet individual requirements: there is not enough volume hard drive, random access memory too little, the video card cannot cope with the load of the most interesting games, cooling does not produce visible results, etc.
At such moments, many people think about how to replace unsuitable parts with more durable ones. But this undoubtedly becomes an expensive pleasure. PC owners have long decided this problem: everything in the old building is being replaced. Technicians assemble computers from suitable components. All they need to do is choose the right motherboard and then it’s a matter of financial capabilities. But if everything is clear with the PC, then how to assemble a laptop yourself using components?
All PC components easily fit into the case, but you will have to tinker with assembling the laptop yourself. All components can be divided into two categories:
- Basic ones, without which the device will not turn on.
- Minor ones that do not affect the performance of the device.
Motherboard and CPU
First of all, before assembling a laptop using the components yourself, you should raise the issue of the motherboard and processor. First you need to decide on the type of central device. On the manufacturer's website you can find several different modifications of the same processor. It is worth selecting characteristics according to the following requirements: frequency, number of cores, maximum memory, etc. You also need to find out what socket the processor has and, based on this information, select a motherboard. It is worth noting that some motherboards are not equipped with additional space for a video card, but only work with an integrated one. In this case, they are not suitable for gamers.
Video card
When answering the question of how to assemble a laptop yourself from components, it is impossible to ignore the video card. How motherboard and the central processor, this component is the main one for a laptop. On this moment nVIDIA devices are rightfully considered one of the best video chips. The flagships of this manufacturer meet the requirements of even the most modern gamers. On the company's official website it is easy to find and download drivers for the selected video chip.

But there is no need to rush into making a choice. First you have to check whether the motherboard supports this device. It is enough to enter the model of the “motherboard” and video chip into the search engine.
RAM
Many workers service centers or self-taught engineers can devote hours to explain the importance of RAM. A damaged plate will prevent the processor and system from starting. When it comes to how to assemble a laptop yourself from components, it is important not only to choose the right RAM, but also to determine its volume.
This choice is based on characteristics central processor and information stated on the official website. For example, with support for DDR4 memory and a capacity of up to 8 GB, you can install DDR3 at 16 GB. The laptop will work, but not correctly. To properly assemble a laptop from components, you will need to find out the frequency of the RAM that the processor supports. For example, 1600 MHz. When choosing a memory stick of 1333 MHz, it will work at its full frequency. But if the frequency is higher (for example, 1866), then the extra 226 MHz will not be used.

Next, you need to find out how many RAM slots are located on the motherboard: one or two. The volume of the slats depends on their number. If the processor supports 16 GB of RAM, and the motherboard has two slots, then you can purchase two 8 GB sticks or one 16 GB, leaving room for expansion.
Cooling
There is a lot of information on how to assemble a laptop from components. And everywhere contains data about the cooling system. This type of component is also essential, as it helps prevent overheating. Experts advise using cooling systems that were specifically designed for the selected motherboard. Then all the fasteners and bends will match exactly.
HDD
Though HDD and refers to the main elements that will help resolve the issue of how to assemble a laptop from components, expert advice boils down to one thing: the volume and manufacturer are selected individually. For more quick launch and "responsiveness" of programs and operating system It is better to give preference to solid state drives (SSD). However, their price is significantly higher than regular ones.
Display and matrix
When the question of how to assemble a laptop from components has almost been resolved, the instructions give the item: matrix. It must be selected so that it matches the connector on the motherboard. Sometimes the matrix can be sold together with a cover, then it is worth considering the location of the fasteners on the case.

Particular attention should be paid to the technology according to which the display is produced: TN or IPS. The first one is currently considered very outdated: poor color rendition and small viewing angles make it difficult to enjoy the picture. IPS, although more expensive, will allow you to watch your favorite films and TV series from any angle.
Frame
One of the main rules when choosing a case is that its size must be equal to or larger than the size of the motherboard. Also, when choosing, you should pay attention to the number of USB connectors, audio outputs, HDMI, etc. The body of the future laptop should not be smaller than the diameter of the display. Users can also choose the material from which the case is made: plastic or metal.
Minor Components
Selecting other components is much easier. The keyboard and touchpad are equipped with identical connectors; all that remains is to decide on the dimensions. The battery selection is simple: either one designed for the motherboard, or an analogue one with equal or greater capacity. Charger selected depending on the battery output.

Whether to add a disk drive or not is the choice of each user. However, disks are used less and less, and the freed up space can be converted into extra hard disk. Interfaces for Wi-Fi and Bluetooth are often integrated directly into the motherboard, but if not, the problem is easily solved with the help of adapters.
Good afternoon, Khabrovsk residents. Thank you very much for the invite! And although starting with translating other people’s posts is not the best good idea, perhaps this homemade project will seem mega-cool to someone else.
This is a translation of a post from the Overclock.net forum. User Show4Pro decided to take out all the insides of his super computer and hang everything on the wall. Great idea perfectly executed. For those who are interested in how it was assembled and how it works - welcome to the cat.
Last time I updated mine home car 1.5 years ago. Well, I thought about upgrading the car to i7 (before that there was Bloomfield), although in fact, more powerful processor I didn't need it. I wanted to buy new building- Corsair 900D, to change the 8 year old Super Armor. But I wanted something special, unique. In Battlestations on Reddit, I came across a very simple but elegant solution - a wall computer. And that's where the whole project began.
Accessories:
CPU: Intel Core i7 950
Motherboard: Asus Rampage III Extreme
Video cards: 2 x AMD HD7970
RAM: 6 x 2GB Corsair Dominator
SSD drives: 4 x 120GB Corsair Force GT SSD
HDD drives: 2 x 1TB WD Caviar Black
2TB WD Caviar Green
1.5TB WD Caviar Green
Power supply: Corsair AX1200i
Sound: Creative Sound Blaster Zx
Cooling:
Cooling for CPU:
CPU Water Cooling Radiator EK Supreme HF Full Copper
Pump Swiftech MCP655 /w Speed Control
The cooler itself FrozenQ Liquid Fusion V Series 400 ml Reservoir - Blood Red
XSPC RX360 Performance Triple 120mm Radiator
GPU cooling
Heatsink for video card EK FC7970 - Acetal+EN
The pump and cooler are the same as for the processor.
Swiftech MCP655/w Speed Control
FrozenQ Liquid Fusion V Series 400 ml Reservoir - Blood Red
Water cooling radiator Watercool MO-RA3 9x120 LT Radiator
Other:
Cooling system pipes
Koolance QD4 Quick Discounnect No-Spill Coupling
Bitspower G1/4 Silver Triple Rotary 90deg Compression Fittings
Monsoon Free Center Compression Fittings
Phobya Angled Clip 90° Tubing Guide
Phobya Terminal Strip Tubing Clip/Holder
The cooling tubes themselves (red) PrimoChill Advanced LRT Tubing Bloodshed Red
Phosphorizing refrigerant, blue color EK UV Blue Non-Conductive Fluid
Cables:
Bitfenix Alchemy Premium Sleeved Extensions
Corsair Individually Sleeved Modular Cables
Creation.
To start, I took photos of all the components in their actual sizes and put it all together in Photoshop. This way I was able to move them around the work surface and decide what it would look like. Well, this is also necessary for routing the cooling pipes. Here are a couple of layouts:
I abandoned this because of the empty space in the lower right corner. And the motherboard ended up on the left, although it should be in the very center and attract attention to the entire panel. 
There is also a lot of space on the right, although the power supply and motherboard are closer to the center. IN final version cooling tubes stretch along the entire right edge, plus two thermometers appeared there.

I transfer the drawing of the motherboard onto an acrylic sheet.

Since the video adapters will be far from the motherboard, I ordered PCIe slot extenders for each card on eBay. This is me testing how they work. However, later I had huge problems with the cross-function of the cards due to cheap unshielded wires. They ended up on top of each other and created serious interference. The system was stuck loading the BIOS. It was possible to launch it with only one card. In the end, I had to fork out a lot expensive cables with good protection. But more on that later.

The goods have arrived!

Most of the water cooling is from Performance-PC. They even gave me a T-shirt and two mouse pads!

Acrylic backing for motherboard.

All acrylic panels are cut at 45° to achieve a glowing edge effect.

The holes are drilled and the fasteners are installed.
TA-dah!!! It turns out that the mother of Rampage III Extreme is eATX format. And this is for the ATX form factor.
I made the correct eATX substrate later.

Time to gut my old dusty case.


In the old computer, the disks are inserted into Vantec HDCS boxes, which make 3 HDD boxes out of 2 5.25" ones.


Video cards.
Supports for all components.

Custom acrylic pump mounts.

Close-up of rough trim done with a table saw. They will need to be sanded later.

There is a triangular cut in the center of each plate. It will reflect light that is projected perpendicularly inside the plate at the edges. Without a cut, the edges barely glow.


Test with the light on on the sound panel.

All panels are sanded with 120 grit wet sandpaper.

Close-up of sanding.
All back panels are pre-drilled.
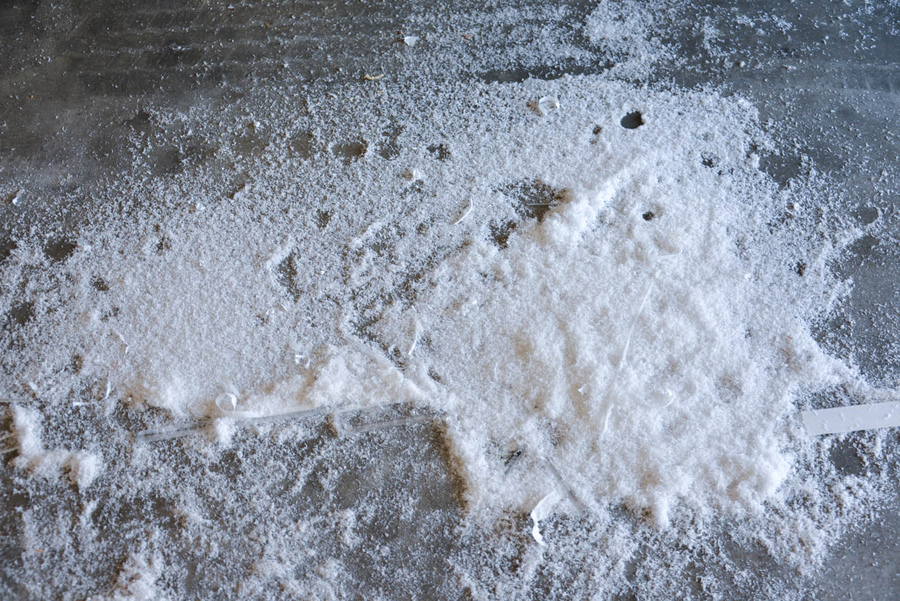
Under the table is acrylic snow.

Preparing to paint red.
Surprisingly, Corsair included thermal pads on the blades, although they don't get hot at all.

Marking all components on the main board to mark various slots and holes. Board - 1/4" 48 x 30 fiberboard.

All cracks and holes are marked in their places.

I'm getting ready to cut out the slots with a jigsaw.


I glue the frame.


I paint the inner edges black - to match the color of the carbon film.


Soldering LED strips.

Workplace.


LED strips. Temporary fastening.

I glue a giant vinyl film. This was the cruelest part. I almost had a heart attack. How to stick a film on a phone screen, only x1000 more.

No bubbles!


I use aluminum tape to hide the LEDs on the front side of the hard drive panel, between them.

My assistant is Tommy.

All substrates are installed in their places on the common board using #10 screws. I screwed them into pre-prepared holes.


Checking the light.

Coolant and cables have arrived. I used Bitfenix for the components and Corsair for the power supply.


On the left is Bitfenix, on the right is Corsair. Bitfenix doesn't have black heat shrink on the ends, so the Corsair looks cooler.

Red zip ties to tie up hanging wires.

Backside. All cables are connected.

We test for leaks while the entire system is lying on the floor - this makes it easier to troubleshoot problems.
First start.
Not loaded. I connected via iROG USB to the laptop to view the download log. It turned out that the system was stuck on the VGA BIOS. I disabled one of the video cards - everything worked. I tried to connect another one - it also works. Both cards are not. Did some research and found that unshielded PCIe extenders with ribbon cables are very susceptible to EMI. I tried to shield them by wrapping them in several layers of aluminum foil. 

After 4 layers of foil I was able to get both cards running. But the machine immediately froze as soon as I launched any game or any 3D editor. Moreover, my Soundblaster is also cascaded with a cable to the 3 x1 PCIe slot, and this also greatly interfered with the operation of the video and hung up the system.
As a result, with pain in my heart, I had to order expensive protected extenders for PCIe slots from 3M (approx. $100 each)

Shielded 3M extension cords in place. They turned out to be longer than the previous ones and now both video cards have reached PCIe x16.


Changed the previous sound to SoundBlaster Zx. This one looks amazing!

And finally
At the moment everything is working smoothly. The installation has only 2 fans. It barely moves on the PSU, and I installed another one on the chipset - it’s very quiet. The pump runs at the lowest power, so the computer came out quite quiet. The only annoying thing is that it turns out that some components can be heard operating outside the case. In my case, this is the buzzing of the video and 1TV hard drive.EK UV refrigerant is very sensitive to ultraviolet radiation. I know you shouldn't mix coolants to preserve their properties, but damn if I used it undiluted, I wouldn't be able to see the coils in the reservoir. For both circuits I used about 1/8 of the jar, the rest was distilled water.
From the translator
I in no way claim any authorship of this incredible project. It’s just that I’m a journalist with a degree in electronics engineering, and doing such things is my dream. And to be honest, I would make a table, not a wall. So I decided, suddenly not all Khabrovsk residents are sitting onFor a computer in a store. They can be horizontal or vertical - this is the most common type. However, if you do not take into account some variation in the front panel, they all look the same, differing only in color. A boring metal box with a couple of buttons and a couple of LEDs may not satisfy the sense of beauty, and then you want to make a case for your PC with your own hands. There is another situation - the existing one is no longer suitable in terms of functionality - there is not enough space in it or there is insufficient ventilation, causing the computer components to overheat. For example, sometimes you need to add a second video card or several hard drives, and a standard case becomes unsuitable for all this. There are other situations when you have to make a computer case yourself. For example, all the money is spent on top-end components, but there is not enough budget for the body. Or you have a laptop with a faulty display, and you want to turn it into a desktop one. The cases are different, but they have one thing in common - you need to pick up the tools and make a computer case with your own hands.
Making your own PC case.
What you need to consider
The most important requirement for any computer case, including a homemade one, is sufficient space for ventilation and cooling. It is no coincidence that in the standard, most common Moddle-Tower Form cases there is a lot of empty space. This allows air to circulate freely, and when installing energy-intensive components, it is possible to add additional fans. Therefore, when developing a home-made design, it is necessary to take into account not only the dimensions of all components, but also provide free place for air circulation around each of them. You also need to decide how the power supply will be installed. There are two options:
- Above. This is a classic scheme in which warm air passes through the power supply to the outside. This ensures ventilation and reduces noise levels. But there is also a minus - the power supply itself may overheat if there are no other coolers. The circuit diagram of a system case with a top-mounted power supply is usually used to create it yourself.
- From below. In this case, the power supply is placed on the bottom of the case, and air enters it from below, through the grille, and is blown out through another wall. Plus - the power supply is well cooled exclusively by “outside air”. The downside is that it does not participate at all in the cooling system of the system as a whole, so coolers are definitely needed. Another disadvantage is that the air flow to the power supply occurs under the bottom of the case and can be difficult. In addition, the noise level will be increased - it is created by the movement of air below, plus the noise from the fan is transmitted directly to the surface.
If you select horizontal version– Desktop type, then the requirements remain the same, except that there is less room for maneuvers with the power supply. However, ventilation must be provided for all units.

Which material to choose
A homemade computer case should not only be beautiful, but also durable and functional. Although some even make it from cardboard boxes, this is not at all serious. Usually the following materials are chosen:
- Tree.
- Plexiglas.
- Aluminum.
- Steel.
Each option has its advantages and disadvantages. Let's take a closer look at them.

Plexiglas is easy to saw and cut; with proper care, the body turns out to be quite professional. This option is usually chosen by modding enthusiasts - creators of beautiful and original transparent cases with many lights inside. Among the disadvantages is that this material still requires the ability to handle it and skills in processing it. An awkward movement and a long, deep scratch is guaranteed.
Aluminum has a lot of advantages, the main ones being that it is lightweight and has good heat dissipation. However, this is a relatively expensive material, and due to the flexibility of aluminum, the rigidity of the body and internal partitions will be rather weak. And it scratches easily, so surface treatment is required. Steel perfectly damps vibrations, has good thermal conductivity, and is durable. The steel case will reliably protect the internal components from any influences. But processing steel requires different tools, and this work is not easy. But the result is excellent.

Before you make your own computer case, the issue of material must be resolved. If you don’t have the skills to work with metal, but you want to use it, you can do this - design all the patterns and make drawings. In many cities there are workshops and enterprises where, according to custom drawings, they will accurately cut out and even deliver all the parts from the metal of the required thickness. All that remains is to assemble this constructor. You can do the same with wooden blanks.
Case design
It’s difficult to give any advice here - everything is strictly individual. You can make a case with a standard design only out of necessity, when you don’t have the money to buy it, although it doesn’t cost that much. Therefore, creative people usually take on this work in order to do something original that no one else has. Or to solve some technical problem - for example, placing the contents of a laptop in a separate case and securing it behind the TV. Fans of modding - experiments with the design of a computer case - have created all sorts of options. These are wall-mounted options, including in the form of a panel under glass. These include numerous transparent cases with spectacular lighting of coolers and other components.
Some even made it out of a glass-topped tabletop. Shapes can also be different - from classic parallelepipeds to spherical or pyramidal. There are also more complex ones - in the form of some characters, for example, the robot R2-D2 from Star Wars. Cases made in retro style look good. For example, there is a spectacular model, stylized as Soviet tube equipment, with many dials and knobs on the front panel - by the way, they function and show the load on the processor, memory, and other parameters. Futuristic and post-apocalyptic designs are also popular. Many computers are designed in the style of the game Fallout.
A DIY PC case always has a personal design because it exists in a single copy. However, before you take on this creative endeavor, do not forget to calculate and provide all the technical aspects that were discussed at the beginning of the article. No matter how your computer case looks externally, comfortable working conditions should be created for the internal devices even under maximum load.
After purchasing a new computer or upgrading an old one, a situation often arises that the computer case itself no longer meets certain requirements. This includes the noise level, installation of new parts or an additional power supply, cooling. And all these innovations cannot fit into your old case, or the temperature level simply rises to prohibitive limits. And you begin to look for the most affordable solution to the problem: buying a new case or making it yourself, on your own. This article will look at an example of how to make a computer case with your own hands or improve it. If necessary, you can watch video instructions for making the case, for example:
As you know, when choosing a computer case you need to think not only about appearance, although an original approach and a non-standard solution are also important. First of all, you need to clearly understand that the case is an integral part of your PC, and not just a beautiful box on the table or under the table. The design of the case must be approached with knowledge of the matter. First you need to find out what types and types of cases there are, their differences and functionality.
Today, only four main types of PC cases are known. There are, of course, many extraordinary solutions, but more on that later. Each of these types has its good and not so good sides, so it is impossible to say for sure which one is the best. Just read their advantages and disadvantages so that you have something to base your design on. Or, if you decide that self-production is not within your capabilities, then the criteria by which you can buy a suitable high-quality case from the manufacturer will be clear to you.
There are vertical (tower) and horizontal (desktop) versions of the cases. Vertical enclosures usually allow you to install large quantity drives and all sorts of other devices, and horizontal ones are more compact.

The first type of case we'll look at is called Small Form Factor.
This type of case is distinguished by its compact dimensions. It is especially convenient for office computers, or for a home PC if you don’t need a particularly powerful system. The dimensions of this case are very small (about 25x25 cm), which allows it to easily fit into any interior and take up minimal space. Such cases have a big disadvantage; such miniaturization requires suitable “filling”, small size parts. It is no longer possible, for example, to insert a modern powerful video card or processor into such a case. In addition, small dimensions can cause cooling problems; components can overheat, causing system failures and breakdowns.

The second type of case is called Mini-Tower Form
Such a case can already be used for a fairly powerful office PC, or for a home media center. Such cases, as a rule, are initially equipped with power supplies with a power of 400W or more. In such a case you can assemble good system with a dual-core processor, install a powerful video card, but many modern components for this option will have to be selected on a “mini” basis. Another inconvenience is the need for monthly dust cleaning.
The third type of case is called Moddle-Tower Form
This type of case is the most popular and widespread. In such a case you can easily fit a good ventilation system, several powerful video cards, and install additional hard disks. This case is well suited for those who are not limited by size system unit. This type of case is difficult to fit into the interior, but it provides good performance systems and will satisfy the requirements of even avid gamers.

The fourth type of case is called Big-Tower
It is very rare to find such a case as a home PC. It is noticeably larger than all the others, and its height reaches at least half a meter. This case can not only accommodate about five good video cards or hard drives, it is suitable for creating servers or a computer that controls other computers in the office. This case allows for good ventilation, which will prevent the computer from overheating. Thus, Big-Tower is ideal for the most advanced users who work in the field of IT technology and particularly demanding gamers.
The first point that you need to pay attention to when selecting or designing a case is whether the internal space is sufficient. It is necessary to determine whether you can place devices there for the necessary cooling of the system unit and installation of fans. It is necessary that air circulate freely inside the case, thereby ensuring the cooling of all parts. Pay attention to the power of the power supply unit (PSU) located in the case or purchased separately. It should be sufficient for the planned PC system. You should also pay attention to the location of the power supply in the case. With large power supplies, you need to think about cooling it. The power supply only needs to cool itself.
For optimal cooling and low noise levels, the power supply can be placed in the following configurations.


In the circuit, with the upper location of the power supply, we get the following advantages:
- Quite low noise level (19 dB) when installing a 430 W power supply, ARX FD1212-S2142E 12V 0.36A 2400 rpm fan;
- The temperature of the elements increases slightly (+3 degrees in the power supply unit and +1 degree in the case);
- Standard location;
- Free air outlet.
This design can be assembled approximately as in the photo below.

The SilverStonetek company has launched the production of cases with a bottom-mounted power supply.
The advantages of this design are:
- The power supply serves only to cool itself;
- There is no need to remake the power supply;
- Low center of gravity for PC case.

The disadvantages include: excessive fan noise and difficult air access to the power supply fan.
The material used to construct the enclosure is primarily aluminum or steel, although many homemade enclosures are made from wood or plexiglass. The advantages of an aluminum case include light weight and good heat dissipation. But such a case bends easily and scratches are common. Price aluminum cases higher than steel ones. The steel body is more reliable and durable. All parts in such a case will be reliably protected. In addition, steel dampens vibrations better, which reduces the noise of the computer.
When considering different case designs, it is important to first determine what connectors and interfaces you will need now and in the future. Many of possible options, for example, you don’t need a thermometer built into the speakers, but others simply need it. Here you need to decide for yourself what design and construction to choose, based on the above. And don't forget about originality...

DIY computer case
So, you decided to make a homemade computer case. This housing should allow you to install any possible components in it, give them fast access and provide good cooling. Housing options are already possible that provide: almost complete noiselessness, high performance, the ability to increase computing potential, and ease of maintenance. True, such a case cannot be made compact.
The computer case can be made of wood using the technology given below.

The diagram shows the location of the main components and the circulation of air flows.
Working drawings of such a building can be downloaded. http://www.easycom.com.ua/downloads/skvorechnik_001.zip
Or look at the picture below.

The computer case is assembled from six walls and one transverse shelf in the middle part. The upper part of the case will house the motherboard, processor fan, video adapters, and the lower part will house all the drives, floppy drive, card reader, hard drives and power supply. It was decided to equip the lower part with only one fan of size 120x120x25 mm, since there will be only one element that needs forced ventilation - this is the power supply. IN top part For normal cooling of video cards and the processor, you need to install at least three fans with a standard size of 120x120x25 mm. They are ideally placed on the front wall of the future case.
The choice of housing material is determined by your capabilities. Plexiglas or acrylic are quite expensive. Iron sheets, from which it is theoretically possible to make the same case, are unacceptable, as they will greatly increase the weight of the case. Already with a sheet thickness of only 2 mm. The manufactured case will most likely exceed 40 kg. Moreover, the metal is difficult to process and its cost is also quite high.
In our version, chipboard will be used to make the body. These are sawdust, pressed into sheets measuring 2660x1660x16 mm (W.D.H.) and impregnated with special glue.
The body parts are marked according to the drawings provided and cut out. There is nothing complicated about this, and you can order it from those who make furniture. If you decide to cut out the blanks yourself, then you will need the necessary tools: a jigsaw and wood files.

You should end up with something like this. Sand the edges of the workpieces well with sandpaper.

When all the blanks are made, you can begin assembling the body itself. It is necessary to connect and secure the parts according to the drawings. A homemade computer case in a partially assembled form will look something like this.

For the reason that the front panel will be used not only as an “air intake”, but on it there will be power buttons, restart the computer and all the main indicators ( hard drives and the entire system), they must be embedded in a wooden panel. It is necessary to make holes for all ports, power and reset buttons, and indication LEDs. Everything must be done carefully and strictly in size.

LEDs cannot operate directly from the motherboard connector; they must be connected to it in series with a resistance value of 480-500 Ohms and a power dissipation of 0.25 W. All these parts can be purchased at any radio store. Wires for connecting buttons and LEDs with motherboard, are soldered into the Q-Connector, which comes complete with ASUS boards. Heat shrinkage is used as an insulating material. This is a tube made of a special material (polyvinyl chloride), which can change its geometric shape (diameter) when heated. In practice, a piece of such a tube is put on a wire, soldered to another and the piece of tube is moved to the soldering site. After which it is warmed up a little with a lighter. After this, the tube tapers around the soldering area and forms good insulation. The shrinkage rate reaches up to 30%.
This means that if the diameter of the tube is 6 mm, then when heated it will change its value to almost 4 mm. Such a tube can also be bought in any radio stores, and the price is only 2-4 UAH per meter. It is advisable to use such an insulating material to carry out all work related to the installation of wires for the manufacture of this housing.

On the rear wall of the case there are connectors for input and output of power from the ~220 V network and an illuminated power switch.
You should pay special attention to the choice of case fans. They must meet aesthetic requirements, since they will always be in plain sight. After all, the front panel is the one that gets the most attention. It is necessary to select the most quiet fans, suited to your performance. Therefore, options such as “grill” grates were immediately eliminated.

The Thermaltake Cyclo 12cm Red Pattern fan or similar is well suited for this solution. His choice was determined not only technical characteristics, which can be the envy of many fans. This fan operates at a speed of 1500 rpm and the noise level generated is not higher than 17 dB, which is characterized as extremely quiet. Another advantage is its unique animated lighting.

However, you can choose a more “advanced” model from this series of fans, Thermaltake Cyclo 12cm Logo Fan. In this model, as in Thermaltake Cyclo 12cm Red Pattern, there are no various animated emblems, but the Thermaltake logo is “written”, the approximate temperature of the passing air is shown (built-in temperature sensor), and the relative noise level that the fan creates is also displayed.
All these fans are mounted on the front panel using wood screws approximately like this:

To avoid the problem of bending the motherboard PCB, which occurs due to the rigid mounting of the cooler without a special pressure plate, you need to replace this pressure plate with something. You can select felt of the required thickness (about 7-8 mm) and cut a square with dimensions slightly larger than the holes for mounting the cooler of the Socket LGA 775 processor socket. If you look at the height of the stand for mounting the motherboard, the felt is 1-2 mm higher than it, which gives the necessary rigidity when bending the textolite of the mother board. Felt can be bought in many construction stores or secondhand in markets. The cost of such a piece will be approximately 5 to 20 UAH.

At the very end of the entire rough processing of the case, it is necessary to make all the necessary holes in the motherboard shelf, through which power wires, cables for hard drives, floppy drives, etc. will pass. First, you need to temporarily screw the motherboard into place and mark and sign all locations with a marker connectors. Then, using an electric drill and a file, all these holes are made.
The easiest way to cover a homemade computer case is to cover the outside of the case with self-adhesive tape. This material is made of thick paper or special rubberized oilcloth. The color scheme is limited only by your imagination or the store’s assortment (from pure white to various photo wallpapers). This self-adhesive is sold in rolls per linear meter. There are two types of roll widths: 450 mm and 550 mm. The cost depends on the complexity of the design and width and is usually in the range of 11 – 22 UAH per linear meter. For the manufacture of this case, a shiny black “self-adhesive” was chosen. After making calculations based on the drawings, it was determined that five meters of “self-adhesive” would be needed to cover the entire body.
To process the cutouts, a different material will be used, double-sided tape with a foam base.

It is necessary as a seal in places where vibrating components (hard drives, drives) come into contact with the walls of the case. The foam rubber from which the strips are made, 14-18 mm wide and 2 mm thick, is very soft in consistency and compresses to 0.5 mm, while also having the ability to spring. All this is very good for the seal. The presence of an adhesive substance on both sides allows this seal to be firmly secured, and individual components to be secured with its help.
All that remains is to make a “basket” for mounting all the drives, hard drives, floppy drive and card reader. Using a standard “basket”, which is installed in serial cases, is difficult and inconvenient due to the non-standard location installed devices. You can use a piece of plexiglass 4 mm thick for these purposes. You won't need much of it, about a meter per meter. The cutting of such material is carried out using a manual grinder or grinder. It is not difficult to do all this work. Then you need to drill the required holes in the workpieces. Plexiglas is a rather fragile material and sometimes crumbles if handled carelessly. To drill a hole with a diameter of 3.5 mm in it, you need to perform this operation in three or four passes, starting with a drill with a diameter of 1 mm and ending with a 3.6 mm one. You must remember to drill out a “socket” for the bolt head to hide it. To do this, you need a drill of the same diameter as the head. All drives, floppy drives and card reader are secured using the same double-sided tape seal.


To prevent hard drives from transmitting their vibration to the basket, thereby increasing the noise level, you can secure them with four erasers.

When all these operations are completed, you can assemble the body. Collected Bottom part case, with a “basket”, hard drives, drives, card reader, floppy drive and installed power supply looks something like this:

When fully assembled, this case will look like this:

After testing the computer's operation, a homemade computer case showed good temperature performance. Price homemade building turned out to be significantly lower than specialized Middle Tower or Full Tower cases. In order to make a computer case with your own hands, you only need certain skills in working with a soldering iron and a special tool.
Introduction
It all started with the fact that we needed to go to another city to record sound for a film, and the money... well, well, you know. The only ADC of suitable quality that we were able to purchase at a reasonable cost was an external one (USB) sound card Creative Sound BlasterSurround 5.1 . But it required a computer. Naturally, there was no laptop either. And I really didn’t want to drag my desktop computer with me. I had to make a laptop with my own hands.
Everything you have at hand
To begin with, I brought some kind of plastic suitcase from the trash heap, it seemed to be from under a typewriter. It was decided to place computer parts in it. The main problem was the monitor. CRT disappeared immediately - you had to carry everything on yourself. Then a 15" TFT monitor without a case was purchased. Taking into account the “used” one, it cost only $50. A hole the size of the screen was cut in the lid of the case. Holes for screws were drilled around it in the places where the monitor was attached to the case. Through them from the inside of the monitor screws are attached to the lid. However, since the suitcase was supposed to travel on a train and who knows where, a suitable sized plexiglass had to be inserted between the monitor and the lid. It turned out that this practically does not affect the image, and protects the monitor from scratches quite well.

The Micro motherboard was attached to the bottom of the case on stands. ATX with Atlon processor - XP at 1000 MHz and Seagate hard drive Barracuda for 20GB (on photoj 3 in the lower left corner under CD -drive). The remaining parts are simply inserted into the body. The power supply is located so that its fan blows the hard drive, protecting it from overheating. The lid of the suitcase with the monitor in working position is placed vertically and held in this position on one side by the weight of the monitor, and on the other by diagonal braid stretchers.

The monitor is powered from the output socket of the power supply. The signal is supplied to it from VGA - connector on mother. The button on a separate cord (photo 4 in the foreground) is designed to start the computer. CD - the drive in the working position is placed on the corner of the suitcase and connected together with the hard drive to one IDE channel, and in the stowed position detaches and fits into the housing. The mouse, keyboard and all the cords, including the power cord, also go there. Now it’s enough to close (carefully) the lid and we get a suitcase with which we can travel, no one will even think that there’s a computer in there.


And if you spread it out...

Dmitry Vaisburd
vaysburd (at) narod.ru
21/12.2008
