How to set up a microphone using realtek hd. Full setup and installation of Realtek High Definition Audio. Installing the Realtek driver
Here it is not difficult to download Realtek High Definition Audio Driver Audio Driver to your computer for installation or reinstallation. The freely distributed Realtek HD software has all the necessary functionality for correct and fast work audio-video players when playing music, video clips, movies, TV series, online TV, computer games, as well as programs for working with microphones, synthesizers, and musical instruments. Positive ratings, reviews and comments on social networks, forums and other Internet resources, as well as tips on how to download Realtek HD sound drivers for Windows 10, 8.. Link: website/ru/drivers/realtekhd
Briefly about Realtek HD
Realtek audio chips are installed in many computers, laptops, and netbooks. Drivers High Definition Audio from Realtek work with PCI audio cards, peripheral audio devices, and built-in audio processors. Anyone can successfully download Realtek High Definition Audio Driver for Windows 7, 8, 8.1, 10, as well as Vista, or XP SP 3 (32-bit and 64-bit) for free and install it on a PC without any effort or spending a lot of time . These drivers will be useful to all users who have just installed or decided to reinstall Windows. If you experience difficulties with sound, or it does not play at all, then updating the Realtek High Definition Audio Driver will come in handy.
Realtek HD interface and functionality
The interface, which is understandable even for a beginner, allows you to quickly understand the settings and get down to business. The fact that the Realtek driver management is correctly Russified allows you not to waste time translating and studying the interface, menus, windows, settings and capabilities.

First you need to download, install or update drivers sound card, and when the appropriate sound driver is installed, after rebooting, start working with multimedia data, whatever it may be. Functionality Realtek High Definition Audio Driver allows you to watch video clips, movies or online TV, listen to music, play computer toys, use a microphone to record speech, sing and voice communication. The benefits of Realtek HD Audio Driver for Windows include:
Friendly interface and convenient settings,
- work with all current audio formats,
- automatic configuration of Plug and Play devices,
- support for DirectSound 3 D, A 3D and I3D L2, Soundman and SoundEffect,
- wide frequency bandwidth,
- support stereo recordings 24 bit/192 kHz and multi-channel 5.1 and 7.1 Dolby Digital,
- 10-band equalizer for perfect sound tuning,
- emulation of audio environments in computer games,
- compatibility with various electronic musical instruments,
- error-free speech recognition when using appropriate software.
As a result of regular updates to Realtek Audio Driver HD, the quality and capabilities are constantly improved. We recommend that without leaving the website now, Realtek High Definition Audio Driver download free to enjoy good sound, in films, TV series, TV programs, video clips, CD, DVD, FLAC, MP3 music, playing games, using musical instruments and microphones, for example, to record original songs and music or sing karaoke.
How to download Realtek the smart way
It’s not enough to just download free Realtek HD sound drivers for Windows 10, 8.1, 8, 7, Vista, XP SP 3 (x86 and x64) to your computer or laptop. To run Realtek HD sound driver appropriate Hardware, that is, the computer must use a compatible chip. You can find out what kind of sound card or chip is installed in your computer visually by inspecting the computer's boards, or without opening the case, in the Hardware section of the Control Panel operating system Windows, or using a specialized software, For example, DriverPack Solution. The following markings are suitable: ALC260 - ALC275, ALC660 - ALC670, ALC882 - ALC889 and the like. The markings ALC101, ALC201 - ALC203 (A), ALC250, ALC650 - ALC658, ALC850, VIA686, VIA8233, VIA8233A indicate that you will need to download Realtek AC97 for Windows 7, 8, 8.1, 10, Vista, as well as XP SP 3 ( 32-bit and 64-bit), also from Realtek.
Select a driver according to your OS from the list below. Software for working with a sound card is installed in the same way as ordinary software. For full-fledged work the computer needs to be restarted. The package includes Realtek Soundman, Sound Effect and Media Player.
Calling over the Internet today is the most common way of communication. But sometimes this is impossible, since the microphone is most often poorly configured and the quality of the connection suffers as a result. All versions of Windows have the same microphone settings.
There are three types of microphones that can be installed on your computer with Windows platform:
1. Standard analog microphones. They are devices on sticks or stands. But they should not be confused with those intended for karaoke. Typically, standard microphones are connected to the computer through a jack that is pink. In order for the sound of the microphone to be of high quality, the input must be in the audio or motherboard Windows. This is important because the lack of a quality input significantly reduces the sound quality of the microphone.
2. Microphone built into the camera. Typically, webcams have regular analog microphones that are connected via a cable. Cheap cameras, as a rule, have weak microphones, which, before producing sound, must convert it through an analog-to-digital converter (ADC). If the ADC works poorly, then the interlocutor hears the sound very poorly.
3. A USB microphone is a device that connects to a computer, but is not connected to the camera. There are very few such models, and they are most often used for communicating on Skype.
Microphone setup via Realtek HD codec
Typically, all microphones are configured in the Windows mixer, which is available on all platforms Windows 7, 8, 10. Most often, the microphone can be configured using the Realtek HD codec:
First of all, you need to connect the microphone, after which the Realtek HD manager will ask how to determine the device connected to it. You need to select a microphone input from the list.

Now, to configure the microphone, you need to go to the Realtek HD sound manager, which is launched through the tray icon. You can also adjust the microphone through the Windows volume mixer. To do this, right-click on the volume control icon and select “Open volume mixer” from the menu, and then select the “Recording” tab.
When the Windows volume mixer is open you need to find the microphone input. Depending on the location of the socket (front or back panel), as well as its color, the name of the microphone input may change. Usually the name looks like this: “Mic in at the name (color) of the socket.” When the connected microphone is found, in the list to configure it you need to click the “Properties” button.

In the new “Properties” tab, open the “Levels” tab. Here you can adjust the input signal level, setting it from 0 to 100. Also, the microphone gain level will be set from 0 to 30 dB. It is in the last parameter that the problem of a quietly working microphone often lies. For some Windows, the minimum allowable frequency is 20 dB, but if the setting allows you to set it to 30 dB, then the noise increases. To eliminate them, you need to go to the “Improvements” tab.

In the new tab, you need to uncheck the “Disable all sound effects” box and put it in the “Noise reduction” box to eliminate noise. If there is an echo in the microphone during a conversation, you can remove it by checking the box next to “Echo suppression.”

You can also configure another setting that will allow you to reduce the level of all sounds during conversations on Skype. To do this, go to the “Communication” tab and select one of the items in the list.

Setting up the microphone via the built-in audio device
The microphone can also be configured through the Intel codec, which is a standard built-in audio device on most Windows platforms. But even if you install a different codec to configure sound on a computer running Windows 7, 8 or 10, you can configure it in the same way.
So, to configure a microphone in Windows, you need to double-click the sound mixer through the speaker icon in the tray.

If you don’t see the icon you need, you can use the following path for all Windows: Start – Control Panel – Sounds and Audio Devices. In the new window that opens, you need to check the “Show icon on the taskbar” option.

In the volume tab, you need to click the “Advanced” button and check the box next to the “Advanced settings” line, otherwise you will not be able to adjust the microphone gain in Windows.

Now you need to set up the recording mixer. To do this, open “Options” - Properties. There you need to select the “Record” column. In a new window there will be a list of available inputs, in which you need to select “Microphone” (Microphone input) and check the box next to it.

After clicking the “Ok” button, you can configure the microphone. In the recording mixer tab, you need to find a line called “Microphone Gain”. But in some versions of Windows this setting may be called differently, such as "Microphone boost". But no matter what this line is called, it means that the microphone can be adjusted to gain up to 20 dB.

In some versions of Windows, it may be that there is no “Adjust” button under the volume level that allows you to turn on the microphone boost. In this case, you need to know that this button is located in the volume mixer and therefore going to the recording mixer is not necessary. The presence of a button allows you to turn on microphone gain without going to unnecessary tabs.
If the above methods did not help achieve a comfortable sound level and the microphone is still very noisy and operates at a low volume level, then you should consider buying a webcam with a built-in microphone or purchasing a new expensive microphone.
You can also improve the sound level by installing a new sound card on Windows with a good microphone input. Another solution would be to install an amplifier on the microphone.
All of the above methods for setting up a microphone are common to everyone. available versions Windows. If all conditions are met, you can configure any microphone that will work at a decent level.
In this short article I will talk about setting up realtek hd manager.
In my practice, I have come across situations that sometimes there are problems with this driver because users do not know how to configure it correctly.
However this driver may cause audio problem. If realtek hd manager not configured correctly the sound will disappear or the microphone will not work.
realtek hd manager This is a driver based on modern technologies. This driver supports all formats and has the ability to connect different device like, subwoofer, headphones etc. T.
I would like to warn you in advance that this realtek hd driver may not be installed on older versions of the motherboard.
There is also such a situation: this driver can be installed on some old motherboards, but the capabilities of this manager will be limited.
In order to set up the realtek hd manager you must download and install the realtek sound driver.
It can be downloaded from the official website or obtained by updating drivers using programs.
But first, let’s check whether this driver is on the computer. To check, go to start, open the toolbar and in the window that opens, click sound and equipment.
If there is a driver, then at the end of the menu list there should be realtek hd dispatcher,
if it is not there, you need to download http://www.realtek.com.tw/downloads/
And so we went to the official website of the developer, downloaded this driver and installed it. After everything is ready, we configure this driver. To open realtek hd dispatcher Again, go to the toolbar, open equipment and sound, and below is our dispatcher. Double-click on it with the mouse and the dispatcher will open.

Interface and appearance may differ on different motherboards. But the essence of their work is the same. This window is divided into three main sections: “speakers”, “microphone” and “analog”. In this article, the main topic will be the setting of the “analog” section, where you can control the connectors of your computer, such as speakers, microphone, etc.
Assignment of sockets realtek hd manager
This window also has two subsections: “back panel” and “front panel”.
On standard motherboards, there are three connectors on the rear panel and two connectors on the front panel. This depends on the model and manufacturer of the motherboard. Now let's look at the standard option.
If you need to check the speaker jack assignment in realtek hd manager. It's basically a nest with green color
Double-click on the green socket and the destination selection menu will open. In the menu that opens, select the “output to front speakers” option.

If you want to connect headphones, then select “headphones”.

In this situation, the sound will do its job. In order to select the correct microphone socket, double-click on the pink socket
and in the window that opens, select the “microphone input” option

The front speaker and microphone input is used very rarely in practice, since it is generally not connected to the motherboard.
If you still decide to use the front speaker connector, then you need to change some settings realtek hd dispatcher.
To do this, in the “analog” sidebar, click on this icon in the form of a folder
And in the window that opens, insert a checkmark in the “disable front panel socket detection” checkbox

And after such manipulations it is activated front panel
This window is also divided into two sections. Each setting in each section speaks for itself; I don’t see the point in explaining it here. This concludes setting up the realtek hd manager. And with the rest of the settings, you already select them to suit your hearing, since everyone has their own choice of equalizer and other effects.

That's it for the setup realtek dispatcher hd ended. I hope that this short article will be useful to you. If you have questions, write a comment. Until new entries!
If you are running Windows XP, Vista or 7 and your computer has a Realtek audio chip, then you must also have Realtek firmware. To activate it, go to the Start menu and type "Realtek" in the search box. When it appears in the Realtek HD Audio Manager search results, click its name to open it. If it is not in the list, then most likely you do not have the audio driver installed or have an outdated version. In this article we will tell you how to install the driver, as well as correctly configure the sound settings.
Installing Realtek Manager
This procedure is necessary if you do not have the Realtek audio driver installed or if you have an outdated version installed.Download the appropriate driver from the Realtek website or your PC manufacturer's website.
Unzip the archive and run the “setup.exe” file to launch the installer.
Note: If the "Windows cannot verify the publisher of this driver" pop-up appears, click the "Install..." button to continue with the installation.
Once the installation is complete, you will need to restart the system for the changes to take effect.
If the Realtek® software is installed correctly, you will see the Realtek® HD Audio Manager icon in your system tray. Double click this icon to display Realtek dispatcher® HD Audio.

Realtek Audio Utility User Guide
The Realtek® Audio Codec provides 8-channel audio support, Jack-Sensing, S/PDIF OUT support, and Realtek®'s patented UAJ® (Universal Audio Jack) technology on all audio ports to eliminate cabling errors.Realtek® HD Audio Manager for Windows 8 / Windows 7 / Windows Vista
This version of Realtek HD Audio Manager supports motherboards Intel and others that have a Realtek audio processor installed.
Note: The configuration option tabs are for reference only and may not match what you see on screen. IN Windows environment® 8™/7™/Vista™, Realtek® HD Audio Manager automatically detects devices connected to the analog/digital ports and displays the corresponding configuration option tabs. In addition, the manager interface may differ slightly depending on the model of the installed sound card, as well as the driver version. For example:

Speakers Tab
The first thing you will see is the device volume slider. In the panel on the right you will see connection options sound devices output.

Digital output
In order to set up digital parameters output:
Click on the item " Additional settings devices." Here you can enable or disable the separation of front and rear inputs (front/rear microphone, front/rear line input).

Next, you will have access to 4 sub-tabs: “Speaker Configuration”, “Sound Effects”, “Room Correction”, and “Standard Format”.
To set speaker settings:


Microphone Configuration
To configure the microphone, go to the “Microphone” tab (Mic in). At the top of the main window you will see microphone gain and volume options. Adjust the slider to a comfortable format.
Click the Set Default Device button to set the port as the default audio input device.

In this section, you will have access to 2 sub-tabs: “Microphone effect” and “standard format”:
- Click the Microphone Effect button to adjust noise reduction, echo cancellation, and conference mode settings when recording audio.
- Click the "Default Format" button to select the default audio output format.
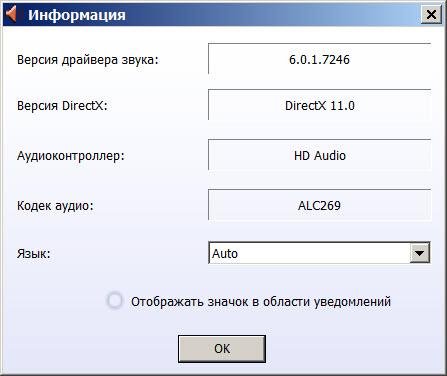
Click the information icon in the upper right corner (sometimes lower) of the Realtek® HD Audio Manager window to display information about the audio driver version, DirectX version, audio controller version, and audio codec version.