Auto-installer
Free automatic installer of any set of programs on your computer.
Attention! Some antiviruses (for example, AVG) report that the program contains a Trojan. In fact, this is not true (tested by other reputable antiviruses).
It’s just that the automatic installation functions of programs for particularly corrosive antiviruses may look like the action of a Trojan program.
If your antivirus does not allow you to install Easy AutoInstaller Free, it is better to look for some other program for your tasks.
You've probably encountered the need to reinstall your operating system more than once. But this is not the main problem - the main thing is to install all the necessary programs and not forget anything!
From my own experience, I know that installing software sometimes takes twice as long as installing Windows itself. Recently, many special disks have appeared with automatic installation of the necessary applications.
Is it possible to create such a disk yourself? Of course! There are many special utilities for this. But they are either paid or not very stable.
However, among the heap of similar programs you can find some pretty decent freeware projects. An example of this is Easy Autoinstaller FREE.
This program is intended for non-commercial home use and allows you to create startup disks with a set of the software we need without any problems! It can remember and then reproduce an unlimited number of times all the actions that the user performs when installing the required software.
Unlike the paid version, the free edition cannot create disks containing operating system files, but the functionality of Easy Autoinstaller Free is quite enough:
Comparison of the free version of the autoinstaller Easy Autoinstaller FREE with the paid version of Easy Autoinstaller PRO
As you can see, in addition to the restriction on creating a startup disk with the operating system, the free version blocks the ability to change the design of the autoinstall menu, as well as recording a script in “real time”.
The latter means that to record the next desired action in the script, you will have to press one of the function keys (left Shift or Ctrl). But more on that later, for now let’s install the program.
Installation Easy Autoinstaller FREE
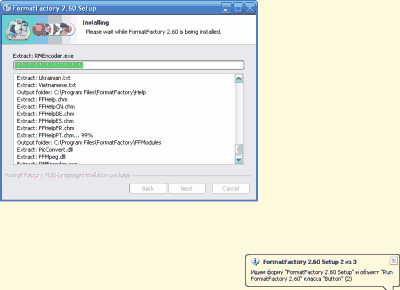
The program installer, although in English, is built in a standard way, so after launching it, we will need to click “Next” all the time and agree with all the offers. Once the installation is complete, the program window will appear in front of us:
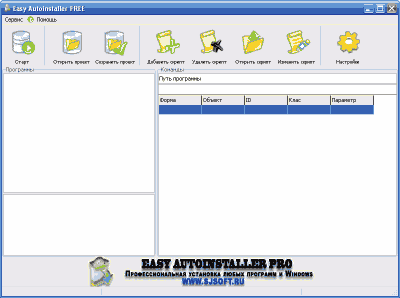
You can start working, but I would advise you to start by creating a folder somewhere into which we will move the software distributions and drivers we need. This will make it easier for us to create our own autoinstall disk in the future.
Creating an autoinstall script
Now let's proceed directly to creating auto-installation scripts. To begin, click the “Add script” button.
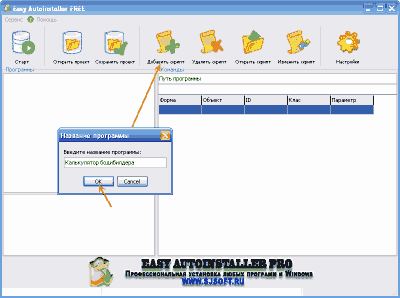
A window will appear in front of us where we should enter the name of the program that we are going to install. After confirming the entry (the “Ok” button), another window will appear in which you will need to specify the version of the application to be installed. In principle, you can enter anything you want into both windows, but for our convenience, we will indicate what is asked :).
After entering the program version, a window will open for selecting the installer for the desired program (remember, we put them in a separate folder;)).
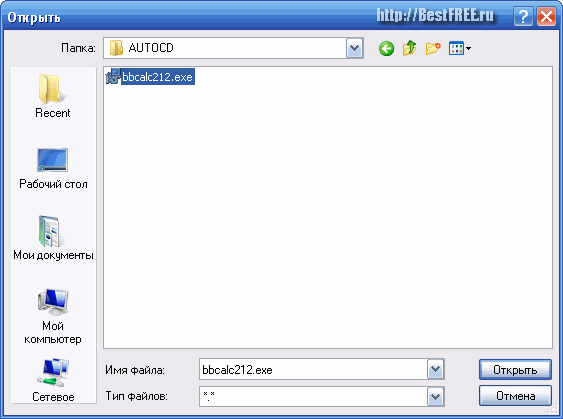
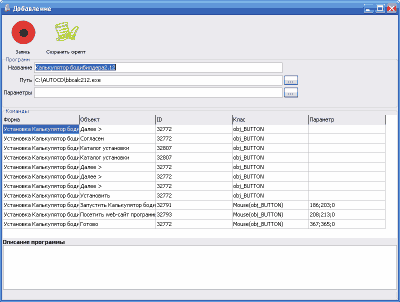
Mark the required executable file (.exe and .msi files are supported) and click the “Open” button. A script recording window will appear in front of us:
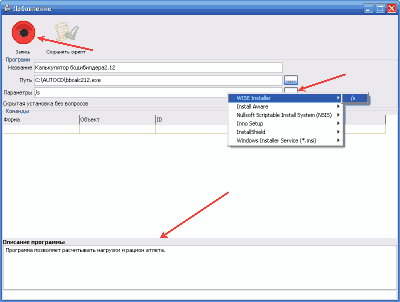
At the bottom, in the “Program Description” section, you can enter short information about the program being installed, so that you can later remember what the utility is actually for. Pay attention to the “Options” window (third from the top).
Here you can set the type of future installation of the program: regular “silent” (silent, /s) installation, “silent” with progress display (and without), or completely hidden mode. You don’t have to select any additional parameters and then you will always have access to manual control of the installation.
When all the settings are made, click the “Record” button and proceed to the “demonstrative” installation of the selected program :).
You will know that the script recording process has been activated by the tooltip in the tray, as well as by the information window that appears in the upper left corner.
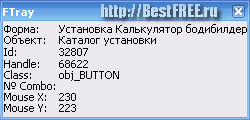
In this window you can see the current coordinates of the mouse cursor, the object the cursor is pointing at, the current operation, etc. Important: try not to move the installer window unnecessarily, as this may affect the correct operation of the script!
Now a few words about the methodology for creating an auto-installation script. To record a command, you must press left CTRL or SHIFT.
It happens something like this: we move the mouse cursor to the desired button or menu item and press one of the above-mentioned keys.
At the same time, SHIFT remembers only mouse clicks, and CRTL can record keystrokes, dots, checkmarks, passwords, paths and the same mouse clicks, so in most cases we press CRTL without thinking. As soon as the button is pressed, your action will be remembered, and you will not need to press mouse keys.
If you need to change the path or enter the serial number of the program, for example, then you need to proceed as follows. We enter the required data in the text line, hover the mouse over this line, press SHIFT, and then CTRL.
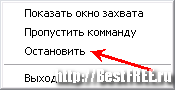
When the installation is complete, you will need to stop recording the script. To do this, right-click on the Easy Autoinstaller icon in the tray and select the appropriate item.
Optimizing and saving the script
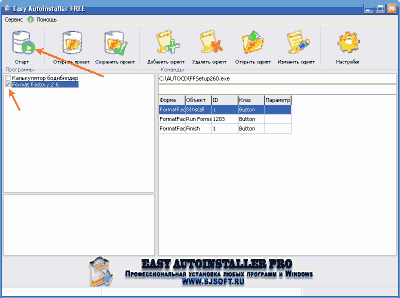
Now let's check our script for empty entries to optimize it:
If there are none, we can click the “Save script” button. If you need to delete any script item, just double-click on it and confirm the deletion.
Now you can check whether the auto-installation script is working correctly. To do this, remove the installed program, mark it with a checkmark in the list of Easy Autoinstaller scripts and press the “Start” button.
After this, the installation process should start automatically, and above the program icon in the tray you will see a report on the current installation step:
If the installation was successful, then we did everything correctly. Otherwise, you will have to either edit the finished script (the “Edit Script” button), or even rewrite it again.
When all the scripts have been checked, you can (and even need to) save the resulting project. To do this, click the button of the same name in the main program window.
Creating an installation disk
And now comes the most culminating moment - creating your own disk with software! :) To do this, click the “Tools” menu in the main Easy Autoinstaller window and select the only item “Disk Creation Wizard”:
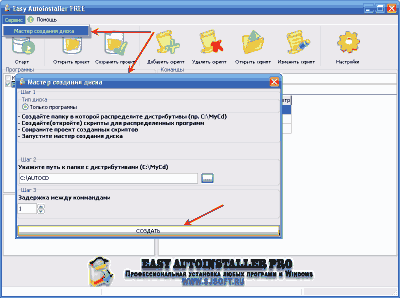
If you followed all the tips described above, then all you have to do is specify the path to the folder in which all the script, distribution and project files are located, and then click the “Create” button.
Several files will be created in the specified folder, which will be responsible for loading the menu of our installation disk:
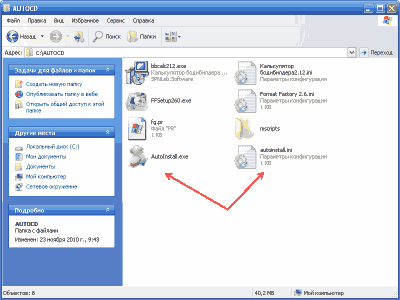
The main one of these files is AutoInstall.exe. By running it, you can see what the menu of our disk will look like:
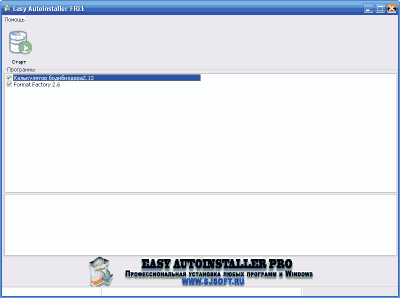
In fact, everything here is simple and tasteful :). The installation disk window presents a list of programs that can be selected for installation and a “Start” button, which initiates the installation.
Did you admire it? :) Now all you have to do is burn the entire contents of the folder directly to a CD, DVD or even a flash drive, and the set of necessary programs with automatic installation will always be at your fingertips!
conclusions
Easy Autoinstaller FREE, of course, is slightly inferior in ease of use and functionality to commercial products, but it copes with its main task, if not a “5”, then certainly a solid “four”.
In any case, I advise you to familiarize yourself with this program and, just in case, create a disk with the necessary drivers and software. Who knows, maybe one day this disc will really help you out;).
P.S. Permission is granted to freely copy and quote this article, provided that an open active link to the source is indicated and the authorship of Ruslan Tertyshny is preserved.
