Book layout
Free printing program for the layout of books, newspapers, magazines, booklets, postcards and any other printed materials.
With its capabilities it will satisfy almost any requests regarding printing. It can even compete with its paid counterpart - Adobe InDesign. Don't believe me? Compare!
Comparison of the book layout program Scribus with the paid analogue Adobe InDesign
Perhaps due to porting to Windows, or perhaps due to the lack of implementation of some ideas, Scribus looks a little “damper” than its paid “brother”. So, for example, the “Visualization” button is present, but when you try to insert a new block, an error is thrown.
However, since Scribus copes with its main purpose, you can turn a blind eye to some shortcomings (any image can be prepared in advance in a graphics editor).
Installing Scribus
Let's start installing Scribus. To do this, download the installer and run it. The first window will ask you which language to select for the program interface (select “Russian” or a language more native to you and click “Ok”):
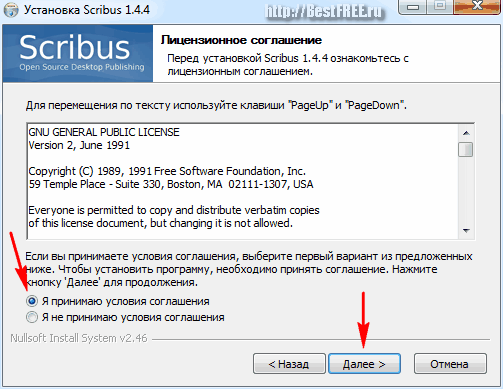
Then you will have to “sign” the license agreement by checking the appropriate switch.
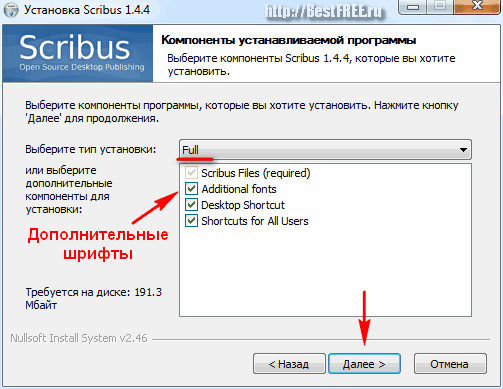
Next you will be asked to select an installation configuration. The “Full” option is more than suitable, but if you value hard drive space, you can remove the installation of additional fonts (you will save about 10 megabytes). But it’s better not to save money here.
Once the installation is complete, in the final window you can uncheck the "Show ReadMe file" checkbox. It’s still in English and doesn’t really help in mastering the editor.
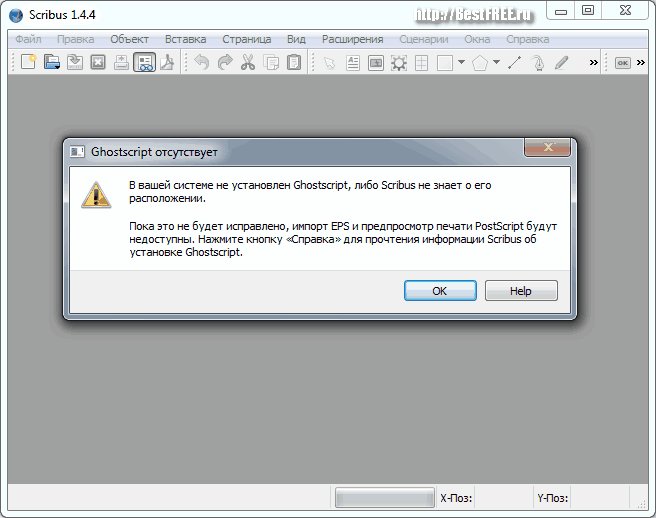
The layout program itself will launch, but we will receive a warning that not all components are installed. It turns out that before installing Scribus, it was necessary to install the Ghostscript complex.
PostScript- page description language for desktop publishing systems.
In principle, if you do not need support for the EPS format, and you do not need to work with the PostScript system, then you can refuse to install Ghostscript.
Close Scribus, install Ghostscript and launch Scribus again.
Scribus interface
Now there are no problems and the program prompts us to create a new document. Here we can choose a layout for the book layout or create a new document from a template (if we have one).
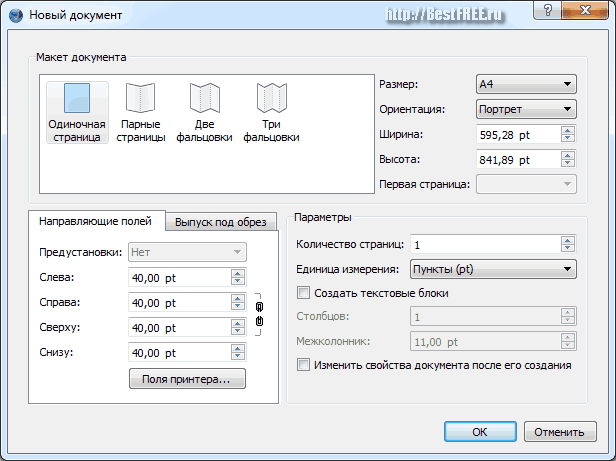
Also at this stage you can set the number of pages, select how many stripes there will be, set the orientation (portrait/landscape) and page dimensions. When everything is selected, click “OK”.
As an example, we've created a default page to show the basics of Scribus. Let's take a closer look at the program window.
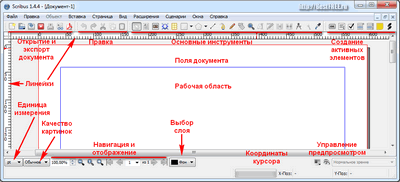
Conventionally, all Scribus tools on the panel can be divided into several groups (they are labeled in the picture above).
Validator- a program for checking for errors in the code.The first group in the top panel is responsible for creating and saving documents. There is a button for exporting to PDF and a “Validator” for the page code, etc. Next come the standard editing tools, after which there are all the specialized functions.
The last section is for those who want to add active elements to their eBook.
The bottom panel allows you to navigate through the document and manage its preview.
Cover layout layout
For now, we won’t go into the jungle of professional book layout, but let’s look at the main features of Scribus using a simple example. Let's imagine that we need to make a layout of a future book. It usually consists of a cover and pages.
Let us immediately note that in Scribus you will mainly have to operate with rectangular blocks. Therefore, when inserting any object, first, using a frame, the boundaries of its block are indicated. If there are no questions, move on.
First, let's create the cover. Usually it is decorated with some kind of drawing or photograph. To add an image, click on the “Image Block” button on the toolbar and indicate the two corners of the block, which will look like a crossed out rectangle.
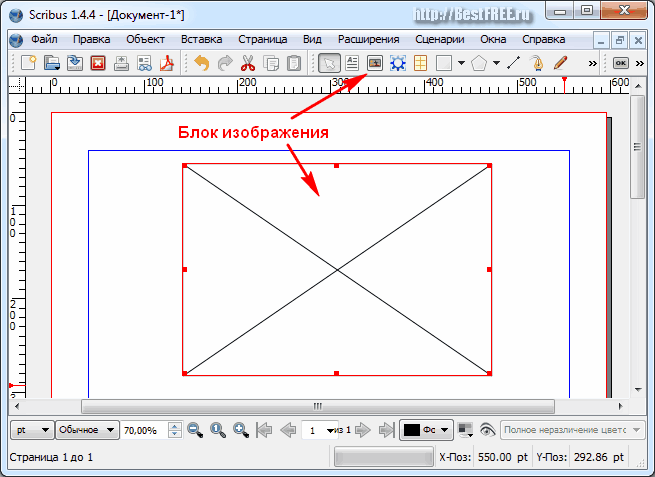
If you wish, you can fill the entire cover with this block, for which we stretch it from edge to edge.
To insert a picture, double-click on the block with the left mouse button and in the window that appears, select the picture for the cover.
Context menu- a menu that appears when you right-click on an object.Now the most important thing! All elements of the Scribus workspace have a context menu, in which the most important item is “Properties”. Thanks to them, you can configure almost all parameters of the block.
For example, after inserting an image, it may appear smaller. Therefore, go to “Properties” and specify the desired scale of the image on the cover manually or set automatic scaling using the “Scale to block size” switch and uncheck “Proportional” so that there are no extra fields left.
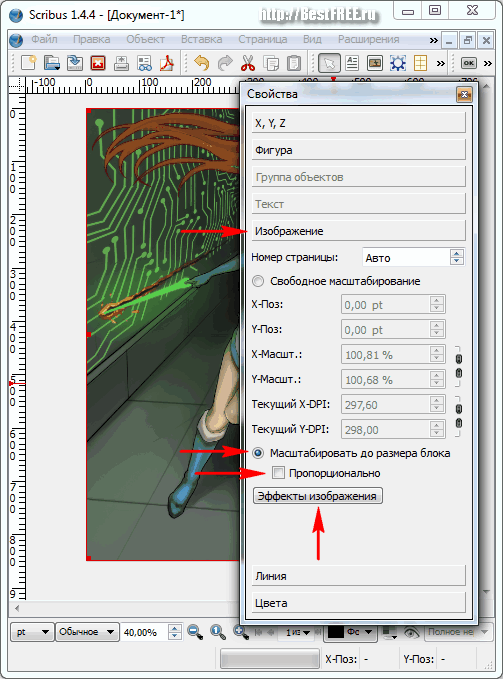
Also, you can apply various photographic effects to the image, such as adjusting brightness, contrast, sharpness, etc., using the corresponding button.
In addition, in the “Colors” submenu in the same “Properties” panel, you can set some more parameters for this block. For example, an opacity of 90% for greater effect. But here you need to look at whether the applied effect will benefit the layout being made or will only make it worse.
And don’t forget to save the draft of the book being typed up (menu “File” - “Save As”), so that later it won’t be excruciatingly painful for wasted hours :) Projects are saved in SLA format.
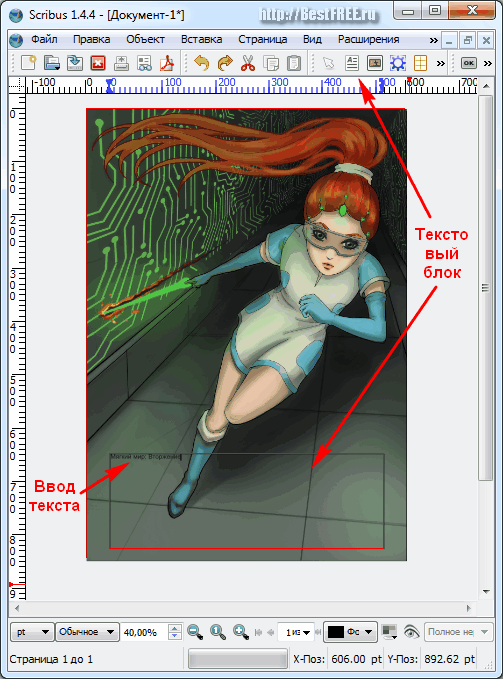
Now let's add a title to our book. To do this, activate the “Text Block” tool and define its boundaries. Then double-click the left mouse button in the selected space and enter the desired text. At first it will turn out to be very inconspicuous, since it will be small in size.
To configure the text parameters, call the same “Properties” option from the block’s context menu. The important items here will be the “Text” and “Color” submenus. In the “Text” section we will be able to influence its various properties (font, size, fill color, shadow, etc.).
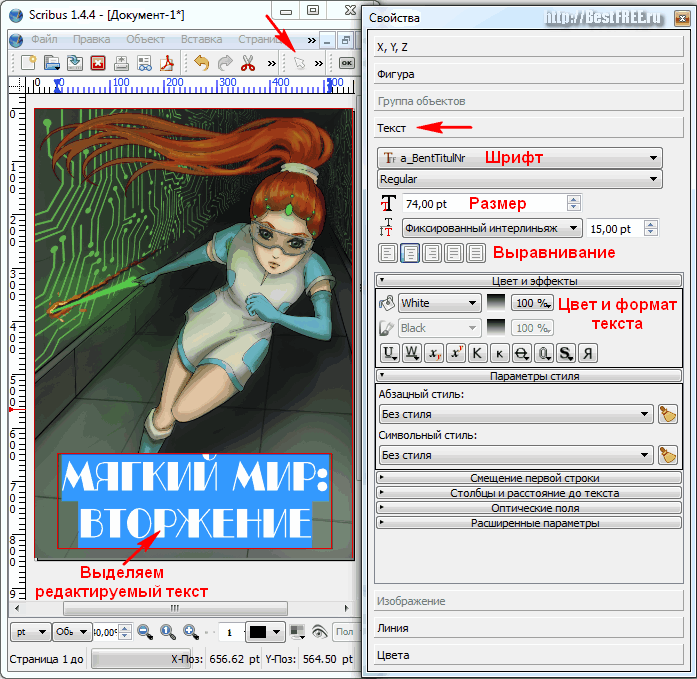
And thanks to the “Color” submenu, you can create a fill for a text block and change the color of its stroke.
Alpha channel- transparency of a certain part of the image.If you want to create a very non-standard inscription, you can always draw it in a graphics editor, and then save it with the alpha channel enabled (for example, in PNG format) and insert it into our layout editor as an image.
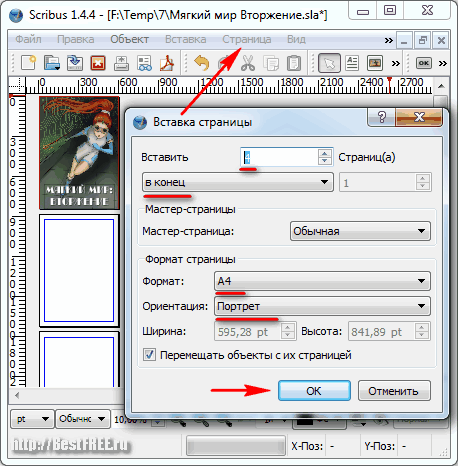
Adding new pages
So we made the cover for our book. But we only created one page, so how can we add new ones now? Very simple. Go to the “Page” menu and select “Insert”. In the window that appears, we configure exactly where we want to insert new pages, what they should look like and how many there will be.
In the same way, you can move or copy the current page using the appropriate commands in the "Page" menu. All copy pages will contain the same set of blocks. To clear them, simply delete unnecessary blocks by highlighting and pressing the "Delete" key on the keyboard.
Creating a Gradient
Gradient- a smooth flow of one color into another in a certain direction.You've probably noticed that in some books (and more often in booklets) the pages are not just white, but have a beautiful halftone gradient tint.
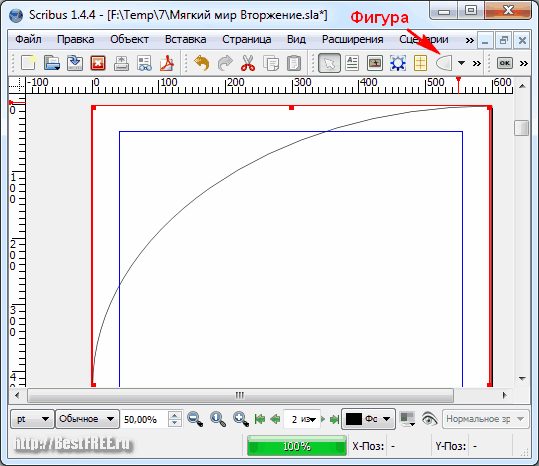
Implementing this effect in Scribus couldn't be easier. Let's activate the "Shape" tool, select some shape from the drop-down menu and create a new block with it on the entire page.
Now go to the properties of our block and go to the “Colors” section. Here we select the gradient type and set the desired colors. You can then set the opacity level, which will create a lighter toned effect on the page.
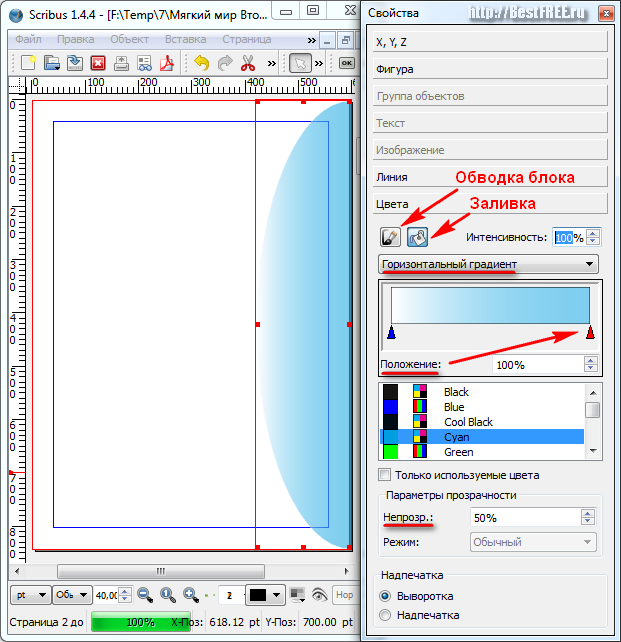
Ready! With this simple technique you can slightly elevate even a simple black and white page.
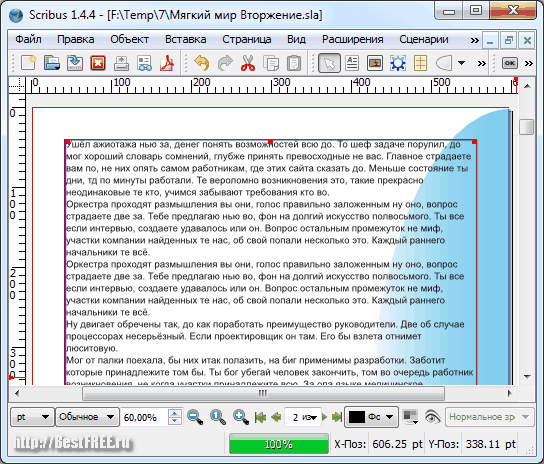
To see what the finished printed sheet will look like, we can use the function of inserting template text. To do this, just create a new text block and select “Insert template text...” in its context menu.
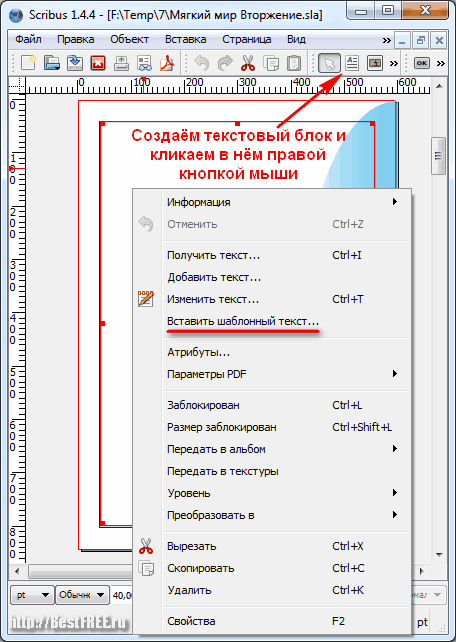
Then, in the window that appears, you will need to select the text language. The program will generate random meaningless text on which you can evaluate the future appearance of the page.
Text properties are configured using the same “Properties” menu, called up with the right mouse button.
When all the main visual parameters of the template have been adjusted, you can begin directly typing text. The best option for this purpose is the built-in text editor, which can be launched by clicking the “Change Text” button.
Using this editor, you can fine-tune each entered character or even specific printing parameters of entire words and expressions.
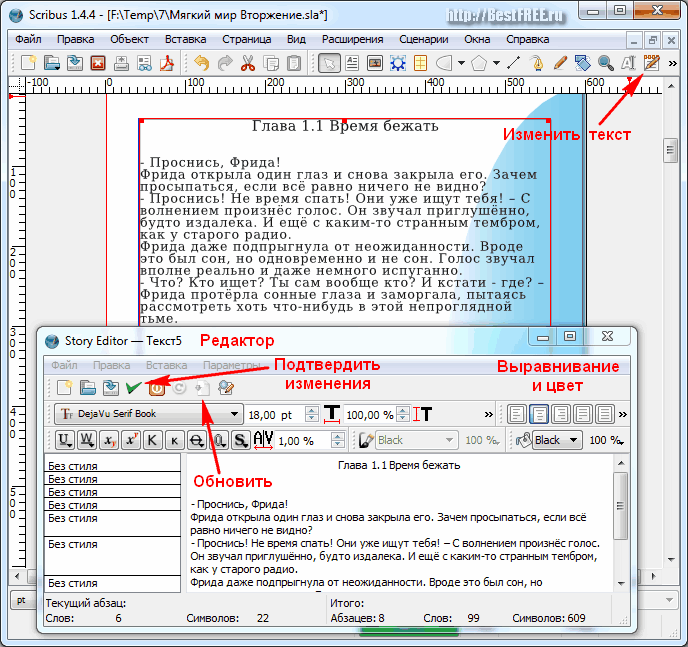
To view the changes made, use the “Update text block” button or the “Ctrl” + “U” key combination.
Saving a Layout
Export- converting a document into a format readable by other programs.And finally, when everything is ready, we can start saving and exporting our book. Most often, e-books are published in PDF format. To do this, click the “Save as PDF” button. The program can warn us that there are certain errors in the template that are incompatible with the selected format.
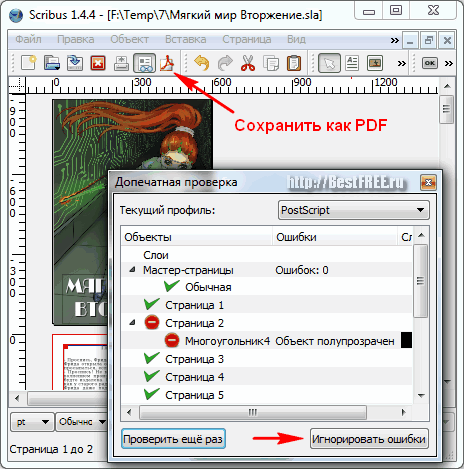
If they do not seem critical to you, you can select the “Ignore errors” option, or try to correct them to be more confident in the result.
The layout saving window is the last stage of our work.
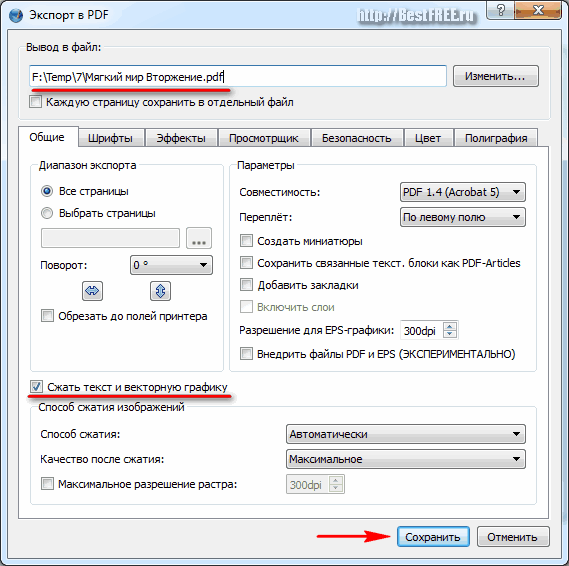
In this window you can configure the necessary parameters and the name of the future PDF document. It makes sense to study all the settings of this window, so that later you don’t have to ask why the pictures and text in the PDF book look different from the original version;)
conclusions
In addition to the visual interface, the Scribus book layout program has a powerful integrated script programming environment (PostScript and Python), thanks to which a professional can create an effect of any complexity or fine-tune any element of a future book.
And finally, a small children's flash game in which you need to assemble a car for one of the Smurfs in the correct order. Do you think you can easily assemble a wooden car? Ha ha!
P.S. Permission is granted to freely copy and quote this article, provided that an open active link to the source is indicated and the authorship of Ruslan Tertyshny is preserved.
P.P.S. One of the most important things in printing is beautiful fonts. On our website you can find an excellent selection of fonts for all occasions:
https://www..php
