Burning discs
A good free program for burning discs, creating disc images and other work needed in the household.
ATTENTION! The description below was made for an earlier version of Ashampoo Burning Studio FREE 6.77.4312
How often do you burn discs? Surely at least once a week you have to download a couple of new films to DVD or burn a CD with music for a friend. And many people use the Nero software package for this purpose.
Today, from a small program for burning discs, it has turned into a kind of “many-faced monster” :). There's just so much Nero can't do today. It processes audio from video, helps work with photographs, and provides access to the Internet, but the recording mechanism itself remains at the level of version 7 (although version 9 is current).
And if you consider that in Nero 7 the ability to record HD-DVD and Blue-Ray discs was simply added, it turns out that to record simple “blanks” in the 9th version, Nero 6 algorithms are used. This is what many still prefer to use for now, since it is not burdened with all sorts of additional capabilities and copes with its “responsibilities” quite consistently.
However, the problem is that even the old version is paid. Today we will talk about how to legally and freely obtain a good disc burning program with some additional useful features. Meet - Ashampoo Burning Studio FREE.
This program exists in two editions - paid (new 9th version) and free (minor 6th version). The capabilities of the 9th version are practically not inferior to those from the Nero package, but let's compare them with the capabilities of the 6th:
Comparison of the Ashampoo Burning Studio 6 (FREE) recorder with the paid analogue Ashampoo Burning Studio 9
In Ashampoo Burning Studio FREE, we have a serious program for burning discs, which is not loaded with any add-ons, and therefore copes with its task quite well.
Installing Ashampoo Burning Studio
To install the program, we will need to download an archive with a small installation distribution of about 8 megabytes in size (for comparison, Nero takes 209 MB) and run it. Following the wizard's instructions, we complete all installation steps. The most important thing is to choose Russian at the beginning:

Otherwise, you may end up with a non-Russianized version of the program.
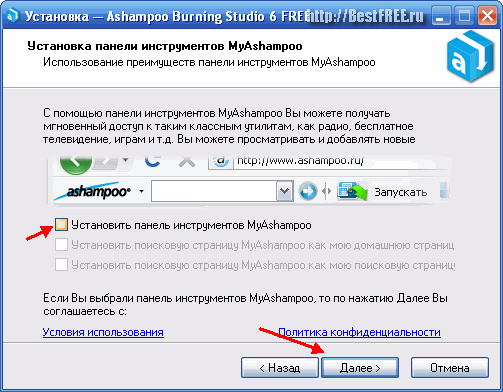
Next, we will be asked to install an additional panel for the browser. As always, I advise you to refrain from the dubious pleasure of cluttering it. To opt out, uncheck all the boxes in the dialog box and click “Next”:
The further installation procedure is standard, so we will not focus on it.
Program interface
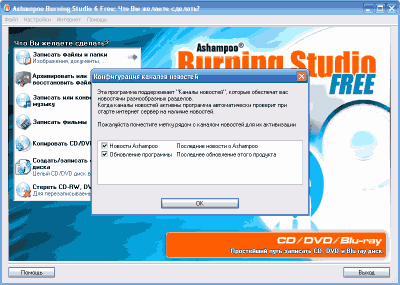
When we launch it for the first time, a dialog box will appear that will invite us to receive news from Ashampoo and program updates. Since the news is not very interesting :), and updates, you understand, will be paid, we refuse all this “happiness” by unchecking the corresponding boxes:
And finally we can see the main program window:
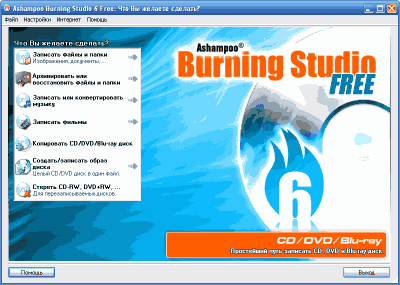
The program interface is very simple. All control can be done using the side menu (which actually duplicates the “File” menu), without going into the intricacies of the program settings. All the capabilities of Ashampoo Burning Studio FREE are clearly depicted here.
If there is an arrow to the right of the function name, this means that this menu item has several sub-items. Let's take a look at the first (and main) item - “Burn files and folders”.
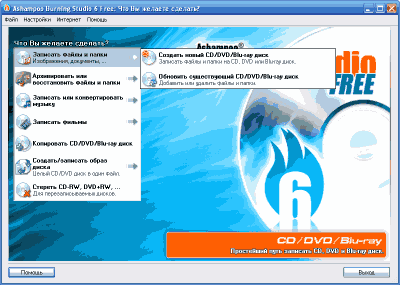
Example of writing to disk
Here, as you can see, there are two sub-items, the first of which suggests burning a new disc, and the second - updating an existing one (by the way, in my opinion, it works even better than in Nero). Let's try to record.
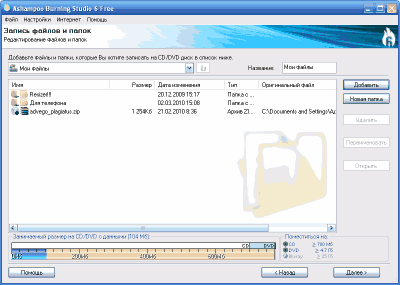
You can add files for recording either using the “Add” button (opens “Explorer”), or simply by dragging and dropping. At the bottom there is a disk fullness scale, and to the right there is an indicator of the type of disk on which the current project can be recorded.
After adding all the necessary files, click “Next” and go to the project recording settings:
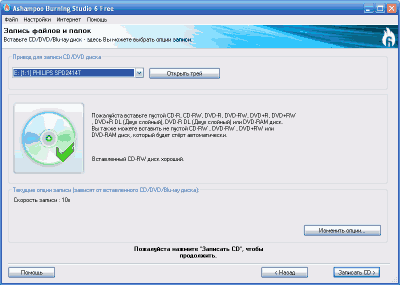
At this stage, we will need to insert a blank disc into the drive, which will be checked for writability (you will know this by the inscription and the disc icon on the left).
You can also change some recording parameters here. To do this, click the “Change options” button:
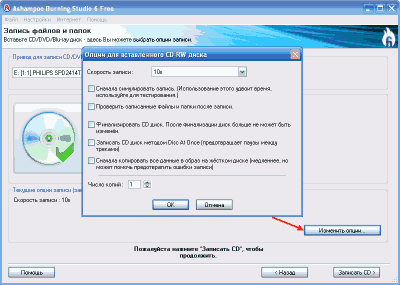
Here you can set the desired recording speed, configure the disc check after burning, its finalization and recording method. If you need to create multiple copies of the disk, you can also specify this here.
After the settings, you can finally start recording. To do this, click the “Burn CD” button. A rather beautifully animated disc burning window will open, in which you can monitor the burning progress:
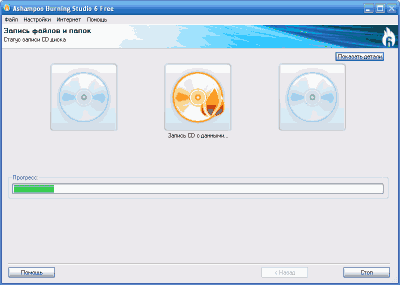
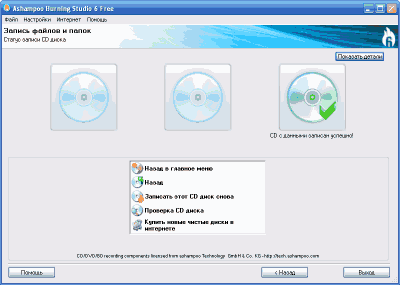
At the end of the recording process, the following window will appear, which allows you to proceed to the next procedure for working with the disc or return to the main menu:
Additional features of Ashampoo Burning Studio
We've dealt with the main functions of Ashampoo Burning Studio FREE, now let's move on to the additional ones. So, next in line is the ability to archive data. After activating this menu item, a window resembling Explorer will appear, in which you can mark files and folders to be backed up:
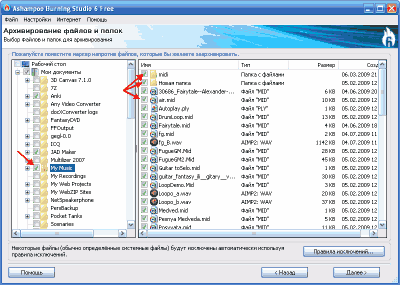
You can set exceptions, for example, by extension mask, and then files with the extension you define will not be included in the archive. This can be implemented by clicking the "Exception Rules" button.
After completing the archive formation, click the “Next” button and proceed to the stage of saving it.
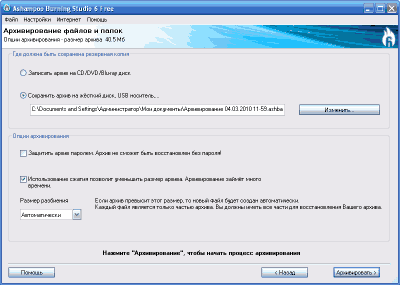
You can save the archive (with the .ashba extension) either to removable media (CD/DVD/Blue-Ray), or to a hard drive or flash drive. Additional features worth noting are password protection of the created archive and the ability to compress data. Saving the archive is initiated after clicking the “Archive” button.
Having Ashampoo Burning Studio FREE and a backup archive created with its help, you can easily restore the data contained in it to your PC by selecting the “Restore existing archive” option.
Creating and ripping Audio CDs
And to complete the picture, I would like to recall a couple more features of Ashampoo Burning Studio FREE. This is the creation and ripping of Audio CDs. Creating music discs with Ashampoo Burning Studio FREE is very simple - just activate the appropriate option and add the desired music tracks to the window that appears.

If when recording ordinary audio files we are limited by their size, then in this case the limit is imposed on the duration. All music tracks (all popular formats are supported - mp3, wma, wav, ogg) will be recorded in a continuous stream with a total duration of 80 minutes on one CD.
The scale below will help us keep track of the remaining space. Once the project is ready, we can move on to recording it by clicking the “Next” button.
And now the exact opposite function - Audio CD ripping. With Ashampoo Burning Studio FREE you can easily convert any audio track into a separate audio file. To do this, insert a music disc into the drive and activate the “Convert Audio CD” option. A list of tracks will appear in front of you:
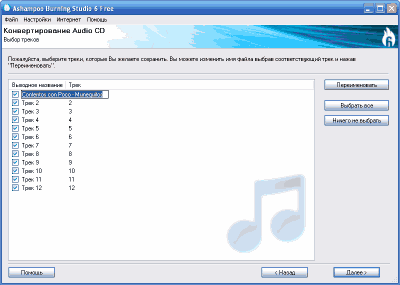
If they (the tracks) do not have names, then it is possible to rename them before saving. Having marked all the necessary tracks, click the “Next” button and you will be taken to the settings window:

Here we can set the destination folder, format (mp3, wma and wav are available) and bitrate of outgoing files. Once everything is set up, all that remains is to click the “Convert” button and wait until all the tracks are converted into separate files.
conclusions
Ashampoo Burning Studio FREE allows you to burn Video CDs in the same way (as Audio CDs) (although only formats are supported mpeg And vob). You can also burn DVDs from pre-prepared files vob, sub And ifo.
In addition, there are several options for creating disk images, and even creating images from files directly on your computer! In general, if you need a powerful program for burning discs with flexible settings and without “extra” functions, take a closer look at Ashampoo Burning Studio FREE.
P.S. Permission is granted to freely copy and quote this article, provided that an open active link to the source is indicated and the authorship of Ruslan Tertyshny is preserved.
