Local MAMP web server for Mac OS. Personal experience of Web development in Mac OS X Local server for Mac OS
Sooner or later you will have a desire or need to start developing for WordPress. But editing code directly on your production server is not a good idea, because if something goes wrong, all visitors to your site will immediately see it. To avoid such troubles and be able to test changes or new plugins before applying them to the production site, you need local environment development. Next, I'll show you how to install WordPress locally on a Mac OS X computer.
Since, like many other web applications, WordPress requires the Apache web server, MySQL database and PHP code interpreter to be installed, running and correctly configured, they will also be needed to run WordPress on your local machine (meaning on your computer, and not on a remote server), which will serve as a local server as well as a development environment.
You can, of course, set them up manually, but if you, like me, prefer to save time so you can spend it on more interesting and productive things, or are simply not very versed in all this server technology, then fortunately for us, good people collected Apache, MySQL and PHP into one package, which is installed as easily as any other application, has the simplest settings, but at the same time provides everything that is required for local website development.
Next, run the installer MAMP_2.1.4.pkg, on the move Installation Type, if you are absolutely sure that you will not use the Pro version, you can click on the button Customize, which will open a window where you can remove the checkbox and thus not install the Pro version.
By default, it is installed along with the free version.
Having completed the installation, it's time to launch MAMP, and the first thing we will see is this window. 
Changing port numbers
But before you press Start Servers, I would advise going to settings Preferences… and change the Apache and MySQL server port numbers from those that are set by default: 8888 and 8889, respectively, to standard 80 and 3306, which will save us from having to add 8888 to the site address each time and will simplify setting up access to MySQL databases. This can be done by simply pressing a button Set to default Apache and MySQL ports.
Launching Apache and MySQL servers
 Now everything is ready to start your local server by clicking on the button Start Servers. If there are no problems, and this is usually the case, you will see that the red lights are opposite Apache Server And MySQL Server turned green.
Yours or will automatically open in your browser start page MAMP or you can open it yourself with a button with an unexpected name Open start page.
On this page you can find all the necessary information about your server configuration, as well as access the database administration tool MySQL data phpMyAdmin, which we'll need shortly. 
Creating a database
Now to install WordPress we need to create a database, for which:
- Let's open phpMyAdmin from the MAMP start page.
- In phpMyAdmin you need to select a tab Databases,
- in field Create database enter the name of the database, I usually name them by the name of the site, for example site_dev,
- and finally press the button Create.

The database is ready, you can proceed directly to WordPress.
Local WordPress Installation
Download and unpack WordPress
- To install WordPress, you need to download it, for example, here: latest version of WordPress.
- Unzip, rename the folder from wordpress to the name of your site, for example, site.dev.
- And place it in the root of your web server; for MAMP, by default this folder is located along the path /Applications/MAMP/htdocs.

Next, you need to repeat the steps of a standard WordPress installation. That is, rename the wp-config-sample.php file to wp-config.php , open it in a text editor and specify the database name, MySQL username and password:
/** Database name for WordPress */ define("DB_NAME", "site_dev"); /** MySQL username */ define("DB_USER", "root"); /** Password for the MySQL database */ define("DB_PASSWORD", "root"); /** MySQL server name */ define("DB_HOST", "localhost");
Be sure to check that you have normal single quotation marks in your file " (which are actually called apostrophes, to be more technical).
I don’t know why, maybe it’s crookedly copied from the browser or people edit the config in rich text editor, but judging by the comments, often apostrophes turn into curly quotes and PHP, which parses the config, of course, does not understand this format, which leads to WordPress not seeing the database.
- Do not edit configs and code at all in RTF text editors(WordPad or TextEdit in RTF mode) and word processors(MS Word, Apple Pages).
- When developing in PHP, always enable logging and display of all errors and notifications. This will save you a lot of time and nerves.
Then open the address http://localhost/site.dev/ in your browser and complete the installation by entering the required data and clicking on the button Install WordPress.
This way you can install as many sites as you like on your local server, each in its own separate folder, and turn your Mac into a full-fledged web development environment.

As we have already seen from experience, a lot useful functions and programs are hidden deep in the bowels of Mac OS X. Referring to the previous article from our “” series, we can safely say that the availability of standard system resources completely allows you to launch and configure a web server with the same ease as we did with FTP. For unknown reasons, the ability to organize a web server was also removed from System Settings, but no problem.
The main question is why might you need server emulation? If there is a need to launch and test Internet platforms and various web services on your machine (for example, a local version of WordPress), then a web server is what you need. If you're learning PHP, this is a great way to practice and try your hand at website development. In other words, we organize hosting, only locally.
So, remember the launchctl we used in the previous article? The same utility will help us activate Apache Web server.
To start Apache Web server, open Terminal and enter the command:
sudo -s launchctl load -w /System/Library/LaunchDaemons/org.apache.httpd.plist
It's simple. To check the server, open Safari and enter in the address bar:
http://localhost/
After which we will be notified with the following message:

To unload the web server, use a similar command in the Terminal:
sudo -s launchctl unload -w /System/Library/LaunchDaemons/org.apache.httpd.plist
Attention. Before you move on to the main part of the article, you should be warned that manual connection PHP, MySQL and Virtual Hosts will take some time. We already have an excellent article on setting up all this using one client, but if you are not the timid type, go ahead.
By default, PHP is disabled on our server, so we need to enable it. This is done by editing configuration file. Open Terminal and enter the following:
sudo nano /etc/apache2/httpd.conf
A file editor (nano) will open, where we need to find the line starting with “#LoadModule php5_module...” and remove the hash:

After deleting, press Ctrl-O (save changes), Enter and Ctrl-X (exit the editor). After which we need to reboot our server with the command:
sudo apachectl restart
Now we can work with PHP scripts. By the way, the site files are stored at: /Library/WevServer/Documents
It is important.
Now about setting up MySQL. To make things less sad, let us remind you that MySQL is software for creating and managing databases (information about users, visits, site content, etc.) that will be fully used when creating your site. Thus, the PHP - MySQL combination is ideal for creating Web sites.
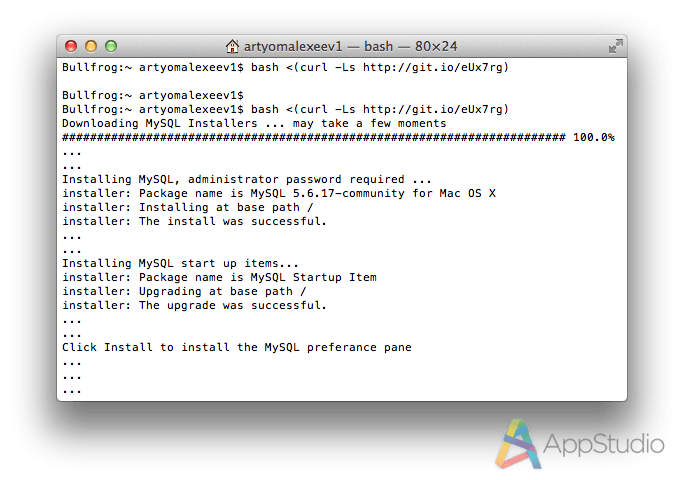
The MySQL installation process itself is not that complicated. There is an excellent script from here for automatic installation. Just enter it in the Terminal (an Internet connection is required):
bash<(curl -Ls http://git.io/eUx7rg)
After which the installation will begin:
MySQL is integrated into the System Settings panel, where we can see the status of its operation, and also set permission to autostart when the system starts.


To work with the database, enter a typical command:
All that remains for us is to set a password. We write in the Terminal:
/usr/local/mysql/bin/mysqladmin -u root password ‘Your Password’
And now, before you start working with the client, you need to run the following command:
mysql -u root -p
Then enter the created password. If suddenly the request knocks out “ command not found", you need to restart the Terminal and try again.

Thus, we have a standard set of tools for managing, administering and checking Web sites locally, right on our Mac server.
There are many ways to deploy a local server on Mac OS X, but the system itself comes with a pre-installed Apache web server and PHP interpreter that you need to activate and configure.
This tutorial requires some command line skills and knowledge of the nano editor, so I recommend reading a good book on the basics of working with the command line and terminal in Mac OS X.
The material below is universal and will be useful to users of any operating systems.
You can enable the web server in the settings: System Settings > General access> enable Web Sharing.
If you dial in address bar browser http://localhost/ , the server will return a page with the text “It works!”
Commands for working with Apache via the command line:
sudo apachectl start | stop | restart
Apache error on Mac OS X 10.6.5 and higher
The following error is observed when restarting Apache on Mac OS X 10.6.5 and higher; if you try to restart the server via the command line, Apache will return an error:
/usr/sbin/apachectl: line 82: ulimit: open files: cannot modify limit: Invalid argument
You need to make changes to the apachectl script (/usr/sbin/apachectl):
sudo nano /usr/sbin/apachectl
Let's comment out line 82:
ULIMIT_MAX_FILES="ulimit -S -n `ulimit -H -n`"
and add below it:
ULIMIT_MAX_FILES=""
Save the script and restart Apache.
Apache configuration
For Apache configurations you need to open the /etc/apache2/httpd.conf file:
sudo nano /etc/apache2/httpd.conf
Go to line 116 and connect PHP (you need to uncomment the line):
LoadModule php5_module libexec/httpd/libphp5.so
Let's set our directory for the local server, change the path to the root directory in lines 168 and 195. After these changes, the root directory will be the Sites folder, located in the user's home directory.
DocumentRoot "/Library/WebServer/Documents"
DocumentRoot "/Users/username/Sites"
Let's similarly replace the previous path in line 195:
On line 230 we will write what types of files and in what order Apache should process:
DirectoryIndex index.php index.html
On line 264 you can specify where to store the Apache error log:
ErrorLog "/private/var/log/apache2/error_log"
Let's uncomment line 469 to connect the file in which we will record virtual hosts:
Include /private/etc/apache2/extra/httpd-vhosts.conf
We save all changes in the httpd.conf file and restart Apache. If you go to http://localhost/, the start page from the sites folder will load with the greeting “Your website”.
Let's check the functionality of PHP by creating a test PHP script in the Sites directory:
touch ~/Sites/index.php
sudo nano ~/Sites/index.php
and write a script that will show the PHP configuration:
Save the index.php file and go to http://localhost/ again, a page with information about the PHP version should open. If the welcome page still loads, you need to check Apache settings(line 230).
The php.ini configuration file is located in the /private/etc/php.ini.defaults folder, it must be renamed to php.ini:
sudo mv /private/etc/php.ini.default /private/etc/php.ini
Virtual host configuration.
All projects will be placed in the user's Sites directory (/Users/username/Sites/). Let's create a new folder in this directory called test , and in it a file index.php with a test script. The local site will open at http://test/. Let's move on to command line and enter the following commands:
mkdir ~/Sites/test
cd ~/Sites/test
touch index.php
nano index.php
and add the script:
Now let's configure the virtual hosts. First, open the /etc/hosts file and add the local site address (http://test/) to the exclusions. Let's go to the command line:
sudo nano /etc/hosts
and add the line:
Let's add entries with the configuration of the new virtual host:
sudo nano /private/etc/apache2/extra/httpd-vhosts.conf
And add the following entries to the end of the file:
Save the changes and restart Apache. Now, if you go to http://test/, a page with the greeting “Hello world!” will open.
All instructions above are given taking into account my tastes and preferences, the purpose this manual understand the basic principles of configuration of native Apache and PHP on Mac OS X. I will be very pleased to hear suggestions and comments on the accessibility of the material presented.
Finally, we found time to cover in detail a topic that we planned to write about a few months ago. It's about creating and using home server running Mac OS X. If when you hear the word “server” you immediately think “no, this is definitely not for me,” do not rush to abandon further reading. Firstly, Mac OS X (and its server edition) is fundamentally different from many other server operating systems in its user friendliness (for which critics often call Mac OS X Server a server axis for blondes). Secondly, the conversation will focus on a very specific type of server - home. This means that spending your time familiarizing yourself with various complex server matters that make sense for corporate networks, we don't plan. On the contrary, we will talk about specific application problems that can be solved quite easily using a home server, and we'll start with general overview these tasks.
Perhaps every owner of at least three Apple gadgets has learned from his own experience that the more Apple devices you have on hand, the better their potential is revealed, and the more you want to buy additional Apple equipment. Over time, Apple's marketing magic leads to the formation of a whole Apple ecosystem in your home (or even in your office). A server running Mac OS X is the core, the heart of this system, since it can take on a significant amount of useful tasks.

At the very beginning of a conversation about Mac servers, it’s worth making an important note: a server is not so much a type of computer in terms of hardware, but rather its status. In other words, it is a mistake to think that only a Mac Pro, Mac mini Server, or, say, the discontinued Xserve can be a server. A server is a computer that provides a number of service functions for other computers. connected to it via wired or wireless local network or externally, via the Internet. In addition, to be a server, a Mac does not have to have Mac OS X Server on board. Most of the problems that will be covered in our new series of articles can be successfully solved on a regular MacOS.
As you can see, the boundary between a server and a “non-server” is quite arbitrary for Macs, and it will become even more blurred with OS X Lion. “Lion” is notable for the fact that it can be turned into a server version by purchasing special application from the Mac App Store.

Another important question is exactly how much Apple technology you should have on hand for creating a home server to make sense. There is no correct answer here either, since everything depends specifically on the range of tasks that are interesting to you. We will assume that you have:
- a couple of Macs (such as an iMac and a MacBook Pro)
- mobile gadgets (any number of iPhones, iPod touch and iPad)
- second generation Apple TV set-top box and TV (without it the set-top box makes no sense :)
- any network hardware Apple (such as Time Capsule or AirPort Extreme)
Which Mac can take on the role of a home server? Of course, it should be a desktop Mac, because... The main requirement for a server is availability. The server must always be turned on (by at least, whenever you might need it). From desktop Macs Mac mini is best suited for server role for the following reasons:
- compactness: the “mini” does not take up much space, the server does not need a monitor, especially since you can do without a keyboard and mouse
- aesthetics: little Mac can easily live on a coffee table or cabinet, fitting into the home interior. Imagine a Mac Pro in this place :)
- energy efficiency: Mac mini consumes much less energy than all other desktop Macs
- low cost: having bought a regular Mac mini, if you wish, you can install a server on it Mac version OS X. There is no point in buying a mini server version (unless you need a terabyte of disk space)

In addition, the mini can relatively successfully replace both the Apple TV (if you are suddenly not interested in the AirPlay streaming function) and the AirPort Extreme along with the Time Capsule, if the apartment layout allows you to connect it to the TV and plug in an Internet cable.
It's time to move on to the tasks that can be solved home server:
- general media library. You can store all your audio and video files, books, podcasts and other iTunes stuffing on the server. Thanks to the Home Sharing feature, all this content will be freely available on all other computers in home network, as well as on iOS gadgets with firmware 4.3 or higher
- access your media library from your TV via Apple TV. You can watch movies, clips, podcasts and/or listen to recordings directly from your TV without any problems, using Apple consoles TV connecting to a server with an iTunes library

- torrent downloader. Do you regret that your wide home Internet channel is sitting idle while you are away? You can download a torrent file on your home server from anywhere - from the office, from an iPad from the car, from an iPhone from the dacha - and when you return home, the files will be downloaded
- automatic video conversion. An elegant addition to the previous function will be the automatic conversion of material (of course, especially for video) into one compatible with iTunes and Apple gadgets format. All this can also happen without your intervention - the torrent will be downloaded, the movie will be converted and added to iTunes on its own, waiting to be watched
- broadcast video with on-the-fly conversion. If you don’t want to bother Minik with preliminary video conversion, you can organize the conversion on the fly. Let's say you want to watch an AVI file from a Mac mini on your iPhone. Do you think the problem cannot be solved? Not at all :)

- Time Machine. As you know, you can back up the contents of your Macs over the network on a Time Capsule. But does the “capsule” justify its price tag? We don’t think so, especially since any Mac with server Mac OS X on board can be perceived by other Macs as a Time Capsule, and all backups will be made to it
- automatic downloading of updates. Another way to occupy your Internet channel in your free time is to instruct your home server to periodically search, download and even install updates for all your Macs

- hosting. In the recent past, the easiest way for Mac users to publish their own website was the MobileMe service. But MobileMe will officially be closed next year, and in the year that comes to replace it iCloud places The hosting simply couldn’t find it. But if you have rights to a domain and home server, then hosting your website becomes a solvable task. Of course, for serious tasks it is much more practical to purchase hosting or rent a server from companies specializing in this - for example, hosting a website with any decent traffic at your home is clearly not the best option. However, for personal experiments, the capabilities of the operating system are perfectly sufficient.
- synchronization of calendars and contacts. Don't want to trust your data to Apple, Google and other services? Create your own service for synchronizing Address Book contacts and iCal events, configure it as you wish, and enjoy it to your heart's content;)
- own mail server. If you have your own Domain name, then you can attach not only your website to it, but also your exclusive mail. Certainly, this function most relevant for companies, but in some cases it can also be useful for home use

- Convenient file sharing. Tired of uploading files to narod.ru, ifolder.ru or, even worse, to RapidShare? :) If you have a server, you can organize your own file sharing platform, without stupid restrictions on volume and speed, without the need to wait, etc.
This list does not pretend to be considered closed - we have only listed those functions that may be of interest to the average user. In the following articles we will talk about them.
There are different number of operating systems, one of the popular ones is Mac OS. On Windows we can install in many ways, for example Instant WordPress or XAMPP, as for Mac, the number of options is limited. Therefore, in this article we will look at the possibility of installing WordPress locally on operating system from Apple - Mac OS.
Prepared for installationWordPress onMac
Here we need MAMP, which is the usual software, with the help of which a local web server is created. Therefore, download and latest version.
We will need to edit the wp-config.php file if you have other settings and create a database through phpmyadmin.
We have enough free version MAMP, but the developer also included a PRO version in the installation package, see for yourself.
InstallationMAMP
After you download the server and then install it, just like a regular MAC application, you need to check whether it works or not, so let’s launch it.
The application itself offers us to make various settings that you can set at your own discretion, for example, you can set your caching type, as well as the port number. As the MAMP port, you need to select the standard Apache and MySQL port, for this you just need to go to the settings MAMP Preference-Ports-Set to default Apache and MySQL ports.

When launching MAMP, you may see an error; this is due to a port conflict with other applications, such as Skype. Either change the port or disable applications with which there may be conflict.

You set the name of the database, you can make it anything, just remember or write it down, since we will need to register it in the WordPress settings file.
Next you need to unpack the file from WordPress in order to proceed with the installation. To do this you need to go to Finder and then Applications-MAMP-htdocs and copy all the files and folders for installing WordPress there:

Completing the installationWordPress onMacOS
We're left with the easy part, after we've installed MAMP, configured it, and copied all the files. All we have to do is edit the wp-config file and install WordPress itself.
Therefore, go to the htdocs folder and you need to rename the wp-config-sample.php file to wp-config.php, and then open it and edit it:
- DB_NAME– the name of the database you created, in this case sml_wp
- DB_USER
- DB_PASSWORD– root, or yours, which you created

