How to protect files on a USB flash drive. How to encrypt files on a flash drive
Hello, dear readers of the blog site. Nowadays, few people store important data in paper form - they mainly use computers, laptops, flash drives and other media.
It would be an incredible pity to lose all this stuff (backup helps us), but even more problems can arise from your data, stored like the apple of your eye, falling into the wrong hands. And there is always something to profit from. This is what happened to me, for example, when a Trojan stole the passwords from my FTP client and .
In this regard, many people have a question - how to password-protect a folder with important data or put a password on the entire computer or at least on a flash drive, so that if it is lost, no one will be able to access the contents. Well, in fact, there are a lot of solutions to this problem, and even Windows itself (in the form of Bit Locker) offers data encryption options, but all this is usually half-hearted and does not guarantee that, if necessary, a workaround will not be found.
TrueCrypt program capabilities, its reliability and settings
However, there is (and has been for a very long time) an almost 100% reliable way to password protect anything in a folder, on your computer, flash drive or external hard drive. This program is called . You can even set a password on Windows itself, and you won’t be able to bypass it even if an attacker (or government officials) takes control of your hard drive, because absolutely all information will be securely encrypted.
True, you will need a little more action than with , but it’s worth it, because the encrypted data can only be cracked using the thermorectal cryptanalysis method (a soldering iron inserted into one interesting place), which, as you understand, will be used only in very rare cases .
And it’s not all that complicated - TrueCrypt has a simple, intuitive and, remarkably, completely Russified interface. The main thing is not to forget the password for it (or key files), because there are no mechanisms for recovering them.
And the guarantee that Trucrypt does not have “master keys” is provided by the openness of its source code (the same applies to the one described a little earlier) - within fifteen years of its existence, all vulnerabilities and “backdoors” would have already been identified and eliminated.
What’s remarkable is that you don’t need to set a password for individual folders. The most convenient way to work with TrueCrypt consists of creating a container from any file available on your computer with any extension (you can also create it specially, for example, info.txt). This is a container and will serve as the most secure folder in the world, and you will determine the difficulty of accessing it yourself.
All data inside this container will be encrypted and, what’s great, it will not be possible to associate it with this program in any way - a regular stream of random data. It is possible to create another (secret) one inside this container, then thermorectal cryptanalysis may not yield results. But this will only be relevant for a narrow circle of users of this program.
In addition, it will be possible using Trucrypt to completely encrypt the entire logical disk(it could be a flash drive) on your computer and put a complex password on it, and to guarantee, also add key files (select any objects on the hard drive or media, without specifying the path to which it will no longer be possible to decrypt the container or folder).
Well, the most serious way is complete encryption of the entire operating system(or the entire physical hard drive along with it). After this, when you boot your computer, the TrueCrypt manager will first be loaded and prompt you to enter the password you set.
Although you can confuse potential attackers and not display any prompts to enter a password at all, or write that an irreparable error has occurred, so that they don’t even try to dig further.
And for particularly serious cases, it is even possible to download a secret operating system, which will be hidden inside a fake OS. Which one will load will depend on the password you entered when starting the computer. This may seem paranoid, but there are cases when only this option can guarantee the safety of data storage. If you are not paranoid, this does not mean that you are not being watched.
One important point. The Trucrypt program doesn’t just allow you to set a password on a file, folder, or entire PC—it encrypts all data on the fly, and if you enter the password correctly or specify key files, it decrypts this data on the fly.
In this case, strong encryption algorithms are used, which can even be combined (double and even triple). Yes, this may slow down your work with data a little (this is not noticeable on modern PCs), but it will make it truly confidential.
The latest version of TrueCrypt is 7.1a and can be installed on operating systems running Windows, Mac OS X or Linux. Download It used to be available from the official website, but now the developers have come under the wing of BitLocker (Microsoft) and the download link has disappeared. I'm currently using version 7.1a, which you can download from this link.

The wizard will allow you to select the installation type from two program options: Install and Extract ( regular or portable, when all the distribution files are simply unpacked into the folder you specified).
In the case of a portable installation of Trucrypt, you can avoid advertising the fact that you are using an encryption program on your computer and may have password-protected folders, files or sections:

The portable version of the program can be stored on a flash drive, so as not to leave any traces at all. However, only the full version will allow you to completely encrypt your computer's logical drives (including flash drives) or put a strong password on your computer by encrypting the system partition.
Personally, I'm happy with using encrypted container files, so I don't need to do a full TrueCrypt installation. If you are going to password-protect (encrypt) the system partition with the operating system, then use the Install installation option, but before starting encryption, without relying on chance, be sure to remove the image from the system, for example, with the same Acronis.
Russifier for Trucrypt You can take it from this page and unpack the archived files into the directory with the program. Launch the program and select “Settings” - “Language” from the top menu to select Russian in the window that opens:

What is noteworthy is that Russification affects not only the program interface, but also translates into Russian language guide to TrueCrypt, which will be available to you from the top menu (Help - User Guide). The information in it is presented in extreme detail and comprehensively, so I will not describe all the possibilities in this article (and I could not even if I wanted to), but will simply refer you to this wonderful tome.
I will only tell you how to put a password on a folder or, in other words, create a container file (an encrypted folder) where you can throw all sorts of things that you would like to hide from prying eyes. Well, also about how to put a password on a flash drive so that when it is inserted into the computer, this program will automatically launch from it and prompt you to enter the password to the encrypted container (folder).
In TrueCrypt settings, which can be accessed from the top menu by selecting “Settings” - “Options”, you can set parameters for automatic unmounting of containers (encrypted folders), after a certain time or on a certain event, and also ask to clear the password cache upon exit:

The setting that forces Trucrypt to work in the background allows auto-unmounting to work, and also allows you to use hotkeys when working with this program, which can be configured in the corresponding menu item (Settings - Hotkeys).
If your activity requires immediate unmounting all open password-protected folders, then you can assign this action to hotkeys:

Let's first answer the question - how to create an encrypted folder(container file), on which we will put a complex password (and also a key file, just to be sure) and we will be able to connect it as a regular logical drive in our operating system. Not quite clear? Well, then let's take it in order.
How to put a strong password on a folder on your computer
In the TrueCrypt window, find the “Create Volume” button or select “Volumes” - “Create New” from the top menu. As a result, you will be taken to the first step of the wizard for creating a new volume (a password-protected folder that will live inside the inconspicuous file you selected for this purpose):

Actually, this is the first option. The second one will allow you to encrypt any logical drive, both stationary and removable (password-protect a flash drive or external storage device). Well, the third option is for those who want, for example, to put one big fat password on their computer. This would probably be a good option for a laptop, which is much more likely to be lost or stolen than a desktop computer.

The second option offered to us by the Trucrypt program may be needed by probably few users, but nevertheless. Without complicating anything, we simply click on “Next”, as a result of which we will be puzzled by the problem creating or searching for a future container(encrypted folder):

It is best to create the file yourself, which will then serve as a container for the volume. To do this, you can write the path to a non-existent object and it will be created, or you can create a dummy file in advance or pick up unnecessary garbage somewhere.
It is important to understand one point here - this file will no longer be such in its general sense, because in essence it will turn into a folder on which we will put a complex password and will be ready to fill it with top-secret data. It would be best to hide this file deeper among others like it.
Now it's your turn decide on the encryption mechanism, which will be applied on the fly to a password-protected folder (encrypt and decrypt its contents when the correct password is entered):

For our needs, the default option is quite suitable, but you are free to choose any of the available types of encryption, including even double and triple, because when working with containers (volumes or, in other words, password-protected folders), you will not feel a decrease in speed.
But if you encrypt the entire system drive of your laptop using TrueCrypt (setting a password to access the computer), on-the-fly encryption speed may be critical. Try to estimate it by clicking the “Test” button in the screenshot above and feel the drop in speed as the encryption type becomes more complex:

There is no need to complicate things unnecessarily, especially when password-protecting a partition of a hard drive with Windows on a weak computer. In most cases, we leave everything as default and click “Next”.
At this step, the wizards in Trucrypt offer you set the size of your future password folder (container) based on the maximum space available for this matter:

I think that the size should be chosen with a margin. Next, you will be asked to come up with a main password to access this very folder. For those who use Keepass, it is best to use the built-in generator of complex sequences of characters, which will then be almost impossible to crack using brute force.

It would not be superfluous to add one or more (in case of an exacerbation of an attack of paranoia) key files. For this purpose, absolutely any objects on your computer, flash drive or any other external storage device can be used. Files on , but these are still rare cases, can also be used as key files.

The key objects themselves will not be damaged (they will remain readable), however, it is best to choose them among many other similar ones (for example, a graphic file from a folder with your photos in jpg format) so that the enemy does not guess. Then be sure to copy these key objects to another hard drive or flash drive so as not to be left with nothing if they fail, become damaged, or are accidentally deleted or changed.
Personally, I have now chosen online services (file hosting) as my main backup location. For example, or . This greatly reduces the likelihood of losing everything at once. I store data from programs such as Trucrypt and Kipas in them without fail. IMHO.
If you are too lazy to remember a complex password, then its field can be left blank, and select only the key file(or several pieces), the location of which on your computer or flash drive will be easy to remember. However, this will weaken the protection of your TrueCrypt password-protected folders, but will improve their usability.
At the next step of the wizard to create a folder with a password, you will be asked to select the type of file system in this container (if you plan to store objects larger than four gigabytes there, then select NTFS):

There you can also check the “Dynamic” box so that the size of this container changes as it fills. However, if there is no free space on your hard drive, then your container may be damaged, so I prefer not to use this option, but to create encrypted folders of a fixed size.
Next, move the mouse over this window, thereby increasing the cryptographic strength of the encryption of the future safe folder and click on the “Mark” button. The markup will take some time depending on the size you set it to and the speed of your computer.
That's it, so we created a secret folder and put the most secure password (and key file) on it as a lock. Now all that remains is to learn how to use it.
How to open a TrueCrypt password-protected folder
In the main program window you will see all the logical drive letters that are not currently used on your computer. You can connect our secret folder with a password to any letter you like. To do this, click on this letter and then click on the button "File":

Find the container that, with the help of the magic and capabilities of Truecrypt, we turned into a secret folder. The path to it will appear in the “Volume” area, after which we will need to enter it by clicking on the button "Mount":

In the window that opens, enter the password (and specify the key file using the corresponding button, if you used one), and then click OK:

As a result of these shamanic actions, in the main TrueCrypt window, opposite the logical drive letter you selected, an entry will appear, meaning that the entire contents of the folder to which we have set a password are open for viewing and working with it:

Now all that remains is to open this disk in Explorer or to start working with the objects contained in this secret directory:

When you finish working with documents and files from the secret folder, do not press the button "Unmount" in the Trucrypt program window:

Well, also scroll up this text to make the necessary settings for automatic unmounting (including using hotkeys) in case you forget to do it manually. I would not constantly keep a password-protected folder open, because in this case the whole point of creating it is lost.
How to set a strong password on your computer in Trucrypt
Now let's take a general look at how you can set a password on a Windows computer using our wonderful program. As I already mentioned, Trucrypt allows you to encrypt either only the logical partition where you have the operating system installed, or the entire hard drive (from which the OS boots).
It will be possible to set an additional password to load the secret operating system, but you can read about this yourself in the program manual, which, after Russification, by the way, will also open in Russian.
Attention! Before carrying out the steps described below to encrypt the system partition, be sure to make a backup copy of your OS, for example, using Acronis, because I don’t want to see your curses in the comments later and read various curses addressed to me. The program works reliably (it encrypts in the background), but no one is immune from circumstances.
Encrypting the entire system partition of a desktop computer can be useful if you use a huge amount of counterfeit software and at the same time you run the risk of being audited by the competent authorities.
Well, if you have a laptop that you constantly carry with you, then it would be very advisable to completely encrypt its hard drive so that if it is lost or stolen, you do not have to worry about possible leaks of your confidential information.
TrueCrypt not only allows put a strong password on your computer, but will also completely encrypt (turn into digital garbage) all the data on it (on the system drive, and the remaining logical drives can be encrypted separately, if necessary).
If an ordinary chest with a lock can be opened by knocking down the same lock or breaking through its wall, then encryption will be similar to a magical act that will turn the chest with all its contents into nothing, and then after entering the key (casting a spell) everything will return “as it was” .
So let's get started. To begin, as usual, you will need to click the “ Create Volume"or select from the top menu the items "Volumes" - "Create new":

However, now we choose the last option, which allows us to password protect our computer. By the way, to make this action available to you, TrueCrypt must be fully installed, and not just unpacked into a folder, like the portable version (read about this at the beginning of the article).
At the next step, the wizard will offer us a choice: either encrypt the system partition or the entire hard drive on which it lives, or go crazy and try to create a hidden OS. We will choose the first option, because the second will really be useful to a very small number of users with a real or imaginary threat of using the thermorectal cryptanalysis method:

Next, you will be asked a question: do you want to encrypt only one logical partition on which the OS is installed, or do you want to encrypt the entire hard drive (if, in addition to the partition with the OS, there are other logical partitions on it):

If your laptop, for example, has only one hard drive and it is not divided into logical partitions at all (there is only drive C), then you can safely choose the second option (this way you will set a password for the entire computer at once).
If the laptop has one hard drive, but it is divided into partitions, then it would be better to choose the second option again, so that no data gets to someone else if the laptop is lost or stolen. Well, if you have a stationary computer with a bunch of hard drives, then I don’t even know what to advise. Think for yourself.

After loading the BIOS, but before starting the operating system, the bootloader created by Trucrypt will be loaded, and it can also take on the role of a boot manager so that you can choose which OS to boot if necessary. When choosing a password-protected operating system, you will have to enter the password for the computer.
At the next step of the wizard for setting a lock on your computer, you will traditionally be asked about the type of encryption you want to choose (See screenshots above in).
As I already mentioned a little higher in the text, be careful when choosing double and especially triple encryption on weak computers, and in any case, click on the “Test” button and check what happens on your hardware:
Next, in the same way as when password-protecting a folder using TrueCrypt, we must come up with a password to access the computer and, if desired, this matter can be strengthened with key files (read more in detail a little higher in the text):

Now you will need to move the mouse within the window that opens to increase the cryptographic strength of the encryption method used, after which you will be shown part of the code of the created crypto keys:

Next comes a very important point - choosing a place on your computer where it will be recorded. Disk image for restoring a damaged Trucrypt bootloader. You will then have to (preferably without delaying it, and in the next step the wizard will remind you of this) burn a disk from this image that can help you start the computer in the event of force majeure:

After burning the recovery disc onto a suitable disc, you can proceed to the next step of the wizard. However, TrueCrypt will definitely check that the recovery disk was written correctly (you will need to insert it into the drive, although you can fool the wizard using a drive emulation program) and will not allow you to carry out further actions at your own peril and risk.
Now you will need to decide how important it will be for you to eliminate all possible ways to recover data from your system partition, because such a possibility always exists if specialists get down to business and begin to torture your hard drive. True, if you write down all sorts of rubbish on it several times in a row, thereby erasing all the remnants of unencrypted information, then the specialists will be left with nothing.
In most cases this will be unnecessary and you can leave the default option:

Next you will be asked check that the bootloader is working correctly(click the “Test” button), created by Trucrypt, but so far without a password and partition encryption. When this preliminary testing is completed, you will be prompted to move on to the actual encryption of the system partition, which will be performed in the background while you use the computer for its intended purpose.
Although, to avoid incidents, it would be better to do this at night or at any time when you don’t need your PC for several hours. Now every time you boot the OS you you will have to enter a password, which you set to guard the security of your computer:

Read all other information on working with the encrypted system partition in the detailed user manual, which, as I have already mentioned several times, was quite well translated into Russian. There you will find a lot more nuances and useful little things that did not have a place in this publication.
How to password protect a flash drive and add TrueCrypt to autorun
There are two options to put a strong and complex password on the media using Trucrypt. Firstly, it will be possible encrypt the entire flash drive as a logical drive of the computer, using the second option (encode a non-system partition/disk) from the first step of the “Create New Volume Wizard”:

However, this option has one significant drawback - it will not be possible configure TrueCrypt autostart when inserting a flash drive into the computer. But this is very convenient when the encryption program itself will be recorded on the media and will launch itself when you insert the device into the PC, and will also mount the required volume (password-protected folder) from the same flash drive, and all you have to do is enter the password in the open window.
We simply add a file to the flash drive that will serve as the container described just above, that is, in the “Wizard for creating new volumes” window, select the first option and follow all the steps described in detail in the second section of this article:
In this simple way we create a password-protected folder on our flash drive. If its size is smaller than the size of the carrier, then you can add something else to it to distract attention. Although, if you autorun the Trucrypt program from a flash drive, then all these precautions will be useless.
Now we need add TrueCrypt to startup and so that a volume (an encrypted folder with super secret data) is automatically mounted into the program. To do this, from the top menu of Trucrypt, select the items “Service” - “Setting up a portable disk”:

In the window that opens, click the top “Browse” button and find your flash drive, the path to which will be written in the form next to it:

Move the checkbox a little lower "Auto-mounting a volume in TrueCrypt", and even lower, using the “Browse” button, indicate the path to the container file (password-protected directory on the media) and click on the “Create” button. After some thought, you will be pleased with a message that the portable drive has been successfully created:

Unfortunately, due to the dominance of viruses on computers and their bad habit of spreading by registering themselves in the autoload of a flash drive, this very autoload is simply disabled on many computers.
Therefore, to mount a volume that is stored on the media, and autorun from it Trucrypt You can create a file with the extension .cmd (for example, smont.cmd) in the root of the flash drive and add the following content to it:
Truecrypt\truecrypt.exe /q background /e /m rm /v "text.txt"
Where instead of text.txt you need to specify the name of the container file (an encrypted secret folder on a flash drive) or before it. When you run this file from a flash drive (double-click), you will see a black command line window and a TrueCrypt window prompting you to enter your password:

If you enter it correctly, the main program window will open with information that the password-protected folder from the flash drive was successfully mounted to the first of the free logical drive letters in your OS.
At the same time, a Windows Explorer window will open with the contents of this newly mounted logical drive or, in other words, with our super secret data carried on the flash drive:

Well, you can also add the razmont.cmd file to the media with the following content:
Truecrypt\truecrypt.exe /q /d
You may need it when you want to remove the flash drive. Running this file will unmount (remove) secret data from a password-protected folder from a flash drive and you can easily remove this flash drive from your computer. Well, that’s all, as it were. It happened briefly...
Good luck to you! See you soon on the pages of the blog site
You can watch more videos by going to");">

You might be interested
 How to put a password on a folder (archive or otherwise password protect it in Windows) How to search the contents of files in Total Commander
This article is devoted to the reliable protection of vital information, as well as any files that you want to protect from access by others, even if your computer or storage media (flash drive, hard drive) falls into the hands of unauthorized persons, including those who are technically advanced and have access to powerful computing resources.
Why you shouldn't trust closed-source encryption software
Closed-source programs can include “bookmarks” (and don’t hope they aren’t there!) and the ability to open encrypted files using a master key. Those. you can use any, even the most complex password, but your encrypted file can still be opened with ease, without brute-forcing passwords, using a “bookmark” or the owner of the master key. The size of the encryption software company and the name of the country do not matter in this matter, since this is part of the government policy of many countries. After all, we are surrounded by terrorists and drug dealers all the time (what can we do?).
Those. Truly strong encryption can be achieved by properly using popular open source software and a crack-resistant encryption algorithm.
Is it worth switching from TrueCrypt to VeraCrypt?
The reference program that has been providing very secure file encryption for many years is TrueCrypt. This program still works great. Unfortunately, development of the program has currently been discontinued.
Its best successor was the VeraCrypt program.
VeraCrypt is free disk encryption software based on TrueCrypt 7.1a.
VeraCrypt continues the best traditions of TrueCrypt, but adds enhanced security to the algorithms used to encrypt systems and partitions, making your encrypted files immune to new advances in brute-force attacks.
VeraCrypt has also fixed many of the vulnerabilities and security issues found in TrueCrypt. It can work with TrueCrypt volumes and offers the ability to convert TrueCrypt containers and non-system partitions to the VeraCrypt format.
This improved security only adds some latency to opening encrypted partitions, without any performance impact during the encrypted drive phase. For a legitimate user this is an almost imperceptible inconvenience, but for an attacker it becomes almost impossible to gain access to encrypted data, despite the presence of any computing power.
This can be clearly demonstrated by the following benchmarks for cracking (brute force) passwords in:
For TrueCrypt:
|
Hashtype: TrueCrypt PBKDF2-HMAC-RipeMD160 + XTS 512 bit Speed.Dev.#1.: 21957 H/s (96.78ms) Speed.Dev.#2.: 1175 H/s (99.79ms) Speed.Dev.#*.: 23131 H/s Hashtype: TrueCrypt PBKDF2-HMAC-SHA512 + XTS 512 bit Speed.Dev.#1.: 9222 H/s (74.13ms) Speed.Dev.#2.: 4556 H/s (95.92ms) Speed.Dev.#*.: 13778 H/s Hashtype: TrueCrypt PBKDF2-HMAC-Whirlpool + XTS 512 bit Speed.Dev.#1.: 2429 H/s (95.69ms) Speed.Dev.#2.: 891 H/s (98.61ms) Speed.Dev.#*.: 3321 H/s Hashtype: TrueCrypt PBKDF2-HMAC-RipeMD160 + XTS 512 bit + boot-mode Speed.Dev.#1.: 43273 H/s (95.60ms) Speed.Dev.#2.: 2330 H/s (95.97ms) Speed.Dev.#*.: 45603 H/s |
For VeraCrypt:
|
Hashtype: VeraCrypt PBKDF2-HMAC-RipeMD160 + XTS 512 bit Speed.Dev.#1.: 68 H/s (97.63ms) Speed.Dev.#2.: 3 H/s (100.62ms) Speed.Dev.#*.: 71 H/s Hashtype: VeraCrypt PBKDF2-HMAC-SHA512 + XTS 512 bit Speed.Dev.#1.: 26 H/s (87.81ms) Speed.Dev.#2.: 9 H/s (98.83ms) Speed.Dev.#*.: 35 H/s Hashtype: VeraCrypt PBKDF2-HMAC-Whirlpool + XTS 512 bit Speed.Dev.#1.: 3 H/s (57.73ms) Speed.Dev.#2.: 2 H/s (94.90ms) Speed.Dev.#*.: 5 H/s Hashtype: VeraCrypt PBKDF2-HMAC-RipeMD160 + XTS 512 bit + boot-mode Speed.Dev.#1.: 154 H/s (93.62ms) Speed.Dev.#2.: 7 H/s (96.56ms) Speed.Dev.#*.: 161 H/s Hashtype: VeraCrypt PBKDF2-HMAC-SHA256 + XTS 512 bit Speed.Dev.#1.: 118 H/s (94.25ms) Speed.Dev.#2.: 5 H/s (95.50ms) Speed.Dev.#*.: 123 H/s Hashtype: VeraCrypt PBKDF2-HMAC-SHA256 + XTS 512 bit + boot-mode Speed.Dev.#1.: 306 H/s (94.26ms) Speed.Dev.#2.: 13 H/s (96.99ms) Speed.Dev.#*.: 319 H/s |
As you can see, cracking encrypted VeraCrypt containers is several orders of magnitude more difficult than TrueCrypt containers (which are also not at all easy).
The second important issue is reliability. No one wants to lose valuable and important files and information due to a software error. I knew about VeraCrypt as soon as it appeared. I followed her development and constantly looked closely at her. Over the past year I have completely switched from TrueCrypt to VeraCrypt. Over the course of a year of daily use, VeraCrypt has never let me down.
Thus, in my opinion, it is now worth switching from TrueCrypt to VeraCrypt.
How VeraCrypt works
VeraCrypt creates a special file called a container. This container is encrypted and can only be connected if the correct password is entered. After entering the password, the container is displayed as an additional disk (like an inserted flash drive). Any files placed on this disk (i.e., in the container) are encrypted. As long as the container is connected, you can freely copy, delete, write new files, and open them. Once a container is disconnected, all files on it become completely inaccessible until it is connected again, i.e. until the password is entered.
Working with files in an encrypted container is no different from working with files on any other drive.
When opening a file or writing it to a container, there is no need to wait for decryption - everything happens very quickly, as if you were really working with a regular disk.
How to Install VeraCrypt on Windows
There was a half-spy story with TrueCrypt - sites were created to “download TrueCrypt”, on them the binary file (well, of course!) was infected with a virus/Trojan. Those who downloaded TrueCrypt from these unofficial sites infected their computers, allowing attackers to steal personal information and help spread malware.
The official locations for VeraCrypt installation files are:
Installing VeraCrypt on Windows
There is an installation wizard, so the installation process for VeraCrypt is similar to that of other programs. Is it possible to clarify a few points?
The VeraCrypt installer will offer two options:
- Install(Install VeraCrypt on your system)
- Extract(Extract. If you select this option, all files in this package will be extracted, but nothing will be installed on your system. Do not select this if you intend to encrypt the system partition or system drive. Selecting this option may be useful, for example, if you want to run VeraCrypt in what is called portable mode. VeraCrypt does not require installation on the operating system it will run in. Once all the files have been extracted, you can run the extracted file 'VeraCrypt.exe' directly (VeraCrypt will open in portable mode))
If you select the checked option, i.e. file association .hc, then this will add convenience. Because if you create a container with the .hc extension, then double-clicking on this file will launch VeraCrypt. But the downside is that third parties may know that .hc are encrypted VeraCrypt containers.

The program reminds you to donate:

VeraCrypt Instructions for Beginners
VeraCrypt has many different features and advanced features. But the most popular feature is file encryption. The following shows step by step how to encrypt one or more files.
Let's start by switching to Russian. Russian language is already built into VeraCrypt. You just need to turn it on. To do this in the menu Settings select Language…:

There, select Russian, after which the program language will immediately change.
As already mentioned, files are stored in encrypted containers (also called “volumes”). Those. you need to start by creating such a container; to do this, in the main interface of the program, click on the button “ Create Volume».

The VeraCrypt Volume Creation Wizard appears:

We are interested in the first option (“ Create an encrypted file container"), so we, without changing anything, press Further,

VeraCrypt has a very interesting feature - the ability to create a hidden volume. The point is that not one, but two containers are created in the file. Everyone knows that there is an encrypted partition, including possible ill-wishers. And if you are forced to give out your password, then it is difficult to say that “there is no encrypted disk.” When creating a hidden partition, two encrypted containers are created, which are located in the same file, but are opened with different passwords. Those. you can place files that look “sensitive” in one of the containers. And in the second container there are really important files. For your needs, you enter a password to open an important section. If you cannot refuse, you reveal the password for a not very important disk. There is no way to prove that there is a second disk.
For many cases (hiding not very critical files from prying eyes) it will be enough to create a regular volume, so I just click Further.
Select file location:

The VeraCrypt volume can be located in a file (VeraCrypt container) on a hard drive, USB flash drive, etc. A VeraCrypt container is no different from any other regular file (for example, it can be moved or deleted like other files). Click the ‘File’ button to specify the name and path to the container file to be created to store the new volume.
NOTE: If you select an existing file, VeraCrypt will NOT encrypt it; this file will be deleted and replaced with the newly created VeraCrypt container. You can encrypt existing files (later) by moving them to the VeraCrypt container you are creating now.
You can choose any file extension; this does not affect the operation of the encrypted volume in any way. If you select the extension .hc, and also if you associated VeraCrypt with this extension during installation, then double-clicking on this file will launch VeraCrypt.
The history of recently opened files allows you to quickly access these files. However, entries in your history like “H:\My offshore accounts of stolen dollars worth of dollars.doc” may raise doubts in the minds of outsiders about your integrity. To prevent files opened from an encrypted disk from going into history, check the box next to “ Don't save history».
Selecting encryption and hashing algorithms. If you are not sure what to choose, then leave the default values:

Enter the volume size and select units of measurement (kilobytes, megabytes, gigabytes, terabytes):

A very important step is setting a password for your encrypted disk:

A good password is very important. Avoid passwords with one or more words found in the dictionary (or combinations of 2, 3 or 4 such words). The password must not contain names or dates of birth. It should be difficult to guess. A good password is a random combination of upper and lower case letters, numbers and special characters (@ ^ = $ * + etc.).
Now you can again use Russian letters as passwords.
We help the program collect random data:

Note that here you can check the box to create a dynamic disk. Those. it will expand as it is filled with information.
As a result, I have created a test.hc file on my desktop:

If you created a file with the extension .hc, then you can double-click on it, the main program window will open, and the path to the container will already be inserted:

In any case, you can open VeraCrypt and select the path to the file manually (To do this, click the "File" button).

If the password is entered correctly, a new disk will appear in your system:

You can copy/move any files to it. You can also create folders there, copy files from there, delete them, etc.
To close the container from outsiders, press the button Unmount:

To regain access to your secret files, remount the encrypted drive.
Setting up VeraCrypt
VeraCrypt has quite a few settings that you can change for your convenience. I highly recommend checking the " Automatically unmount volumes when inactive for a period»:

And also set a hotkey for " Immediately unmount everything, clear the cache and exit»:

Portable version of VeraCrypt on Windows
As of version 1.22 (which is in beta at the time of writing), a portable option was added for Windows. If you read the installation section, you should remember that the program is already portable and allows you to simply extract your files. However, the separate portable package has its own peculiarities: you need administrator rights to run the installer (even if you just want to unpack the archive), and the portable version can be unpacked without administrator rights - the only difference is that.
Official beta versions are only available. In the VeraCrypt Nightly Builds folder, the portable version file is VeraCrypt Portable 1.22-BETA4.exe.
The container file can be placed on a flash drive. You can copy a portable version of VeraCrypt onto the same flash drive - this will allow you to open the encrypted partition on any computer, including those without VeraCrypt installed. But be aware of the dangers of keystroke hijacking—an on-screen keyboard can probably help in this situation.
How to Use Encryption Software Properly
Some tips to help you keep your secrets better:
- Try to prevent unauthorized persons from accessing your computer, including not checking laptops in luggage at airports; if possible, send computers for repair without a system hard drive, etc.
- Use a complex password. Don't use the same password you use for mail etc.
- Don't forget your password! Otherwise, the data will be impossible to recover.
- Download all programs only from official sites.
- Use free or purchased programs (do not use hacked software). And also do not download or run dubious files, since all such programs, among other malicious elements, may have kilologgers (keystroke interceptors), which will allow an attacker to find out the password from your encrypted container.
- Sometimes it is recommended to use an on-screen keyboard as a means of preventing keystrokes from being intercepted - I think this makes sense.
Hello everyone. Many of us have to carry information with us every day, and I think that we all have situations where this information is confidential. A flash drive is a thing that can get lost, break, or fall into the wrong hands at the wrong moment. To protect yourself, I highly recommend doing these simple manipulations to protect data on a flash drive.
Video lesson:
1. Download preconfigured programs in one archive
http://hostmedia.myjino.ru/truercrypt_keepass_portable.zip
2. Prepare a flash drive. You need to unzip the contents onto a flash drive. Beforehand, to be on the safe side, I recommend copying all data to any other location.
As a result, it should turn out that your flash drive contains:
- Folder!!!
- open.bat file
3. Open Keepass. Run the file open.bat You will have two windows open. Enter the preset password password and click OK
An empty program window should appear keepass
4. Create container. Go to the folder !!! - Truecrypt - TrueCrypt Format.exe. Click Further
Further
Select the path to place the volume. Click File, select a folder !!!
on the flash drive and name the file 111
Further
Choose volume size, when choosing, consider the following things
- maximum volume size 3700 MB (features of the file system on your flash drive)
- There will be less free space on the flash drive exactly by the size of the volume
- Don't choose a partition that is too large: it's easier (faster) to back up, and your encrypted partition is less likely to fail if the flash drive has problems
Now we need create a very strong password for our encrypted partition, for this we will use password generator in a programme keepass
Choose password length (minimum 60), check the boxes as in the figure and click on the Generate button several times and click accept
NECESSARILY!! Save the password database by clicking on the floppy disk icon
Copy enter the resulting password into the Truecrypt volume creation wizard and click Further
Click mark out
Click ok and press exit
Copy your password in the "Enter password for X:\!!!" window (this window has opened and will open when you run open.bat) and click OK
If you did everything correctly, the folder should open (by default drive X) - this is your encrypted file container. Copy here, what files and programs are needed.
5. Shutdown. How to do this correctly so as not to damage the files and the entire container as a whole.
Closing all open documents, close programs that are launched from the encrypted container.
Then we need close (unmount) encrypted partition. To do this, find the icon truecrytp near the clock (usually at the bottom right of the screen), right click And select unmount all mounted volumes
Note 1
If the program displays a window like this, check again whether you have closed all files and programs.
Note 2
In order to change the password for the keepass program, select File - Change master password enter your password and repeat it again.
!!! BE SURE TO SAVE YOUR DATABASE AFTER CHANGING YOUR PASSWORD
Links on how to come up with a strong password:
Link 1
Link 2
Note 3
If you need to use multiple containers or change launch options, open the file with Notepad open.bat and copy the first line (example shown below)
open.bat
start \!!!\TrueCrypt\TrueCrypt.exe /q background /ly /e /m rm /v "!!!\111 "
start \!!!\TrueCrypt\TrueCrypt.exe /q background /lz /e /m rm /v "!!!\222 "
start \!!!\Keepass\KeePass.exe \!!!\pass.kdb
/ly, /lz- the drive letter on which the volume will be mounted (the letters must be different and not occupied by other hard drives)
111, 222
- this is the name of your encrypted container
Note 4: Data security and integrity
- do not store the password with the flash drive (even if the piece of paper is in another place (wallet, pocket, etc.) for the first time until you remember the password, then if you lose the flash drive you will not worry so much.
- Back up regularly. And the more often you use a flash drive, the more often you reserve it. Just copy the folder!!! to your computer, burn to disk, etc. To restore - just copy the folder!!! back to the flash drive.
- Do not leave keepass and truecrypt programs open when you leave the computer.
Good luck everyone, I hope this instruction is useful.
A flash drive is a very strange object: here it is, but suddenly it’s gone... Like any small things, USB flash drives are easily lost. Along with them, information leaks out that may not be intended for prying eyes and ears. To prevent your files from being opened by strangers, protect them with a password, or even better, encrypt them.
You can set a password on a flash drive in different ways - both using specialized software and using Windows tools without third-party programs. Let's consider both.
On many computers running Windows there is an archiver called WinRAR, and it has the function of setting a password for the archive. If packing and unpacking files on a portable drive doesn’t take too much time, you won’t find a more convenient way.
To set a password for a WinRAR archive, do the following:
- Connect the flash drive to the USB port of your PC and open the “Computer” folder.
- Right-click the context menu of the flash drive and select the “add to archive” option, marked with the WinRAR icon.

- On the General tab, click the Set password button.

- Enter the code word in the marked field and click OK. Optionally, check the “show password” and “encrypt file names” checkboxes.

After this, all your data will be moved to the archive, and each time you open it you will have to enter a password. You can access the contents of the drive on any machine where the archiver program is installed. By the way, not only WinRAR, but also any other with similar functions. For example, 7-zip.
The advantages of using WinRAR to protect removable media are not only its simplicity and widespread use, but also the fact that it can be used to set a password on a separate folder or file. The disadvantage is that the archiving method is convenient only if there is a small amount of information on a removable disk, otherwise the process of unpacking and packing will be too long.
BitLocker Windows
BitLocker encryption is designed to protect information stored on desktop and portable drives of Windows computers and is part of the operating system itself. The technology is very reliable and easy for the user, but is not implemented in all, but only in server, professional, corporate and maximum editions of the system. And this is perhaps its most significant drawback. On a PC where, for example, Windows Home is installed, there is no way to open an encrypted disk. But Microsoft does not offer tools for separate installation of Bitlocker in home OSes.
Using BitLocker to protect flash drives is justified only if you are going to work with them on machines with the above-mentioned versions of Windows, as well as Linux and Mac OS X. For the latter two systems, there is a utility developed by enthusiasts that allows you to open and view encrypted drives, but does not allow you to encrypt them.
How to protect a USB device with BitLocker:
- Connect the USB flash drive to your PC and open the list of drives in Windows Explorer (go to the “Computer” folder).
- Open the context menu of the flash drive and select the “Enable BitLocker” option.

- The first thing the system will offer you is to choose a method for unlocking the media. For home users, the only suitable option is a password. Enter it in the field provided, repeat and click Next.

- Next, determine how it is more convenient for you to store the recovery key, which you will need to access data in case you lose your password.

- Next, specify which part of the drive should be encrypted.

- In the next window, select the encryption mode. For portable drives that will be used in different versions of operating systems, compatibility mode is suitable.

- The last step is to confirm your intention - click “Start encryption”.

The encryption operation will last several minutes, after which the contents of the flash drive will be accessible only with a password. Every new item you save on it will also be automatically encrypted.
The strengths of BitLocker are its highly hack-resistant algorithm, no need to install third-party software, and ease of use. Disadvantages are the inability to encrypt a single file or folder of the user’s choosing (only a partition or the entire drive) and a limited scope of use.
CyberSafe Top Secret
The CyberSafe Top Secret application, according to experts, is one of the best means of encrypting data on desktop and portable storage devices. Available in several versions - from free to expensive corporate ones. For personal use, in particular, encrypting flash drives, the free version or one of the inexpensive paid ones with an expanded set of functions is sufficient.
CyberSafe Top Secret Free allows you to encrypt files, containers, disk partitions and removable media using the DES algorithm with a 64-bit key length (password length limit is 4 characters). Paid versions use more robust algorithms - AES-256 and BlowFish-448, and also support electronic digital signatures, allow you to hide files and folders, compress data to save space, etc. A full list of capabilities of different versions of the utility can be found on the official website.
To protect information on a flash drive with CyberSafe Top Secret, just move your fingers a little:
- Open the flash drive in the application as a disk partition: in the left panel, select “Encrypt disk”, select the desired media and click “Create”.

- Next we set the encryption algorithm and password; determine whether to save the file system or not (if not, the drive will be formatted); we indicate which area should be encrypted - only the occupied space or all available space. After clicking “Accept”, the program will begin the encryption process.

You can only open an encrypted flash drive on a computer where CyberSafe Top Secret is installed. Other PCs will see it as media with an unknown file system.
To get rid of encryption, just format the flash drive in any program.
The advantages of CyberSafe Top Secret are power, functionality, free, the ability to encrypt individual folders and files, and no disk space limitations. The disadvantage is the inability to use a flash drive on a PC that does not have this program.
USB Safeguard
The free version of the USB Safeguard utility allows you to protect flash drives with a capacity of up to 4 GB. Unlike CyberSafe Top Secret, it does not need to be installed on your computer. You need to run it directly from the device that it will “protect.”
USB Safeguard does not have a Russian-language interface, but it is very easy to use:
- Copy the utility to removable media and launch it by double-clicking. Administrator rights are not needed - the program will work even on machines where you do not have administrative rights.
- After the first launch, USB Safeguard may prompt you to format the flash drive. If you refuse, protection will not be possible, since the utility only supports the NTFS file system.
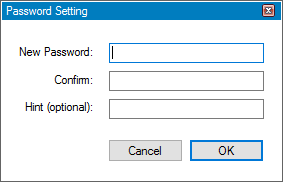
- After formatting and restarting USB Safeguard, a window will open asking you to set a password to access the drive files. In the “New password” field, enter the code word, in the “Confirm” field - repeat it, in the “Hint” - specify a reminder hint.
Now the utility will ask for a password every time you connect a flash drive to your PC.

The advantages of USB Safeguard are that there is no need for installation and the ability to open a protected flash drive on any computer. Disadvantages - the device capacity is limited to four gigabytes and only supports the NTFS file system.
Lockngo
The principle of operation of the Lockngo utility is reminiscent of USB Safeguard, however, it has no restrictions on disk space and has a Russian language. You can use it to protect any portable drives, and not only those with a USB interface.
The program is aimed at Windows and Mac users - it supports the file systems of both OSes. Available in versions compatible with Windows only, Mac only, or both. It has the functions of hiding files on protected media, blocking access to it with one click, automatic blocking when the user is inactive, encrypting data in a private directory (uses the AES-256 algorithm), launching the selected program after unlocking.
Lockngo is a paid but very affordable utility. The price of one license, depending on the version, is 200-500 rubles.
How to use Lockngo:
- Transfer the downloaded Lockngo.exe file to the USB flash drive and run it. Enter the unlock password and its confirmation in the specified fields. After clicking OK, the program will lock the drive.

- To resume access to data, enter the same password in the form.

Lockngo's strengths are simplicity, functionality, fast and efficient operation. There is, perhaps, only one drawback - the lack of opportunity to test it before purchasing (the developer does not release trial versions). But overall, the program is very good, and you really don’t mind paying some 200 rubles for it.
![]() Probably, many users thought that it would not be superfluous to protect their files (photos, documents, etc.) located on a portable medium (flash drive) from access by unauthorized persons, because a flash drive can be lost or simply forgotten somewhere , and this in turn can have the most unpleasant consequences.
Probably, many users thought that it would not be superfluous to protect their files (photos, documents, etc.) located on a portable medium (flash drive) from access by unauthorized persons, because a flash drive can be lost or simply forgotten somewhere , and this in turn can have the most unpleasant consequences.
But if the storage medium is securely encrypted, and a password is required to access its contents, then it will become almost impossible for anyone other than the owner to gain access to the data. Later in the article we will look at how to encrypt the contents on a flash drive and set a password to access it.
For these purposes, you can also use the standard tools of the Windows 7/8/10 OS; in this context we are talking about BitLocker, but today we will talk about another, absolutely free VeraCrypt program, which is in many ways superior to the standard Windows tool.
VeraCrypt is a fork of the once popular on-the-fly encryption program TrueCrypt. VeraCrypt not only “inherited” all the best from the defunct TrueCrypt (on May 28, 2014 it was announced that support for the TrueCrypt program would cease), but it also has a number of advantages over its predecessor, and the program is currently continuing to improve.
And so, let's look at the simplest and fastest way to securely encrypt a flash drive using this wonderful program.
Installation should not cause you any difficulties, everything is standard here:
- Download the program or from the developer’s website;
- Run the resulting VeraCrypt Setup.exe file;
- Next, the installation wizard will offer two installation options: standard ( Install) and portable, in our example we will choose the portable version of VeraCrypt ( Extract) and click “Next”;


This completes the installation, go to the folder that you specified in the previous step, in our example D:\VeraCrypt\, you may have a different one, and run the program (VeraCrypt-x64.exe file).
First of all, let’s switch the interface from English to Russian; to do this, in the program window that opens, click: “Settings” → “Language...” → find Russian in the list (there are other localizations).

 As a result, the main VeraCrypt window will look like this.

Next, we’ll prepare our actual storage medium—for the “purity of the experiment,” we’ll format the flash drive (after making sure that there’s nothing important for you on it). Right-click on the flash drive in Explorer and select “Format…” in the context menu that opens.
When formatting the media, it is better to immediately select the NTFS file system format, because If you select FAT32, you will not be able to store large files over 4 GB on a flash drive. Click “Start”, and after completing the formatting process we return to VeraCrypt.

 In the main program window, select: “Tools” → “Volume Creation Wizard”.

Select “Create an encrypted file container” and click “Next”.


Volume placement → using the “File” button, select our flash drive → come up with any name and create a file (for example, 12345) where our encrypted virtual disk will be located → “Save” → “Next”.


Volume size → at your discretion (it all depends on the size of your drive and what part of the data you want to encrypt and what to leave open) → “Next”.

Volume password – here you need to come up with a strong password; detailed instructions for this are provided in the Volume Creation Wizard window → “Next”.

Formatting the volume → click “Markup” (before doing this, be sure to read the comment marked IMPORTANT in the Volume Creation Wizard window).


 The VeraCrypt volume was successfully created. Click “Exit”.

 At this point, the process of creating an encrypted volume can be considered complete.
All that remains is to download the VeraCrypt files to the flash drive so that you can use the encrypted partition on other computers.


Setting up a portable VeraCrypt disk → using the “Browse” button (file parameters), select our flash drive in Windows Explorer → configure the autorun parameters, here we select auto-mounting the volume (in this case, you will not have to run the program and mount the encrypted volume manually) → in the VeraCrypt volume mounting parameters Using the second “Browse” button, we find and specify the volume to mount (the file that we previously created, in our example this is file 12345) → “Create”.


That's all. The flash drive with the encrypted partition and password is ready.
To check the result, simply remove the flash drive and connect it to the computer again. If you have autoload enabled, then all you have to do is wait for the media to be mounted, get the password, and use the encrypted partition for your pleasure.
In Windows Explorer, a flash drive with an encrypted volume will be displayed as follows (as two media, and you will have your own partition letters): 1) VeraCrypt Portable Disk (E:) (data not encrypted), 2) Local Disk (J:) ( encrypted partition).
Those. now any files that you place in the encrypted partition (in our example, this is Local Disk (J:)) will be reliably protected, and to access them you will need the password you created during the process of creating the encrypted volume.

If you do not have autoload enabled, then you need to launch VeraCrypt yourself from a flash drive (the folder of the same name is on the flash drive, it appeared there during the setup of the VeraCrypt portable disk). In the VeraCrypt folder on the flash drive, find and run the VeraCrypt-x64.exe file. Next, in the main window of the program, click any letter you like from the list, using the “File” button, find and select the volume file we created on the flash drive (12345), click “Mount” → enter the password → “OK”.


That's all. Now we have a securely encrypted USB flash drive, the contents of which are very, very difficult to access without knowing the password.
