GIMP is a multifunctional graphics editor. GIMP - multifunctional graphics editor Red-eye removal
GIMP 2.10.8 (new version of Gimp) download a free, freely distributed program for creating, assembling and editing images (drawings and photographs). GIMP supports raster graphics and some vector graphics.
Graphic editor Gimp - has almost all the functions necessary for a modern graphics editor. It can be used to create and manipulate digital graphics and photographs, such as creating designs and logos, resizing photographs, manipulating image colors, combining images using layers, converting between different types of graphics files.
Main features of GIMP:
Drawing. A complete set of tools, including a brush, pencil, spray, clone (stamp)... All drawing tools are flexibly customizable (line thickness, shape, transparency, etc.).
System. Image sizes are limited only by free disk space. Unlimited number of simultaneously open images.
Powerful tools. Full alpha channel support. Layers. Editable text layers. Transformation tools (rotate, scale, flip, tilt...). Selection tools include rectangle, ellipse, freehand and smart. Working with a scanner and tablet. Filters. Batch processing. Working with exposure.
Rollback. Full history of working with the image.
Animation. The ability to work with individual frames as layers of one image. MNG format support.
File processing. Supported formats include bmp, gif, jpeg, mng, pcx, pdf, png, ps, psd, svg, tiff, tga, xpm and many others. Convert image formats.
Full support for Ukrainian and Russian languages
We often think in stereotypes, and the software market is no exception. In addition to Windows, there are many interesting operating systems; documents do not have to be typed in MS Word, and photographs can be processed not only in Adobe Photoshop.
Processing raster graphics at a professional level is the domain of expensive, powerful software. However, digital image processing today is carried out not only by professionals and amateur photographers, but also by a wide range of users who are far from this “labor” segment.
What does the average user need? Everyone wants to have a simple, easy-to-learn program that works stably and allows you to perform all the necessary operations. Devil with a brush in his mouth
The word "GIMP" stands for GNU Image Manipulation Program. The graphic editor, distributed under a free license, has a funny logo with a devil, which did not appear by chance, because the product name contains the anagram “imp”. GIMP works on all popular operating systems: Linux, Windows and Mac OS X. GIMP is included in almost all popular Linux distributions, so it does not require separate installation. If the program does not appear in the start menu of the working environment (KDE, GNOME, etc.), then it simply needs to be installed from the distribution disks using standard means (for example, in SuSE, YaST2 is responsible for installing the software). Installing the editor on Windows requires the GTK+ library. You can download the library (3.7MB) and editor (7.8MB) from the page. The library and editor have international modules and do not require additional loading of Russification. GIMP has rather modest system requirements compared to other graphic editors, running successfully even on outdated computers with 128MB of RAM. The minimum processor requirements make the older generation hit a distant memory: Pentium MMX. But even taking into account the fact that real software system requirements are always much higher than the officially stated minimum, GIMP will feel confident on all workstations built in the current millennium. Interface
The first start of GIMP happens quite quickly, but the program window that opens can confuse a beginner.
The editor's interface seems unusual, to put it mildly. Instead of the usual program window with an extensive main menu and a line of tools, we have a miniature concentration of buttons. But as soon as you open an image, the situation becomes more or less clear - documents open in independent windows, in which the main menu is already present. The start window functions as a kind of quick access panel, which contains all the most frequently used functions. The remaining tools can be called in several ways. The first, most guessed method is to navigate through the main menu of the document's working window. The second is using the right mouse button. Instead of the usual calling the properties of the current object, you will be offered a full list of editor functions, duplicated by the main menu. If you press the left mouse button near the top edge of the menu that opens, it will turn into an independent window, which can also be used as a panel for quickly calling up tools. 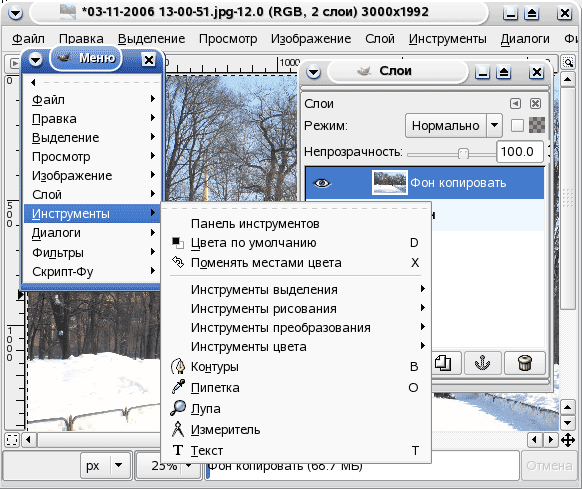
And finally, the third method is hot keys. Call up the program settings from the main window and go to the "Interface" tab. Enable the "Use keyboard shortcuts" and "Save keyboard shortcuts when exiting" options. This will allow you to assign hotkeys while the editor is running. The most frequently used functions can be called using hotkeys natively. But if your priorities differ from the developers’ original intentions, then why not add your own combinations to the list? You can also reassign existing hotkeys. In order to assign/reassign a keyboard shortcut, you need to get to the desired menu item, but not select it. Stop the mouse cursor on it and press any key combination. A pointer has appeared to the right of the item name indicating that this combination is now linked to the current instrument.
Dialog boxes for opening and saving files are made in the standard traditions of GTK+ applications, which is familiar to Linux users, but may seem inconvenient for Windows fans. Brief overview of features
GIMP can be used as a drawing editor (thanks to its support for graphics tablets) and as a tool for photo processing (including batch processing).
| Type of operations | Implementation in GIMP |
| Extensibility | Present. The GIMP distribution includes more than 200 extensions. In addition, you can connect external modules, of which there are more than 100 on the Internet. |
| Drawing | Brush, pencil, airbrush, stamp. All drawing tools are flexibly customizable (line thickness, shape, transparency, etc.). |
| Layers | Present. In addition, editing of individual channels is possible. There is alpha channel support. |
| Text | You can work with text using a standard tool, and also draw artistic logos using special scripts. |
| Animation | Present. You can work with animation frames as separate image layers. |
| Selection | Rectangle, ellipse, free, diffuse and smart selection, Bezier curves. |
| Conversion | Rotate, scale, tilt and flip. |
| Working with exposure | Curves, histogram and traditional controls. There are automatic modes that allow you to “improve” images with one click. |
| Rollback | Unlimited number of times. |
| RAW conversion | Implemented using extensions. |
| Working with a scanner and tablet | Through drivers. Standard. |
| Filters | Present. In addition, GIMP supports the Script-Fu language, which allows you to create new tools based on a group of filters. The distribution includes many ready-made scripts. |
| Batch Processing | Present. Implemented through custom scripts. |
Of course, a reasonable question arises: what is better than Adobe Photoshop? Let's look at the main advantages of a paid product.
| Feature present in Adobe Photoshop | The situation in GIMP |
| Color profile support | Will appear in the next stable branch 2.4. Unstable versions 2.3.x already have support for color profiles |
| CMYK color space | Implemented using an extension |
| Red-eye removal tool | Absent. It must be corrected manually by selecting an oval area and lowering the brightness of the red channel in it. However, there is a special extension that works, however, in an extremely primitive way. |
| The Magnetic Lasso tool allows you to make smart selections WITHOUT pressing the mouse keys. | There is no analogue. You can use the Shape Selection tool, placing points between which the program finds the optimal path for selection. |
| Healing Brush tool for removing minor blemishes (such as acne on the face) | There is no analogue. You have to be content with the Stamp tool. |
| Powerful plugins developed by famous photo brands (Kodak, Phase One, etc.) | Power is a “subjective” parameter, but it is worth noting that large companies do not develop extensions for GIMP. |
A graphics editor is most often a tool for processing images to improve their quality. Let's look at GIMP as a tool for performing a wide range of image processing tasks. Most often, processing begins with converting RAW to JPEG or TIFF. During the conversion process, you can adjust your images by adjusting exposure, white balance, and other settings. The GIMP distribution does not have a built-in RAW processing tool, so you must download a special extension. For example, . If you are working on Windows, you can immediately download the installable package. For Linux users, there is a set of packages compiled for various distributions. If your distribution is not in the list, download the extensions and compile it yourself using standard commands:
./configure
make
make install
By default, the assembly does not include support for EXIF display, but you can manually enable it by specifying an additional key when configuring --with-libexif
After installing the extension, when opening files, raw image appears in the list of available types. Now we can open RAW from almost any modern camera. 
The extension supports displaying two histograms: RAW (internal) and Live (real). Using the Exposure control, you can change the overall illumination level of the image (there is an automatic mode). Image adjustments are made using tools located in four tabs.
- W.B. Adjusting white balance. There is an automatic mode.
- Base. Adjust exposure using curves.
- Color. Adjusting brightness and contrast, setting color profiles.
- Сorrections. Adjusting color saturation.
After completing all the manipulations, you can open the image in the editor. If the shooting was done in JPEG, then all the operations described above will have to be performed in the editor itself.
Exposure and color balance are adjusted using Curves. 
GIMP. Working with "Curves".
By controlling three channels simultaneously (Brightness), we adjust the exposure, and by transferring control to individual channels, we can control the white balance. In addition, color balance can be adjusted using the tool of the same name. 
You can separately adjust the balance in three dynamic range segments: shadows, midtones, and highlights.
Noise reduction is carried out using the Selective Gaussian Blur filter. In the filter settings, you should specify the blur radius, as well as the maximum difference between neighboring pixels that the filter will pay attention to. 

Sharpen images using the Unsharp Mask filter. You specify the sharpening radius, the degree of influence of the filter, and the minimum threshold for its application. 
Red-eye removal in GIMP is a very labor-intensive process. Using the Elliptical Marquee Selection, select the red pupil. Then open the Channels dialog and leave only the red channel visible. Go to "Curves" and lower the channel intensity graph. Turn on the remaining channels again and observe the result.
You can also download a special extension for removing red eyes -. Windows users just need to download the ZIP archive, which is a packaged exe file. Linux users should download the extension source code and install it with the command:
gimptool-2.0 --install redeye.c
After installing the extension, a new Misc group appears in the filters, and in it are the Red Eye Remover and Auto Red Eye Remover items. Next, you simply select a rectangular area around the pupil and apply a filter. 
When processing images, you often have to resort to layers. Let's look at how layers work using the example of emulating a soft focus effect. The layer list window is called up using the Ctrl+L keyboard shortcut. Let's create a new layer as a copy of the current one. On a new layer, apply a Gaussian Blur filter with a radius of 15 pixels. After this, set the layer transparency to around 30-50%. The image looks as if a special filter or lens was used when shooting. 
Photographers are not snipers. Very often the model being photographed is not in the center of the frame, and there are also unnecessary details in the composition. Additionally, non-DSLR cameras have 4:3 aspect ratio sensors, while printing requires a 3:2 aspect ratio. In such cases, it is customary to crop the image, that is, cut off the edges. GIMP allows you to crop using the mouse by moving and scaling the frame boundaries. In addition, in the working window of the tool, you can manually set the coordinates of the frame boundaries, and also, which is very important, indicate the proportions of the future image. 
After all the transformations are completed, you can safely save the file to your hard drive. Free: “cheese” or real benefit?
Of course, the article examined only a small part of all the possibilities that GIMP contains. In GIMP you can draw well, take screenshots, make beautiful logos, perform a variety of photo stylizations, and much more. It is not the absolute number of functions that is important, but the quality of their implementation and the ease of working with the editor. Of course, GIMP is inferior to Adobe Photoshop in the field of professional use. But if we consider exclusively the amateur level, then completely free of charge we get a high-quality, stable product with rich capabilities. Instead of an afterword
The latest stable version of GIMP at the time of writing is 2.2.10. At the same time, a new version of the editor is being developed. Not long ago, the site published a story about what to expect in the new version of the editor 2.4.
On the Russian-language product support site, you can read several educational articles designed for both beginners and experienced users.
The utility allows you to correct simple images and digital paintings. Unlike the photo editor Adobe Photoshop, the GIMP program takes up little space on your hard drive and is distributed completely free of charge. As soon as the user gets used to the unusual interface of the application, working will become easy and pleasant. This article explains how to use GIMP.
Installing the application
First you need to download the utility and run the installer. GIMP was created for the Windows and MacOS operating systems. The authors invite users to download installers from the official website. To install the application on an Ubuntu system, you need to run the following command: $ sudo apt install gimp. The program is launched from the main menu of the operating system.
Setting the window layout
The user may notice that the utility differs from most similar editors. GIMP interface in Russian. The program window consists of several parts. The side columns contain toolbars and layers.
There is a working window in the center. The panels can be moved if necessary. To return to the usual screen view, select “Single-window mode” from the menu.
Color correction
After installing and configuring the utility, you should return to the question of how to use the GIMP photo editor. The program is used to create digital images from scratch. The application has a large set of tools that allow you to draw original works. Regular users can edit photos, perform color correction and optimize other settings.
To get started, open the image. You won't find automated tools in the Colors section of the menu. The user can manually adjust saturation, contrast, balancing and other parameters.

Applying filters
GIMP allows you to improve the appearance of your images with just one click. By opening the Filters menu, you can add a lens or flash effect, blur the picture, and make corrections. To return the image to its original state after an unsuccessful experiment, you need to click on the cancel button.
The GIMP 2 application supports batch filtering. The selected filter can be applied to several photos at once.
Removing red eye
In order to remove a defect, you need to select an object using the Magic Wand or Lasso tool. Then you should find the “Improvement” item in the “Filter” section. Next, you need to click on the “Red-eye removal” link.
You can use the slider to change the color. All corrections are displayed in a special window. You should move the slider until the eyes take on a natural look.

Correction of deficiencies
Editing photos in the free GIMP is one of the key aspects of photographers' work. Use the healing brush to remove dark spots, highlights on faces, small leaves, and other unwanted objects from images. How to work with this tool?
To correct deficiencies, you need to click on the icon in the shape of a piece of band-aid and indicate the size of the area to be corrected. The area to be painted can be selected using the Ctrl button. Then you should click the left button of the optical mouse on the unnecessary element. The unwanted object will disappear.
Return to previous state
If a computer owner does a lot of experimenting with his photos, he will soon notice that he lacks the number of undo levels in GIMP. How to use the option to increase the amount of memory used? First, go to the “Edit” menu, select the “Options” section and switch to the “Environment” tab. Next, you need to set the values at your discretion.

Image Transformation
This is one of the main functions of the GIMP program. How to use the Transform tool? First you need to go to the “Conversion” section. Here you can find all possible options for transforming a photo. The application allows you to rotate the photo, bend the picture, change the perspective and perform other actions.
Editing layers
If the reader has previously used other complex programs for creating and processing images, then he has already encountered a similar problem.
Work with the image is performed only on a certain layer. This is one of the most important processes in GIMP 2. Each layer contains its own part of the image. If you combine all the elements, you can get a whole image. To make changes, you need to make the layer active.
If this action is not possible, you will not be able to edit part of the image. Switching active layers is done using the Page UP and Page Down keys. The program allows you to complete the details. If the user changes his mind about adding new elements, he can make the layers invisible or delete them.

Working with other tools
The developers offered users a set consisting of classic and non-standard brushes. They also provided the opportunity to create new brush options. To add a tool, you need to open the “Brush” section in the left panel. Using a special slider, you can change the geometric shape of the brush. The result is saved in this section.
Advanced users can use shades of gray. The results are saved in GBR format. Users also have the option of creating wireframe brushes and multi-colored pictures with several levels.
Adding a watermark
To complete the task, you need to select any graphic image and activate the “Text” tool. The selected area will be used as the base layer. Next you need to enter the text. It is recommended to pre-specify the color, size and style of the font.
After setting all the parameters, you need to click on the text layer in the right panel. Use the slider to select the desired opacity level. To install a logo, go to the “File” section, click on the “Open as layers” link and specify the location of the image. Next, you need to select a value for the “Opacity” parameter.

Adding plugins
Free add-ons allow you to expand the functionality of the program. How to use Photoshop filters in GIMP? To do this you need to install the PSPI plugin. You can use the free Focus Blur extension to enhance your background image processing.
The Save For Web plugin is used when saving small images in good quality. To add additional fonts and text settings, you can install the Free Type Text extension.
Export photos
After finishing working with the image, you need to save the result. The user can select the XCF format to export the image. The file saves all information about the layers. Photos exported in XCF format cannot be viewed in other applications.
In order to be able to open saved images in other programs, you need to go to the “File” section. Then you need to select “Export”. Next, you should save the edited version of the photo as PNG or PNG.
conclusions
This article discusses the key points of working with the application. The program has all the necessary tools. The level of complexity of the work performed depends only on the user’s skills.
Gimp is another graphics editor. You know many similar programs in this area. And they are all essentially the same, with the exception of complex Photoshop. You can also highlight Gimp. Because this program is several steps ahead of other graphic editors, with the exception of Photoshop and Rav-editor.
Despite the fact that the program is not mega-complicated, it has miraculously wide functionality. After all, everyone knows that truly powerful editors are complex. Gimp program download for free in Russian It will be easy because it is a functional and simple editor. It offers the user the most famous photo tricks. These include playing with light, various effects, enlarging or reducing parts of the image, face correction, color filters and much more. In general, it almost repeats the set of the famous Photoshop, but it is more accessible and simple. It is also worth noting the ability to create animation and drawing. A convenient interface and tools for creating portraits, which is not even available in Photoshop.
Advantages and disadvantages of the Gimp editor.
The main advantage, of course, is the most convenient and simple interface in Russian. The second advantage is the availability of the program, because you can download it absolutely free. Third, a large set of tools from various fields. Both for photo correction and drawing from scratch. The program has few disadvantages, but still has them. The most significant are limited printing functionality and limited text processing capabilities.
Report a bug
Broken download link File does not match description Other
GIMP 2 is a multifunctional application designed for working with raster and vector graphics. The editor allows you to create screen graphics, original pictures, and is also capable of converting and batch processing images.

The program supports a huge number of filters and specials. effects, so the application is somewhat reminiscent of Photoshop. Unlike its main competitor, GIMP is open source and distributed free of charge.
System requirements
- CPU with a frequency of 1.6 GHz;
- RAM – 512 Mb;
- Platform – Windows starting from XP;
- Bit depth – 32-bit/64-bit.
It should be noted that GIMP is developed not only for Windows, but also for other operating systems. In addition to the basic requirements, it is recommended to install a video card on your computer so that graphics can be processed faster and with better quality.
Key Features
- Supports all existing graphic formats;
- Crop the image;
- Rotate the picture;
- Working with masks and canvas;
- Adding comments to images;
- Changing the angle of the picture;
- Installing plugins;
- Image scaling;
- Setting up and applying filters;
- Writing scripts in popular programming languages;
- Ability to take screenshots;
- Scanning pictures and text.
Advantages
The GIMP graphics editor is a pretty good application, so it has advantages over its competitors. In addition to the fact that the program can open any image, it can work with extensions such as PSD and PDF.
Another advantage of GIMP 2 is that, compared to its competitors, the program takes up very little disk space. This affects the performance of your computer or laptop. It should be noted that the small size does not mean that the application has limited functionality.
The GIMP editor program has an open architecture. This allows any programmer to make adjustments and improve functionality. Thanks to this, the application becomes even more popular.
Many users like the fact that the GIMP editor is portable. Unlike Photoshop, it can be placed on a flash drive and then run on any device.
It should be noted that the GIMP photo editor is distributed in Russian. This allows even beginners to quickly learn all the capabilities of the reactor. In addition, the Russian-language interface allows you to work faster with the program.
Flaws
GIMP 2, like any program, has several disadvantages. The main disadvantage is that it will be difficult for beginners to understand the program, since it is not easy to press buttons, but to apply various filters and settings.
Even advanced users note the incomprehensible operation of some functions. If the GIMP has unnecessary functions, it is best to get rid of them to make the program less cluttered.
When working with graphics, the Gimp photo editor is considered one of the best applications, but when it comes to text, the program has limited capabilities. No problems with working with text were found in other similar editors.
The graphic editor for Windows 7 and other operating systems sometimes causes unreasonable slowdowns on the computer. Sometimes the system freezes. Otherwise, no shortcomings were noticed.
How to download the editor
Anyone can download GIMP for free. To do this, you should visit the office. program web resource. The Internet resource is located at “https://www.gimp.org/”. After downloading the website, you should click on the “download” link.

When the next page opens, GIMP can be downloaded for free. To do this, click on the appropriate button. It should be noted that you can download the program directly from the website.

Users who want to get GIMP in Russian will need to additionally download a language pack. To do this, scroll down the page. Then find “Russian”. After clicking on the link, the file will be downloaded.

Now the user can only run the downloaded file.
Installation
To install the application, run “gimp-2.8.20-setup”. After launching the installer, a form will appear in which you need to select the installation language.

In the next step, the installation wizard will appear. To begin the installation, just click on the “Install” button. In this case, the installation will take place automatically. You need to go to settings by clicking on the corresponding button.

First, a form with a user agreement will appear. To accept it, just click on the “Next” button.

The next step is to choose where to install the program. If you wish, you can not change anything.

After this, a form will appear in which you can select the following installation type:
- Full;
- Compact;
- Selective.

Depending on the type of installation, additional components will be installed.
The next step is to select files that will be opened with a graphic editor.

After this, you just have to wait until the software product is installed. It is worth noting that the first launch of the program may take 7-10 minutes, as fonts and extensions will be downloaded.
Video review of GIMP 2
