How to clean smartphone camera glass. Cleaning your camera like a pro
Your camera and lenses can easily become covered in dirt and grit over the summer, so they need to be cleaned regularly, now is the time to do it. When cleaning photographic equipment, it is very important to first remove any dirt particles using air (a special rubber blower) or a brush before wiping with a cloth. This will help keep particles from getting into the fabric, which could get stuck and scratch the surface you're wiping. Below we will tell you how to clean your camera safely and effectively.
Compressed gas cans should be used with caution. If it is not held vertically, propellant may enter the gas stream and cause damage. Also high pressure difficult to control. It is better to use a special rubber bulb and a soft brush, which are sold in photo stores.
Always apply cleaning fluid to a cloth or tissue, not to the lens element, and use the fluid sparingly. This will prevent excess liquid from getting into the camera or lens cavities, which can lead to disastrous results.
Have you been to the beach or in a dusty room? Then you need to thoroughly clean the bag, otherwise the remaining sand or dust in it will ruin your cleaning of the camera.

1. Cleaning the case
Clean the camera body with the lens attached to prevent dust from getting inside the camera. Start removing dust and dirt from the lens side with a soft brush. Pay attention to hard-to-reach places, such as memory card slots, where dirt can accumulate.

2. Cleaning the viewfinder.
Now let's turn our attention to the viewfinder. If possible, remove the rubber eyecup and carefully remove any dust. You can now use a soft cloth or wipes to clean the lens (but you will have to use a different wipe to clean the lens). Clean the viewfinder glass thoroughly.

3. Cleaning the screen.
Even with a protective film, the LCD screen can become covered in dust and fingerprints, which can make it difficult to view images on the screen. Clean it with the same type of cloth you used to clean the viewfinder.

4. Cleaning the lens.
Remove sand and dirt with a blower and brush, then use a small amount of cleaning fluid on a lens cloth. Gently wipe the surface of the lens or filter. Use a dry cloth to remove any remaining liquid by gently wiping the lens dry.
The situation when a smartphone camera begins to take photos or videos poorly, making them cloudy or split, is quite common, and in the vast majority of cases, a scratch on the lens of the device is to blame. Of course, it is best to contact specialists on this issue so that they replace the damaged part with a new one, however, you should remember that there is a simple method on how to polish the camera on your phone, which will help you save a decent amount of personal money. Money. As for the risks, answering the question of whether it is possible to polish the camera on a phone with my own hands Without special equipment, no master will give a 100% guarantee of a successful result. But since there is still nothing to lose, the risk is completely justified, especially since in case of failure there is always a fallback option - contacting a workshop or service center.
Picking up required material To clean and polish a damaged lens, you should remember that there are several available means to polish the camera glass on your phone. And the most popular material for relatively safe grinding of a smartphone camera is the fine-grained abrasive paste of GOI (State Optical Institute), which is widely used in optics. Among other things, you will need ordinary vegetable oil (preferably refined) and a piece of clean fabric (velvet, suede) or felted wool. As for the process itself, it is not at all complicated, because all you need to do is moisten the prepared sponge in oil, and then add a small amount of GOI paste, rubbing the damaged lens with the resulting mixture. At the same time, it is recommended to use quick circular movements, using a medium degree of pressure, in order to improve, rather than aggravate, the situation.
However, you should not think that everything is so easy, because grinding with GOI paste must be carried out for at least an hour and a half, interrupting only to brush off the resulting dirt and refresh the solution on the grinding roller used. Such lengthy processing is explained by the lack of mechanization or automation of the process as such, although it is quite difficult to call this a serious cost. In addition, we should not forget about the need to carry out certain preparation of the smartphone, because in order to prevent vegetable oil along with the grinding and polishing paste from getting onto the surface or into the inside of the device, it must be properly protected. Typically, this is done using thick, waterproof insulating tape, which is used to cover the body of the smartphone, leaving only the camera window.
In order to significantly improve the result, it is recommended to change the direction of circular movements from time to time, either in one direction or the other. The results of the changes can be observed with the naked eye by exposing the camera lens to any source of artificial light and observing the glare on its surface formed at different angles. At the final stage of grinding and polishing work, the camera lens must be cleaned of the resulting greasy film using ordinary ethyl alcohol, which should be soaked in a cotton pad or swab. You can control positive changes step by step, taking pictures with your smartphone camera from time to time, not forgetting the very first photo taken before the start of treatment with GOI paste. Typically, such a simple technique helps not only to smooth out deep scratches, but also to remove the general haze of images.
In especially severe cases, when it comes to the formation of deep cracks, it is necessary to use some more abrasive compounds and craftsmen often leave their choice on materials such as baking soda, tooth powder or even dry baby powder mixed with furniture polish. Therefore, if it is necessary to clean and thoroughly polish the camera expensive smartphone, it’s better not to experiment and turn to real professionals for help.
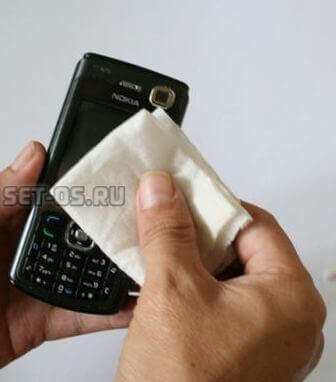
Nowadays there is a photo and video camera on almost every modern phone. On some there are even two of them: back and front. On more expensive models, for example, the iPhone 6, the camera allows you to take very decent pictures of excellent quality. But after a while, you may realize that the photographs taken have become unclear. The most common culprit for this is dust and dirt on the lens. Why be surprised? Where do you usually carry your smartphone? In a jacket or jeans pocket, in a bag, backpack or briefcase. Therefore, the time comes when you need to clean your phone camera from dirt.
The best tool for this is a regular microfiber cloth. But, unfortunately, it is not always at hand. You can replace it with a clean and slightly damp cloth or soft cloth. The main requirement is that it is not wet and does not leave lint on the lens.
Another convenient tool that allows you to clean the camera of an iPhone or any other phone is a simple cotton swab, which is always in the “arsenal” of almost any modern representative of the fair sex. Just use a dry stick glass is better don't rub. Moisten it a little with glass cleaner and squeeze thoroughly. It should be just a little damp. The main thing is that you don’t even think about spraying glass cleaner on your phone, tablet or smartphone.

Do not clean the lens with dry, hard rags, paper handkerchiefs or toilet paper. Hard surfaces and various particles can easily scratch the glass of the rear or front camera.
P.S. If dirt and dust get inside, under the glass, then in this case you will have to completely disassemble the device. This is a more complex and time-consuming process. Therefore, I would not recommend cleaning the lens and glass from the inside on your own - it is better to seek the help of specialists.
In our mobile age, every person has several devices with touch screens, either mobile phone or tablet. But after a while, small and sometimes large scratches appear on any touch device. If the cracks are large enough and you notice that this has led to the loss of some functions or malfunctions, be sure to replace the glass or display. But if there are only small scuffs on the screen, you can deal with it yourself. How to remove scratches from a phone camera - this is what we will discuss in this article.
Preparation for polishing
Before you start polishing, it is necessary to carry out preparatory work:
- Turn off the device completely.
- Cover the external connectors with masking tape or electrical tape. This will prevent water and other foreign substances from getting inside the gadget.
Important! Be patient, you may have to spend a lot of time getting your gadget in order.
Paste GOI
It is unlikely that you will be able to completely get rid of scratches, but they can be disguised. This can be done by polishing. How to remove scratches on a phone camera and polish the display?
You can use a product called GOI paste. It comes in several types, depending on the grain size.
Important! The finest paste is suitable for polishing the display. Machine oil won't hurt either. You only need a few drops to dilute the GOI paste.
Operating procedure:
- First, clean the screen of dirt, otherwise you will not be happy with the result.
- Take a woolen cloth, rub it with paste and add a drop of machine oil.
- Rub the resulting mass into the display using the same woolen rag.
- You need to polish until the scratches become barely noticeable, if you're lucky, they won't be visible at all.

Polishing with toothpaste
How to polish your phone camera using toothpaste? For these purposes you will need a regular white toothpaste, without any additives in the form of crystals or granules:
- Apply some toothpaste to the scratched surface. You can polish using a piece of soft cloth, a cotton swab or a special microfiber cloth.
- Rub the product in circular motions for several minutes.
- Remains of toothpaste can be removed after polishing with a slightly damp soft cloth.
- If the result does not impress you, you can repeat the procedure.
Polishing with baking soda
In the same way, you can polish the surface using baking soda, which is available in the kitchen of any home:
- Dilute the baking soda with a small amount of water until you get a paste.
- Apply this mixture to a soft cloth or napkin and buff the surface with gentle movements.
Important! Try not to press too hard on the surface so as not to aggravate the defect.

How to remove scratches with polish?
First you need to purchase a special polish. The product must contain cerium oxide. You can buy polish either ready-made or in the form of a substance that must be dissolved before use. The first option is much more convenient to use, however, soluble powder will provide high quality polishes.
Operating procedure:
- Prepare polish. If you bought it in powder form, then it must be dissolved. Follow the instructions. Pour the specified amount of polish into a bowl, gradually adding water and stirring the resulting mixture.
Important! Under no circumstances should this product come into contact with places such as the phone speaker or the opening for charger, headphone jack. In addition, it is quite dangerous for a smartphone camera. Therefore, if you want to remove scratches on your camera, you need to use it very carefully or choose a different polishing method.
- Now you need to rub in the polish using a cotton rag or cotton swab. The surface should be treated until the damage disappears or becomes significantly smaller.
- After finishing polishing, be sure to remove the excess with a dry cloth or napkin.

Vegetable oil
Vegetable oil can provide timely help for your device. True, it is used rather to give the surface a beautiful shine, and small scratches will become less noticeable. Just drop a drop of oil onto the screen and rub it with a dry soft cloth.
Professional products
There are also professional products for polishing gadget screens on sale. The most popular product is DISPLEX DISPLAY paste, a completely new type of polishing paste that does not contain abrasive elements. The procedure for removing scratches and abrasions is done quickly.
Important! When used correctly, the contents are enough for 8-10 polishings - it all depends on the area of the surface being treated.
DISPLEX paste does not contain abrasive elements; after using this product, the display does not become cloudy. There is only one significant drawback - the rather high price.
Important! If you were unable to restore your camera, but you use it constantly, it makes sense to think about buying a more advanced device. Check out our rating.

Preventing scratches
How can you protect your phone camera and display in general from scratches?
