How to use microsoft powerpoint. Creating a presentation in PowerPoint. Step-by-step instructions with photos. What is a presentation
With help Microsoft Office PowerPoint You can create high-quality presentations. This article will describe the basics of working with this program.
You can create slides with a specific layout as you wish, for example, you want the slide to contain only text, or to include text, pictures, or even video.
To create a slide, select the “Home” tab and click the “Create Slide” icon.
If you need to select a slide of a specific layout, click on the “Create slide” sign with the arrow and select the desired layout in the menu that opens.

You can also later change the already created layout by clicking on the “Layout” button and selecting the desired one.

This could be a title slide, a Title and an object, a section title, or two objects. comparison, title only, Blank slide, object with caption, picture with caption.
The desired option will be highlighted in orange. Double click on it.
You can choose the presentation design at your discretion.
To do this, go to the “Design” tab.
Here you can choose the style you like,
including editing the color scheme, font
and add transition effects from one slide to the next.

If necessary, you can change the position of the slide, i.e. Select horizontal (landscape) or vertical (portrait). To do this, click the “Slide Orientation” button. 
Well, now all that is required of you is just to fill out the fields of the slide form that appears.

And the slide is ready!
Microsoft PowerPoint is a powerful set of tools for creating presentations. When you first learn the program, it may seem like it's really easy to create a demo here. Maybe so, but most likely the result will be a rather primitive version, which will be suitable for the most minor displays. But to create something more complex, you need to dig deep into the functionality.
First of all, you need to create a presentation file. There are two options here.


Now that PowerPoint is running, we need to create slides - frames of our presentation. There is a button for this "Create slide" in the tab "Home", or a combination of hot keys "Ctrl" + "M".

Initially, a title slide is created on which the name of the presentation topic will be shown.

All further frames will be standard by default and have two areas - for title and content.

A start. Now you just need to fill your presentation with data, change the design, and so on. The order in which you do it doesn't really matter, so the following steps don't have to be done sequentially.
Customizing the appearance
As a rule, the design is customized even before filling the presentation with data. For the most part, they do this because after customizing the appearance, existing website elements may not look very good, and the finished document has to be seriously reworked. That’s why most often they do it right away. To do this, use the tab of the same name in the program header, it is the fourth one from the left.
To configure you need to go to the tab "Design".

There are three main areas here.
It’s worth talking about the last option in a little more detail.
Button "Background Format" opens an additional side menu on the right. Here, if you install any design, there are three bookmarks.


These tools are quite enough to make your presentation design not only colorful, but also completely unique. If the presentation does not have the specified standard style selected by this time, then in the menu "Background Format" there will only be "Fill".
Customizing your slide layout
As a rule, before filling the presentation with information, the format is also set up. There is a wide range of templates for this. Most often, no additional layout settings are required, since the developers provide a good and functional range.


If, nevertheless, there is a need to create a slide in a layout that is not provided for by standard templates, then you can make your own blank.


When all work is completed, press the button "Close sample mode". After this, the system will return to working with the presentation, and the template can be applied to the slide in the manner described above.

Filling with data
Whatever is described above, the main thing in a presentation is filling it with information. You can put anything into the show, as long as it fits harmoniously with each other.
By default, each slide has its own title and a separate area is allocated for this. Here you should enter the name of the slide, the topic, what is being discussed in this case, and so on. If a series of slides talks about the same thing, then you can either remove the title or simply not write anything there - the empty area is not displayed when showing the presentation. In the first case, you need to click on the border of the frame and press the button "Del". In both cases, the slide will not have a title and the system will mark it as "nameless".

Most slide layouts use "Content Area". This area can be used both for entering text and for inserting other files. In principle, any content added to the site automatically tries to occupy this particular slot, adjusting its size independently.

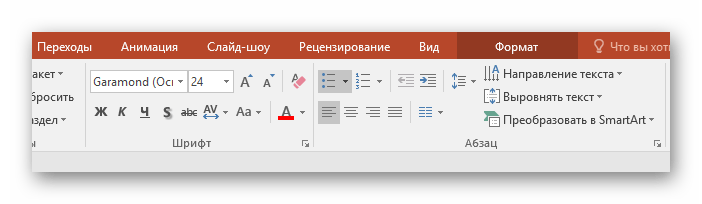
If we talk about text, it is easily formatted using standard Microsoft Office tools, which are also present in other products of this package. That is, the user can freely change the font, color, size, special effects and other aspects.
As for adding files, the list is wide. It can be:
- Images;
- Mathematical, physical and chemical formulas;
- SmartArt diagrams, etc.
A variety of methods are used to add all this. In most cases this is done through the tab "Insert".

Also, the content area itself contains 6 icons for quickly adding tables, charts, SmartArt objects, pictures from your computer, images from the Internet, and video files. To insert, you need to click on the corresponding icon, after which a toolkit or browser will open to select the desired object.
The inserted elements can be freely moved around the slide using the mouse, manually selecting the required layout. Also, no one forbids changing sizes, position priority, and so on.
Additional functions
There are also a wide range of different features that can enhance your presentation, but are not required to be used.
Setting up a transition
This point half relates to the design and appearance of the presentation. It is not of such primary importance as setting up the external one, so it is not necessary to do it at all. This toolkit is located in the tab "Transitions".

In area "Go to this slide" There is a wide selection of different animation compositions that will be used to transition from one slide to another. You can choose the one you like best or that suits the mood of the presentation, and also use the customization function. There is a button for this "Effects Options", each animation has its own set of settings.
Region "Slide Time" no longer has anything to do with visual style. Here you can adjust the duration of viewing one slide, provided that they change without the author’s command. But it’s also worth noting here a button that is important for the last point - "Apply to all" allows you to avoid manually applying a transition effect between slides on each frame.

Animation settings
You can add a special effect to every element, be it text, media, or anything else. It's called "Animation". The settings for this aspect are located in the corresponding tab in the program header. You can add, for example, animation of the appearance of an object, as well as its subsequent disappearance. Detailed instructions for creating and setting up animations are in a separate article.
Hyperlinks and control system
In many serious presentations, control systems are also configured - control keys, slide menus, and so on. All this is done by setting up hyperlinks. Not in all cases such components should be present, but in many examples it improves perception and systematizes the presentation well, practically turning it into a separate manual or program with an interface.
Bottom line
Based on all of the above, we can come to the following most optimal algorithm for creating a presentation, consisting of 7 steps:
- Create the required number of slides
It is not always possible for a user to say in advance how long the presentation will be, but it is best to have an idea. This will help in the future to harmoniously distribute the entire amount of information, configure various menus, and so on.
- Customize visual design
- Distribute slide layout options
To do this, either existing templates are selected, or new ones are created, and then distributed to each slide separately, based on its purpose. In some cases, this step may even precede setting the visual style, so that the author can adjust the design parameters exactly to the chosen arrangement of elements.
- Enter all data
The user enters all the necessary text, media or other types of data into the presentation, distributing it across slides in the desired logical sequence. All information is edited and formatted immediately.
- Create and configure additional elements
At this stage, the author creates control buttons, various content menus, and so on. Also, often individual moments (for example, creating slide control buttons) are created at the stage of working with frame composition, so that you do not have to manually add buttons each time.
- Add secondary components and effects
Setting up animation, transitions, music, and so on. Usually this is done at the last stage, when everything else is ready. These aspects have little impact on the finished document and can always be abandoned, which is why they are dealt with last.
- Check and correct defects
All that remains is to double-check everything by running the preview and make the necessary adjustments.

Additionally
At the end I would like to mention a couple of important points.
- Like any other document, a presentation has its weight. And it gets larger the more objects are inserted inside. This is especially true for music and video files in high quality. So you should once again take care to add optimized media files, since a multi-gigabyte presentation not only poses difficulties in transporting and transferring to other devices, but can generally work extremely slowly.
- There are various requirements for the design and content of a presentation. Before starting work, it is best to find out the regulations from the management, so as not to make a mistake and not come to the need to completely redo the finished work.
- According to the standards of professional presentations, it is recommended not to create large piles of text in cases where the work is intended to accompany a speech. No one will read all this; all the basic information must be spoken by an announcer. If the presentation is intended for individual study by the recipient (for example, instructions), then this rule does not apply.
As you can understand, the procedure for creating a presentation includes many more possibilities and steps than it might seem from the very beginning. No tutorial will teach you how to create demos better than just experience. So you need to practice, try different elements, actions, look for new solutions.
The office suite from Microsoft is quite popular. Products such as Word, Excel and PowerPoint are used by both ordinary schoolchildren and professional scientists. Of course, the product is primarily designed for more or less advanced users, because it will be quite difficult for a beginner to use even half of the functions, not to mention the entire set.
Of course, PowerPoint was no exception. It is quite difficult to fully master this program, but as a reward for your efforts you can get a really high-quality presentation. As you all probably know, a presentation consists of separate slides. Does this mean that once you learn how to make slides, you will also learn how to make presentations? Not quite, but you will still get 90% of it. After reading our instructions, you will be able to make your own slides and transitions in PowerPoint. Then all that remains is to improve your skills.
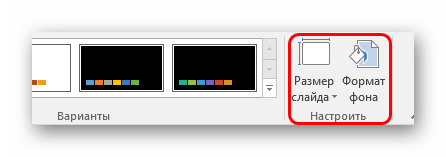
1. First you need to decide on the proportions of the slide and its design. This decision undoubtedly depends on the type of information being presented and the location of its display. Accordingly, for wide-format monitors and projectors it is worth using a 16:9 ratio, and for simple ones - 4:3. You can change the size of a slide in PowerPoint after creating a new document. To do this, go to the “Design” tab, then Customize - Slide Size. If you require a different format, click "Customize slide size..." and select the desired size and orientation.

2. Next you need to decide on the design. Fortunately, the program has many templates. To apply one of them, on the same “Design” tab, click on the theme you like. It is also worth considering that many themes have additional options that can be viewed and applied by clicking on the appropriate button.

It may well be that you don’t see the ready-made theme you need. In this case, it is quite possible to make your own picture as the background of the slide. To do this, click sequentially Configure - Background format - Picture or texture - File, and then simply select the desired image on your computer. It is worth noting that here you can adjust the transparency of the background and apply the background to all slides.

3.
The next step is adding material to the slide. And here we will look at 3 options: photo, media and text.
A) Adding photos. To do this, go to the Insert tab, then click on Images and select the type you want: Pictures, Online Images, Screenshot or Photo Album. After adding a photo, you can move it around the slide, resize it and rotate it, which is quite simple.

B) Adding text. Click on Text and select the format you need. In most cases, you will probably use the very first one - “Inscription”. Next, everything is the same as in a regular text editor - font, size, etc. In general, you adjust the text to your requirements.

IN) Adding media files. These include videos, sounds and screen recording. And here it’s worth saying a few words about each. Videos can be inserted both from a computer and from the Internet. You can also choose a ready-made sound or record a new one. The Screen Recording item speaks for itself. You can find all of them by clicking on Multimedia

4. All objects you add can be displayed on the screen one by one using animations. To do this, go to the appropriate section. Then you should select the object you are interested in, and then click on “Add animation” and select the option you like. Next, you should configure the appearance mode of this object - by click or by time. It all depends on your requirements. It's worth noting that if you have multiple animated objects, you can customize the order in which they appear. To do this, use the arrows under the “Change Animation Order” caption.

5. This concludes the main work with the slide. But one will not be enough. To insert another slide into the presentation, return to the “Main” section and select Create Slide, then select the desired layout.

6. What's left to do? Transitions between slides. To select their animation, open the “Transitions” section and select the required animation from the list. In addition, it is worth specifying the duration of the slide change and the trigger for switching them. This can be a click change, which is useful if you are going to comment on what is happening and don't know exactly when you will finish. You can also make the slides switch automatically after a specified time. To do this, simply enter the required time in the appropriate field.

Bonus! The last point is not at all necessary when creating a presentation, but it may come in handy someday. We are talking about how to save a slide as a picture. This may be necessary if the computer on which you are going to show the presentation does not have PowerPoint. In this case, the pictures you have stored will help you not to lose face. So how do you do this?

To begin, select the slide you need. Next, click “File” - Save As - File Type. From the list provided, select one of the items marked in the screenshot. After these manipulations, simply select where to save the picture and click “Save”.
Conclusion
As you can see, creating simple slides and making transitions between them is quite simple. You just need to consistently perform all the steps listed above for all slides. Over time, you yourself will find ways to make your presentation more beautiful and of better quality. Go for it!
Create a simple presentation in PowerPoint
Tsybanova Galina Anatolevna,teacher at Tver Trade and Economic College, Tver.
Description: The master class is designed for schoolchildren, students, parents,
additional education teachers, educators and teachers.
Difficulty level: Simple. Execution time, 20 - 30 min.
Purpose: Creating a presentation in Microsoft PowerPoint.
Target: Create a simple presentation project for Victory Day
Tasks:
- introduce the technology of working in PowerPoint;
- develop creative abilities;
- cultivate accuracy in work.
Work algorithm:
1. Prepare text and images on the chosen topic.
2. Open Microsoft PowerPoint.
3. Select a slide layout.
4. Select the background (theme) of the presentation.
5. Place information in the appropriate blocks.
6. Edit the presentation.
7. Save the new file to a folder on your hard drive.
Preface:
A presentation is a brief and visual presentation of information that helps the speaker reveal the essence of his work in more detail. Now it is used in many areas of our lives. Therefore, before you start, decide on a plan for your speech. Determine the main goal of your presentation, think about what you will say at the beginning, at the end - and, accordingly, what slides, with what information and in what sequence you will need.
You can create high-quality presentations using PowerPoint. It comes with the standard Microsoft Office package. With it, you can create, view, and show slide shows with text, shapes, images, graphs, animations, charts, videos, and much more.
I will introduce you to the basics of creating a presentation.
When working on a computer, follow the safety requirements:

Progress:
1. Find information in advance on the topic of the future presentation and upload it to a text file.
Save it in a separate folder on your computer.
2. Prepare the necessary images and save them in the same folder.
The images can be your photographs or pictures copied from the Internet.
You can use a scanner and digitize any photograph or drawing.
3. Open the program Microsoft Office PowerPoint
You can do this:
from the main menu Start - All Programs - Microsoft Office PowerPoint
by program shortcut on the desktop;
by the presentation file icon in the folder.

If no one has opened this program on your computer yet, then you should look for it in the folder
Microsoft Office (Start - All Programs - Microsoft Office - Microsoft Office PowerPoint)

Immediately after launch, the first tab called home, here we see an empty slide,
which you can already work with.

“By default”, a slide opens with two text blocks (title and subtitle),
which can be used as a title page.
To change the slide layout, use the command Layout on the tab home and select the appropriate one.

2. To prevent the presentation from being faded, you need to choose an appropriate background.
To do this, go to the tab Design and select the appropriate one. The presentation background can be made
and independently, but this is a topic for another master class.

Enter the title of the presentation in the top block, and subtitle information (for example, information about the author) in the bottom block.

The font size is already set, you can change it a little without forgetting
that the information on the slide should be easy to read.
This can be done in the window Font or using tab commands home

4. To create a second slide, select the command Create slide on the tab home.
If you have already decided what information will be presented on it,
select the appropriate template (header and object, two objects, etc.)

I'll create a slide with two objects and a title.
I will enter some of the information into the title block.
To do this, I will open a text file prepared in advance and copy a fragment of text to the clipboard

and insert this fragment into the top block. You can also enter text from the keyboard.

5. I will insert a picture into the left block by clicking on the corresponding icon.
In the window that opens Inserting a picture I select the desired file.
The image size can be changed by selecting the image and dragging the corner.

6. I will also place text in the right block. Now the second slide is ready.

7. I will create the next slide from Blank slide.

To insert a text block, run the command
Insert – Caption(the mouse pointer will change its appearance)

Place the pointer at the desired location on the slide, press the left mouse button and, while holding it, stretch the rectangle to the desired width. Inside the new text block, enter the required information.
8. To insert a picture, use the command Insert – Drawing.

Select the file in the window of the same name that opens (see photo in paragraph 5)
and move it to the desired location on the slide (resize the image if necessary).

To crop a picture, use the command Size and position(context menu).
I cropped the image a little at the top and bottom. The third slide is ready.

9. Create the remaining slides in the same way.
On the last slide it is customary to indicate sources of information.
If creating a presentation takes a while, do gymnastics.
The exercises are “compact”, you won’t disturb anyone
1. Raise your hands clasped together and stretch, trying to reach the ceiling;
2. Raise your shoulders (pull your head in), move your shoulders back, trying to align your shoulder blades
and release your shoulders (“through your back”), performing a kind of circular movement with your shoulders (4 times);
3. Sit up straight, look into the distance;
turn your head to the right (while looking into the distance);
tilt your head, trying to touch your chin to your shoulder (do not raise your shoulder!!!),
look at your shoulder;
raise your head, look into the distance;
slowly turn your head to the starting position, look straight (into the distance)
Repeat the exercise with a twist to the other shoulder.
4. Roll from toe to heel (although this can be done while working)
10. Be sure to save the presentation you created.
This is such a simple presentation.
There is no animation, transition between slides is carried out “by click”,
the visual and text series on the slide changes automatically, along with the previous one.
I will try to talk about setting up animation in the next master class.
I apologize in advance to IT technology specialists, maybe I used the wrong terms...
...I'm self-taught, so please don't throw away mice and keyboards...
It’s better to write in the comments what’s wrong.
Thank you for your attention.
Instructions
Ways to create new slides.
In order to more freely manage the available material and change the structure, you need to prepare several blank slides.
1. In the slide panel located on the left, right-click; In the context menu, select the “Create Slide” command. The same can be done in sorter mode.
2. “Home” tab - “Create slide”.
Note: In Power Point 2003, the Insert menu is New Slide, as well as the New Slide button on the toolbar.
To speed up your work, you can create layouts for a title slide, a slide with a title and subtitle, a slide with a title and a list, etc.
1. On the Home tab of the Ribbon, find the Layout button. Call up the list.
2. To apply the selected layout, left-click on it.
Note: In Power Point 2003, Slide Layout is located in the task pane (to the right of the current slide). To select a layout layout, left-click on it. To select markup application options, right-click.
If you want to freely manage the space of the slide without using a predetermined arrangement of objects, then use the “Empty Slide” markup. This will allow you to randomly insert any object onto the slide.

Slide design.
To give your presentation a personality, you need to apply a certain color scheme to it.
1. In the ribbon, select the “Design” tab.
2. Move your mouse over the design samples to view them on the current slide.
3. To apply the template you like to all slides, left-click on it. If application options are required, right-click on the sample in the ribbon and select the desired option from the context menu (for example, “Apply to selected slides”).
Note: In Power Point 2003, "Slide Design" is located in the task pane (to the right of the current slide). Design templates that contain certain fonts and color schemes by default are selected separately. Options for using the design are also selected by right-clicking on the sample.
You can create a presentation background without using templates. Simply right-click on the current slide and select Format Background (in Power Point - "Background"). The background settings window will open, where you can change the necessary settings.
Remember that the background of the presentation should contrast with the color of the text: dark background and light text, light background and dark text. This makes it easier to perceive information. The minimum font size is 18 for text and 22 for headings. A maximum of 2 different font types can be used in the presentation, preferably sans serif (for example, Arial).
